When connected to any network, your computer gets an IP address assigned to it, which helps the network determine where to send data that you’re supposed to receive.
However, if there’s a problem with this IP configuration or assignment, it can cause several problems, and that’s exactly what we’re going to resolve in this article.
Also read: How to fix ‘no WiFi networks found’ error?
Restart your PC and router
Restarting your computer, router, and any other networking equipment that you might be using can go a long way in helping you resolve seemingly random issues, especially when it comes to network issues regarding IP assignments.
Updating the driver
If restarting the router didn’t help, try manually updating the WiFi driver.
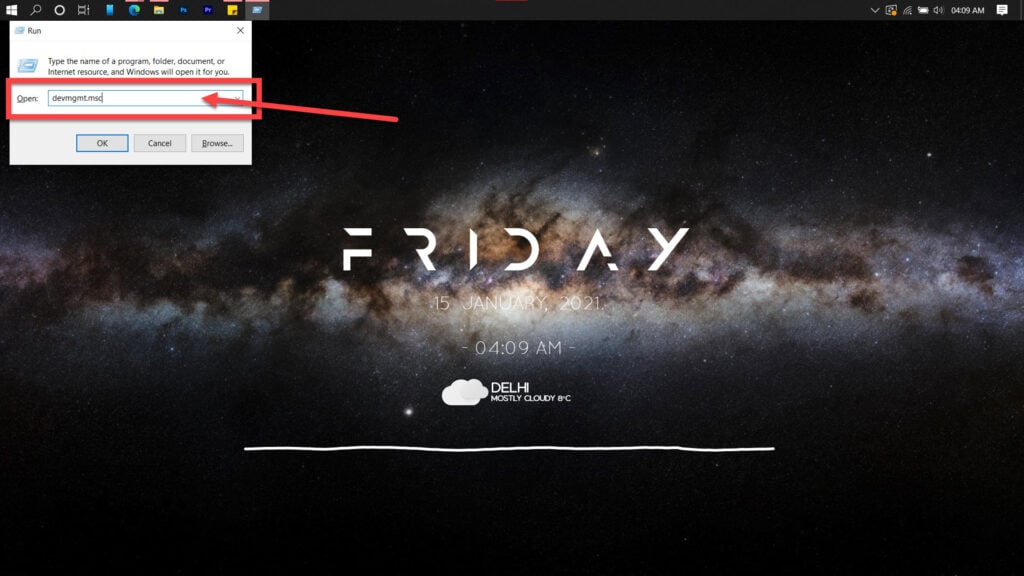
Step 1: Press Windows key + R, type in devmgmt.msc and hit enter.
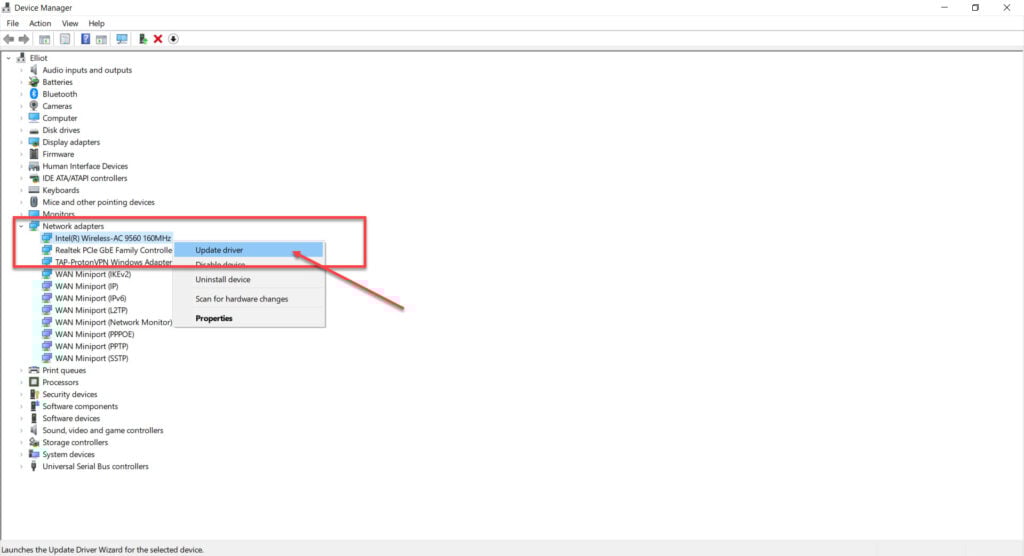
Step 2: Double click Network adaptors to expand it and right click your WiFi card. Click on Update driver.
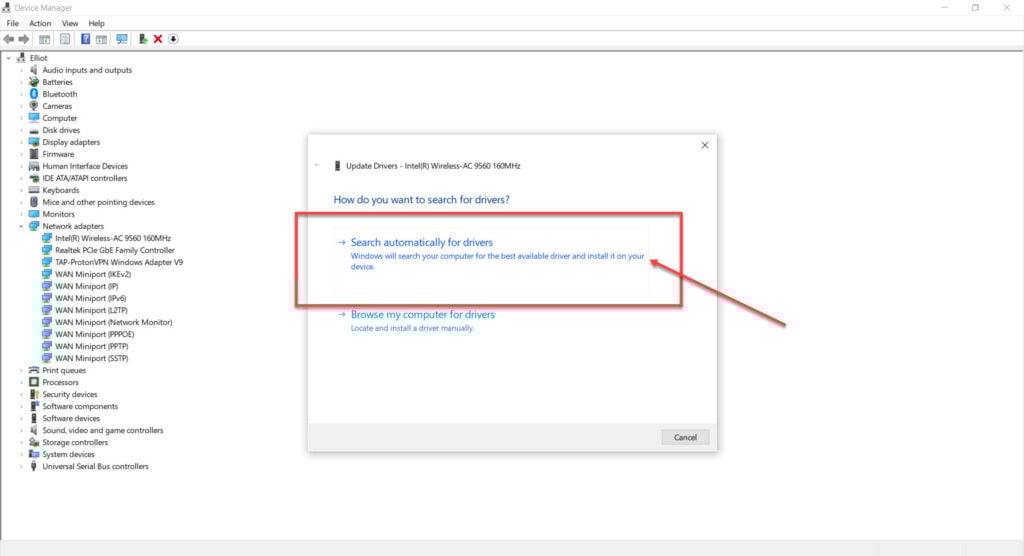
Step 3: Select Search automatically for drivers, and Windows will find and install any available updates.
Also read: How to fix the ‘WiFi connected but no internet access’ issue?
Reinstalling the driver
The next step after updating fails is to reinstall the driver completely.
Step 1: Press Windows key + R, type in devmgmt.msc and hit enter.

Step 2: Double click Network adaptors to expand it and right click your WiFi card. Click on Uninstall device.
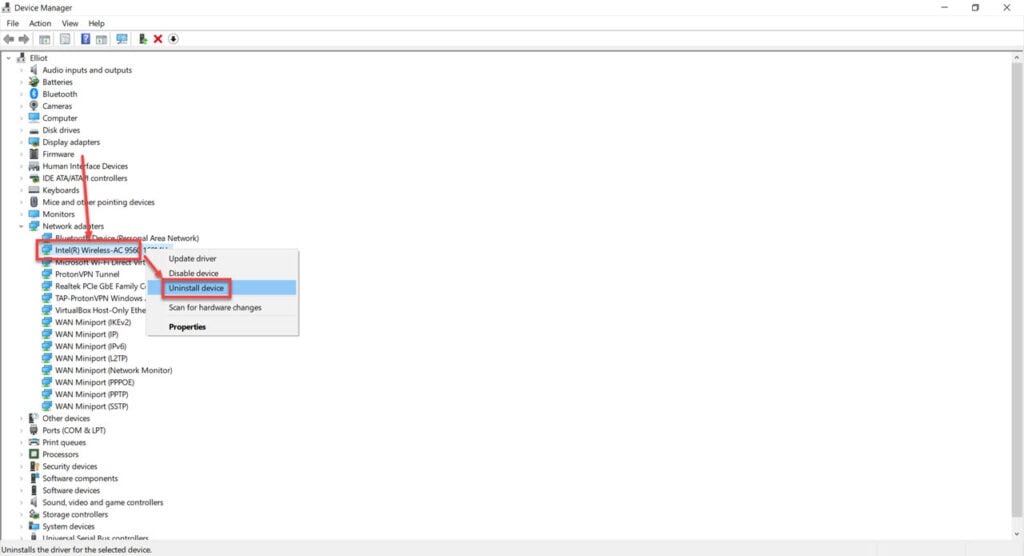
Once the driver is deleted, restart Windows to force the driver to install manually.
Rolling back the driver
You can also opt to roll back to a previous version of the driver working fine for you. Here’s how.
Step 1: Press Windows key + R, type in devmgmt.msc and hit enter.

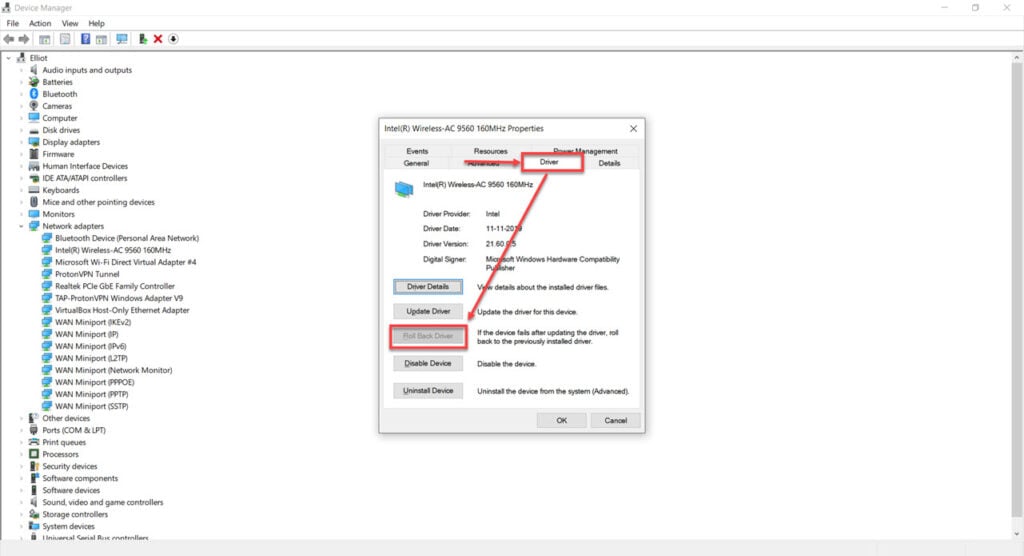
Step 2: Double click Network adaptors to expand it and double click your WiFi card to open its properties.

Step 3: Under the Drivers tab, click Roll Back Driver. If the option is greyed out for you, the driver can’t be reverted to an older version or is already on the oldest version.
Run the Windows troubleshooter
Windows 10 comes with many handy troubleshooters that are quite effective at rooting out problems from your PC. First, try running the Network Adaptor troubleshooter to see if it can resolve the issue.
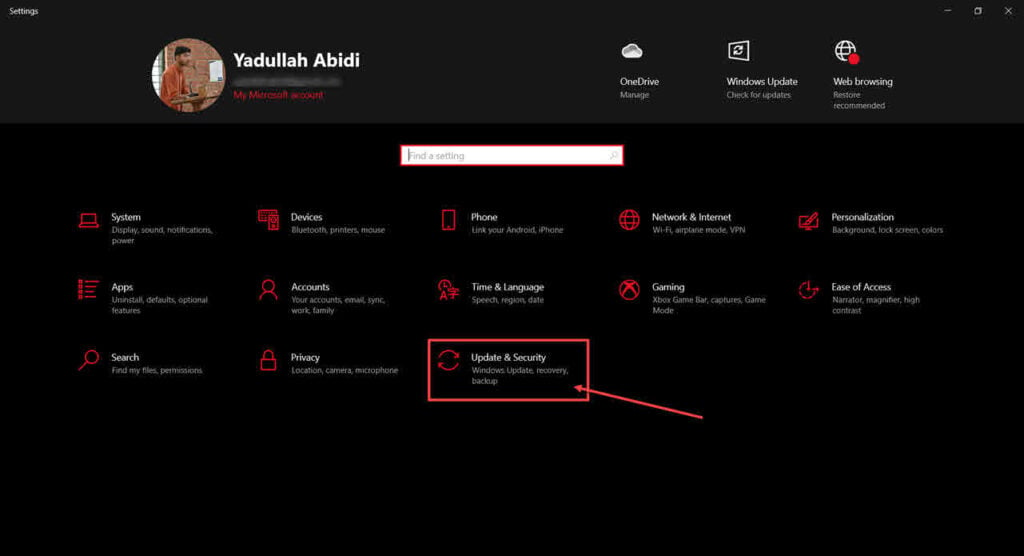
Step 1: Press Windows Key + I to open Windows Settings. Click on Update and Security.
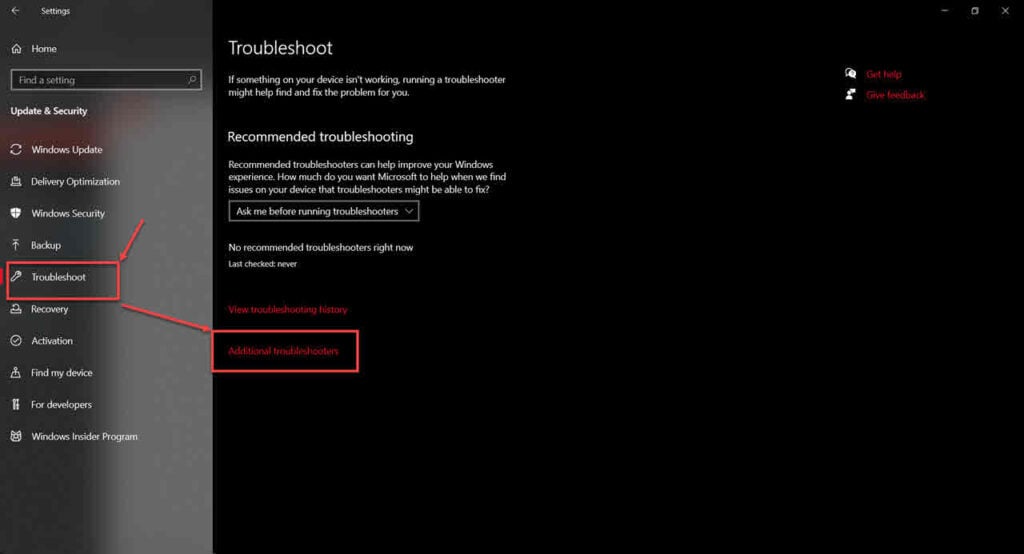
Step 2: Head over to the Troubleshoot tab and click on Additional troubleshooter.
Step 3: Find and run the Network Adaptor troubleshooter.
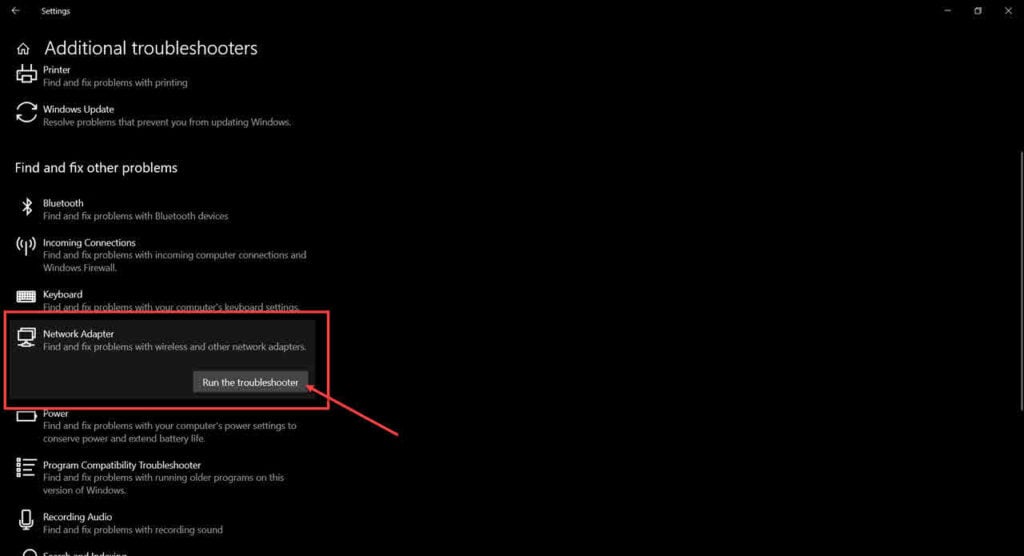
Once the troubleshooter has finished running, restart your PC and try again.
Also read: How to fix Red Screen of Death in Windows 10?
Disable Fast Startup
While fast startup as a feature is usually meant to help users boot their PCs faster, it can sometimes cause issues with your hardware, especially storage devices. Try disabling fast startup to see if that solves your problem.
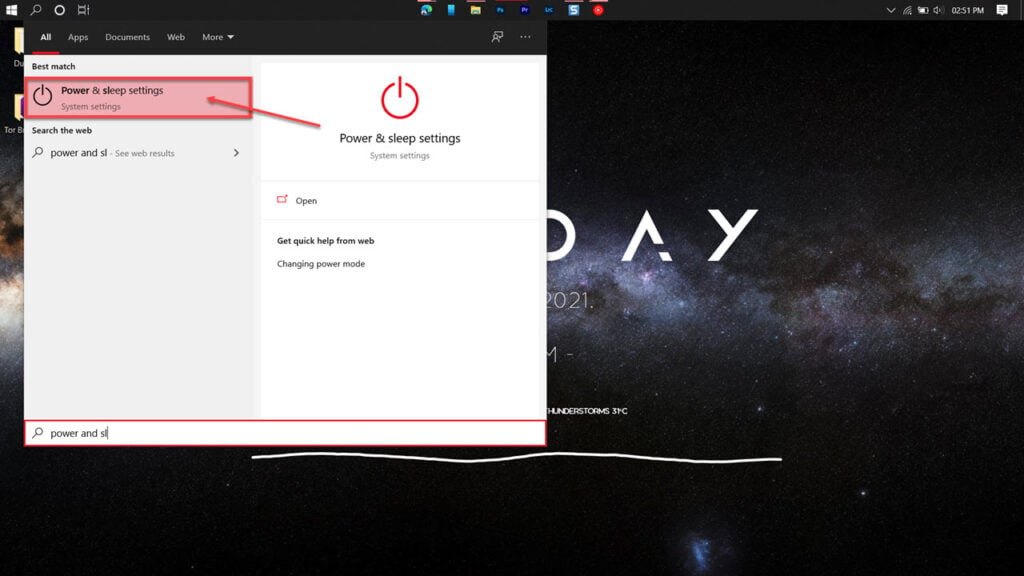
Step 1: Press the Windows key and search for Power & Sleep Settings. Click the corresponding search result.
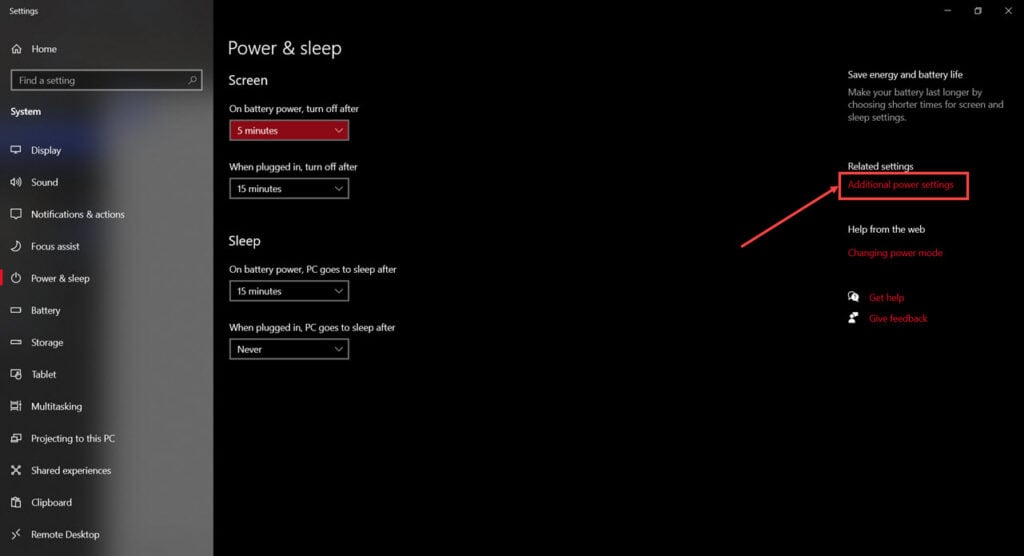
Step 2: Click on Additional power settings on the right.
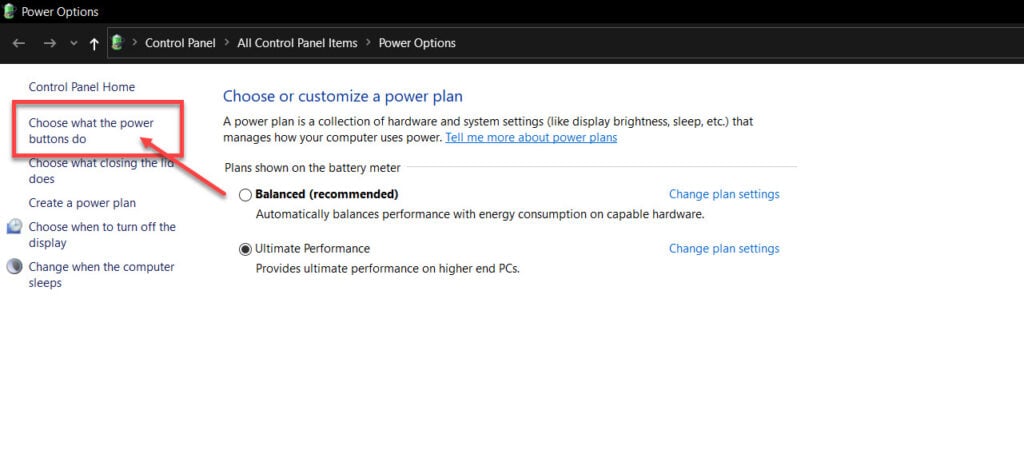
Step 3: Click Choose what the power buttons do on the left.
Step 4: Click the Change settings that are currently unavailable option and then disable the fast startup, sleep and hibernate settings.

Now restart your PC, and it should work just fine.
Check for IP /DNS conflicts
If you can connect to other networks just fine, it could indicate an IP conflict on your router.
Another way to confirm this is to ping your router’s default address through the command prompt. Type in ping [router IP address] in the command prompt, and if you get a Request timed out error, you’re most probably having an IP conflict issue. Here’s how you can fix this.
Step 1: Press Windows key + I to open the Windows settings.
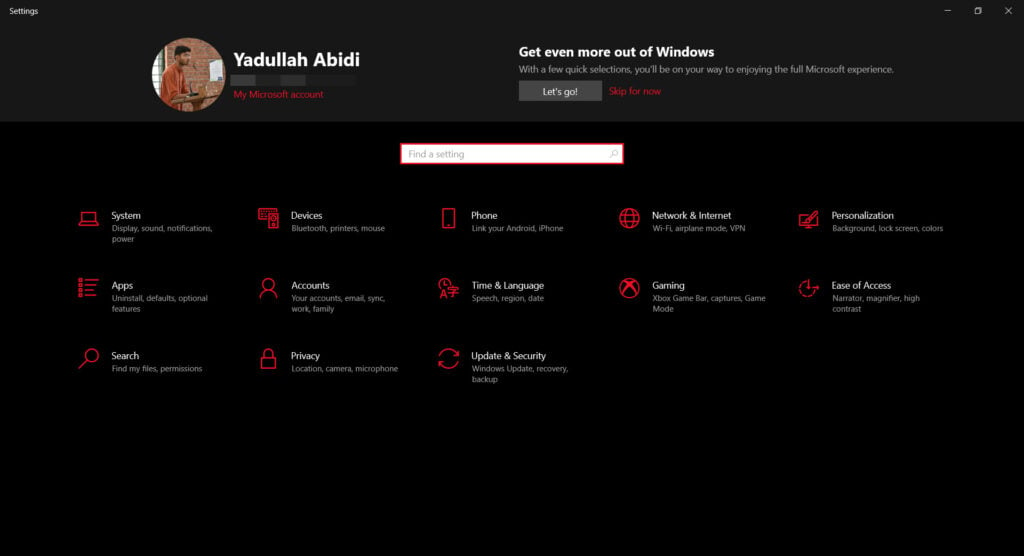
Step 2: Click on Network & Internet.
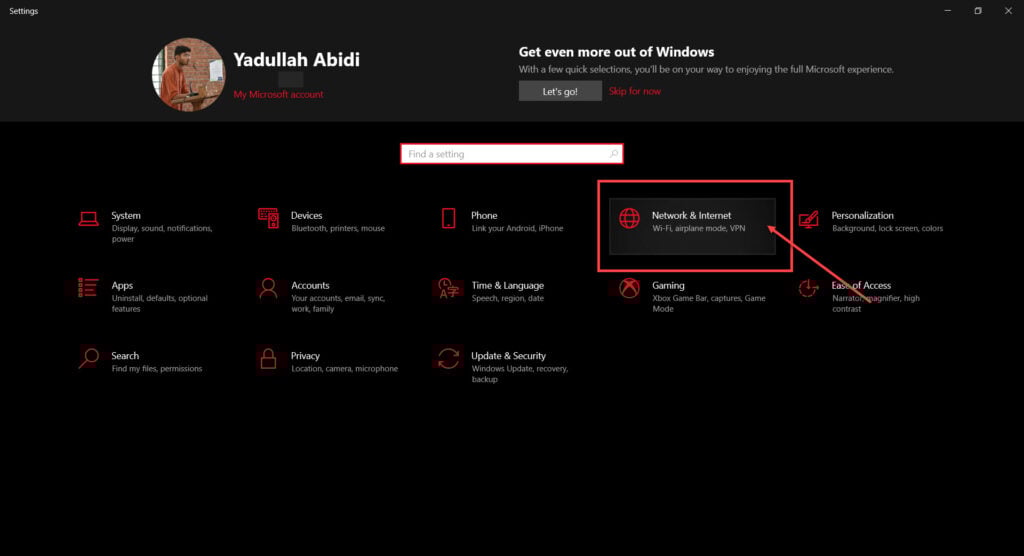
Step 3: Click on Change adaptor options.
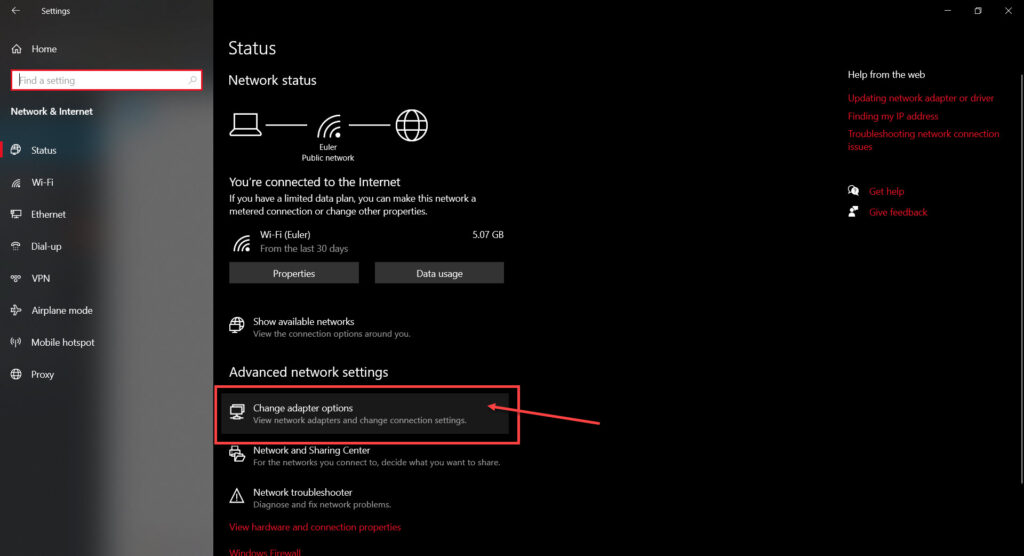
Step 4: Right-click on your Wi-Fi network and click Properties.

Step 5: Find Internet Protocol Version 4 in the list, click on it, and click Properties.
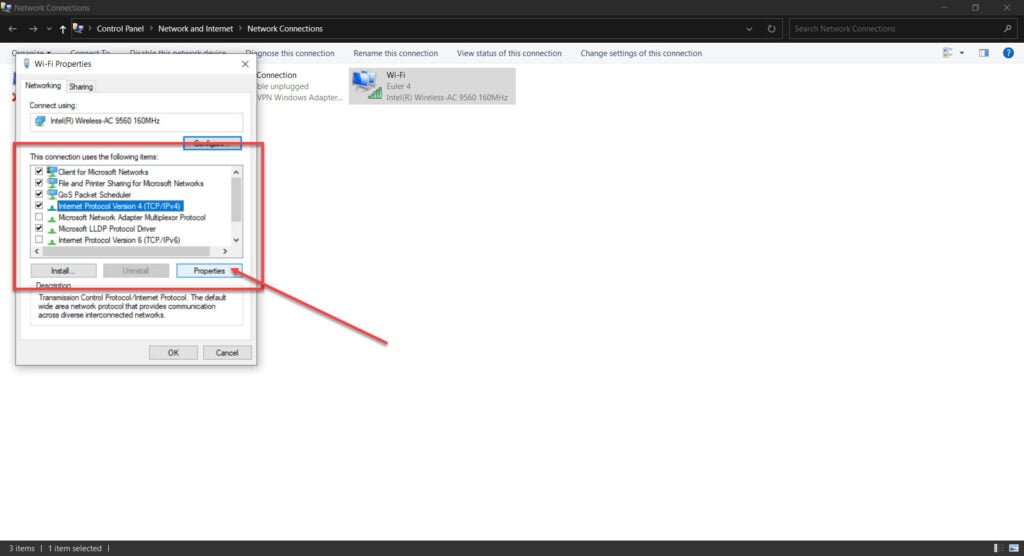
Step 6: Make sure that all settings are set to automatic.

Now reconnect to your network, and it should connect seamlessly.
Check your DNS settings
If you’re running custom DNS settings on purpose or by mistake, having them set incorrectly can cause internet connectivity issues.
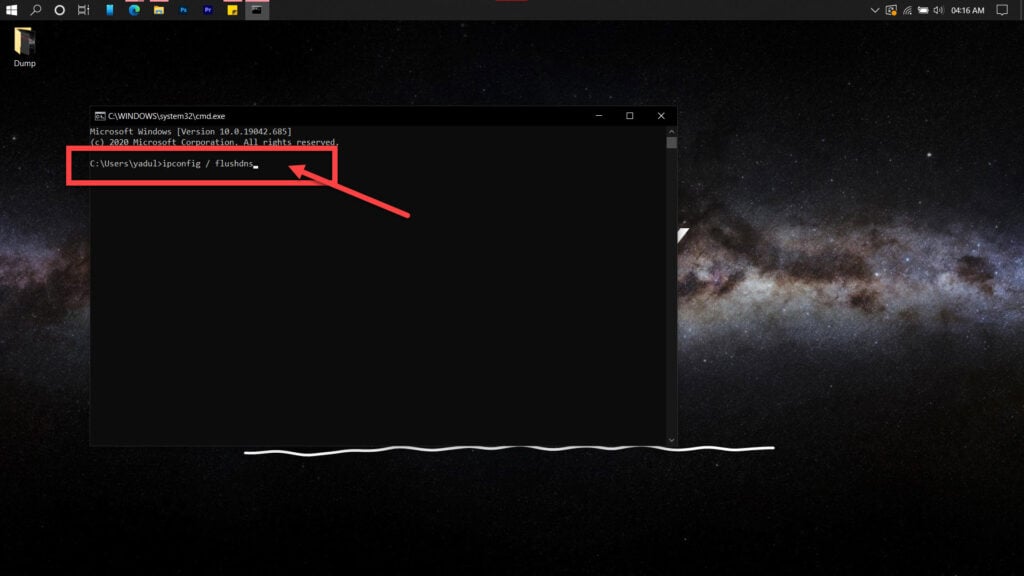
Flushing your DNS settings can set them back to the default values and can resolve such issues. Here’s how.
Step 1: Press Windows key + R, type cmd and hit the Enter key.
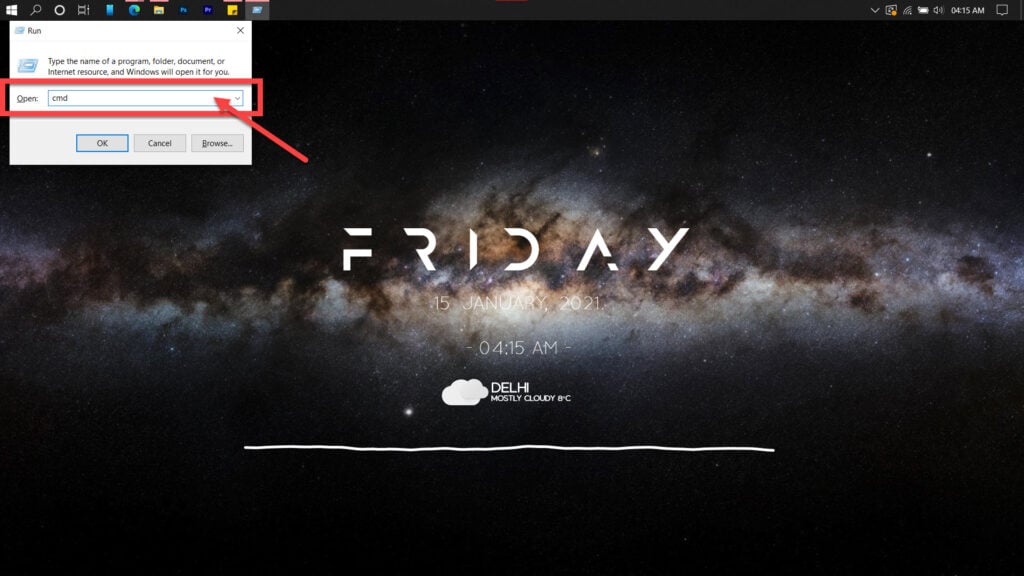
Step 2: Type in ipconfig /flushdns and hit enter. This will reset your DNS settings to their defaults.
You can take this a step further and reset files that Windows uses to access the internet using these commands back to back.
netsh winsock reset
netsh int ip reset
If you suspect an issue with your router’s DHCP assignment, use these commands to release your old IP and request a new one.
ipconfig /release
ipconfig /renew
If that doesn’t work either, you can use the following commands in the order that they’re listed to reset your network stack.
ipconfig/flushdns
nbtstat -R
nbtstat -RR
netsh int ip reset C:\resetlog.txt
netsh winsock reset
Also read: How to find IP address and WiFi password in Windows 10?


