Windows is built on top of hundreds if not thousands of small tools and processes that bring the operating system together for the user experience we get. However, not all of these tools get the same limelight as the most popular ones and so they’re tucked away in settings that only power users would use.
In this article, we’re going over the QoS packet scheduler in Windows, its features and functions and how you can use the tool.
Also read: Windows 11 Pro vs Home: 6 Key Differences
What is the QoS Packet Scheduler?
QoS or Quality Of Service is a metric that allows network admins to prioritise network traffic from one app or device over another. This ensures that multiple programs can access the network’s bandwidth but the more important ones get prioritised.
This is where the QoS Packet Scheduler comes in handy. It determines the delivery schedule of each packet sent over the network based on priority and the rate of flow. If there are multiple packets trying to get through at once, the QoS Packet Scheduler decides which ones go first ultimately helping create a smooth, more uniform network flow. Do keep in mind though that the QoS Packet Scheduler only impacts your network’s bandwidth. Your internet speed remains unaffected.
How to enable the QoS Packet Scheduler?
Here’s how you can enable the feature on your PC.
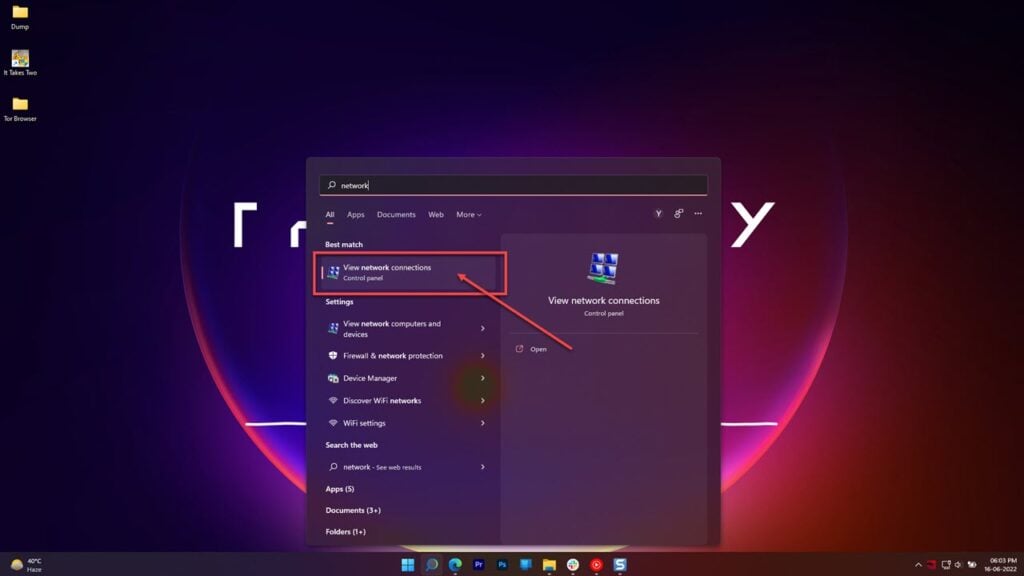
Step 1: Press the Windows key and search for Network connections. Click the corresponding search result.

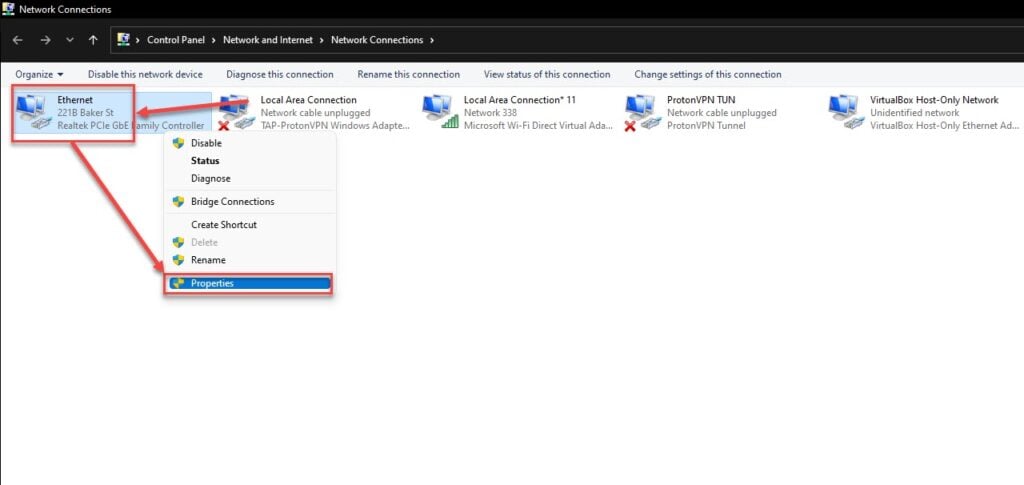
Step 2: Right-click the currently active network and select Properties.

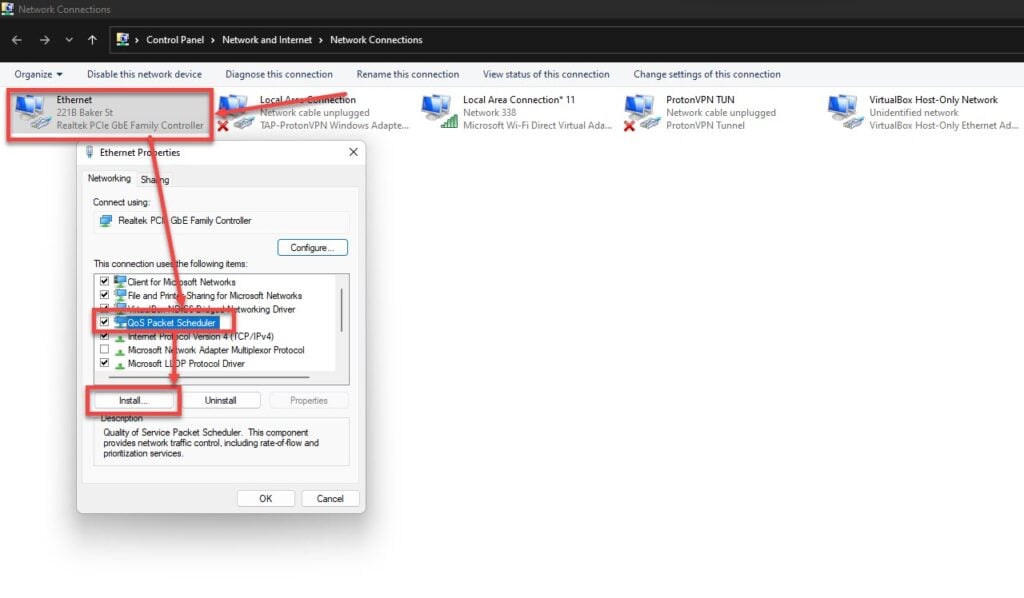
Step 3: In the Networking tab, scroll down to find the QoS Packet Scheduler and click the checkbox to enable the feature. Then, click the Install button.

And that’s all you need to do to enable the QoS Packet Scheduler.
Configuring the packet scheduler
You can configure the QoS Packet Scheduler using two different ways in Windows.
- Using the Group Policy Editor (Windows Pro only)
- Using the Registry Editor
Since the Group Policy Editor isn’t present in Windows Home editions, we’ll be going with the Registry Editor.
Step 1: Press Windows key + R to open the run prompt. Type regedit and hit enter.

Step 2: Navigate to the following directory.
HKEY_LOCAL_MACHINE\SOFTWARE\Policies\Microsoft\Windows\
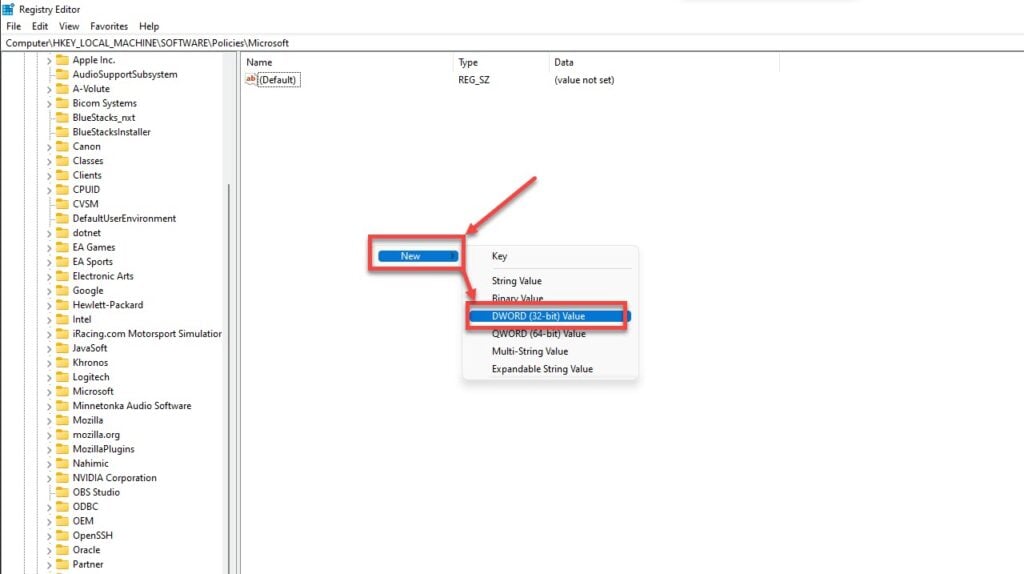
Step 3: Right-click the empty space on the right and then click on DWORD (32-bit) Value. Name the new value Psched.

Step 4: Now double-click the newly created key and enter 0 as the value.

Also read: Windows error 0xc1900106: 7 Fixes


