The internet has become the cornerstone of what we do all day every day. From work to leisure, we need the internet for pretty much everything. As the need for the internet increases, so does the reliance on WiFi.
In this article, we’re taking a look at Spectrum WiFi connected but not working.
Also read: How to fix the ‘Android Connected to WiFi but No Internet’ error?
Restart your router
As always, the first step of troubleshooting anything is to reboot the device that may be causing the issue.
It almost seems like a joke now, but rebooting your device actually does have some pretty surprising results, and you might be able to resolve many seemingly random issues.
Take a look at your router
Your router has a bunch of LED lights that indicate different statuses. Make sure that the WAN and Wi-Fi lights are up and blinking.
If these lights are blinking okay and indicating that everything’s fine, this means that your WiFi network is fine and you are getting access from your ISP as well.
Issues at the ISP’s end
If the WAN light on your router isn’t on, this can indicate that you’re not getting a signal from your ISP and that they may be facing an outage.
The best thing to do in such cases is simply contacting them and enquire about what’s going on with them. Generally, your ISP would be quick to resolve any such outages.
Security apps and Antiviruses
Although sparingly, but antiviruses, antimalware or other security apps may disable your machine’s internet access to protect it from any malware that might be on your machine.
Try disabling any such apps on your system and reconnect to the network to check it resolves your issue.
Use the Windows Internet troubleshooter
If you’ve established that everything is alright with your ISP and your Wi-Fi network, often using the Windows troubleshooter can fix your issue.
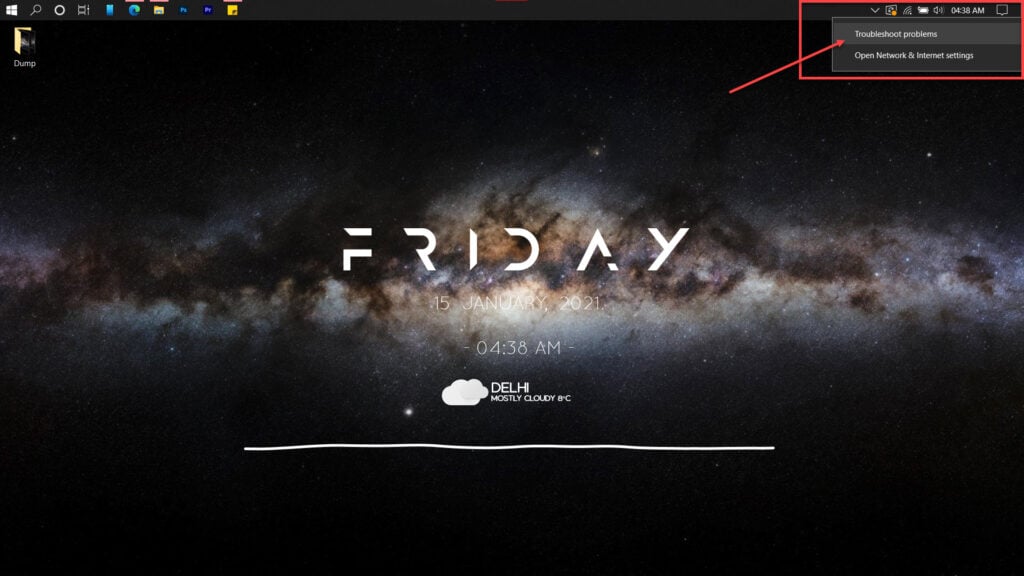
Right-click on the network icon in the taskbar and click on Troubleshoot problems and let the troubleshooter do its thing.
Also read: How to fix the ‘Android WiFi keeps disconnecting and reconnecting’ issue?
Check your DNS settings
If you’re running custom DNS settings whether on purpose or by mistake, having them set incorrectly can cause internet connectivity issues.
Flushing your DNS settings can set them back to the default values and can resolve such issues. Here’s how.
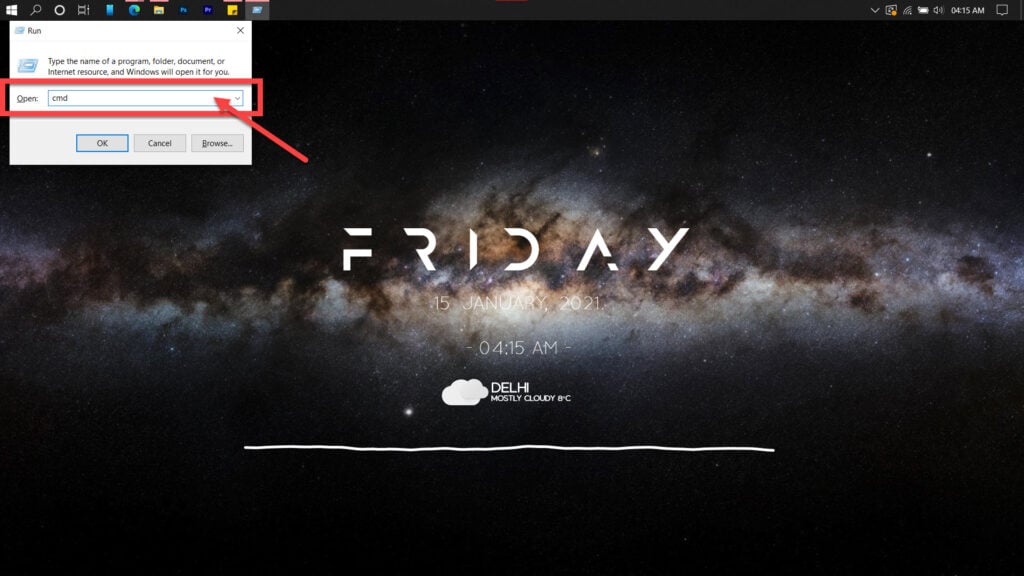
Step 1: Press Windows key + R, type cmd and hit the Enter key.
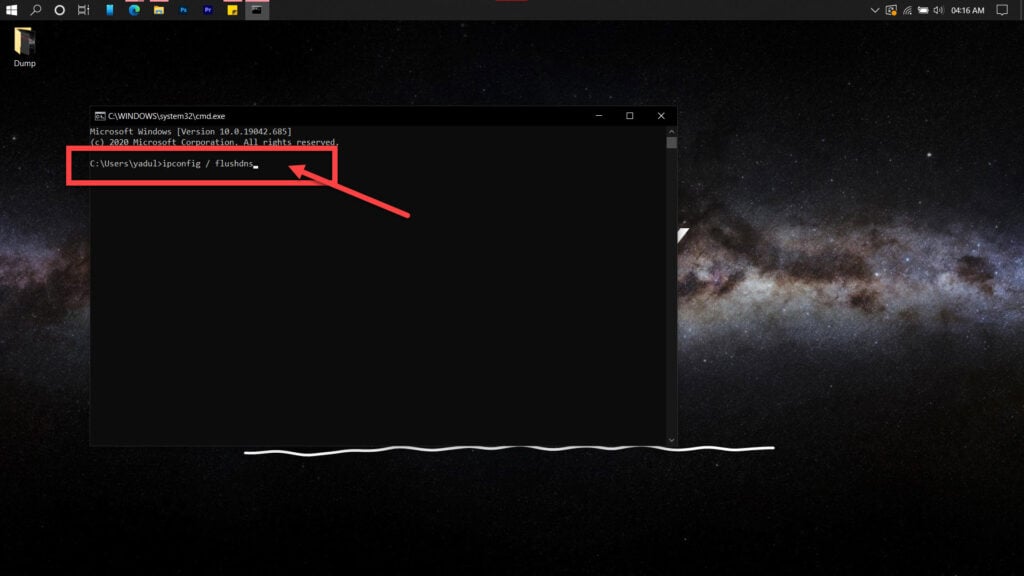
Step 2: Type in ipconfig /flushdns and hit enter. This will reset your DNS settings to their defaults.
You can take this a step further and reset files that Windows uses to access the internet by using these commands back to back.
netsh winsock reset
netsh int ip reset
If you suspect an issue with your router’s DHCP assignment, use these commands to release your old IP and request a new one.
ipconfig /release
ipconfig /renew
If that doesn’t work either, you can use the following commands in the order that they’re listed to reset your network stack.
ipconfig/flushdns
nbtstat -R
nbtstat -RR
netsh int ip reset C:\resetlog.txt
netsh winsock reset
Check your drivers
Your Wi-Fi card’s drivers could also be causing connectivity issues. Try connecting to the internet using either an ethernet connection or any other alternatives and follow these steps to get your drivers in place.
Step 1: Press Windows key + R, type in devmgmt.msc and hit enter.
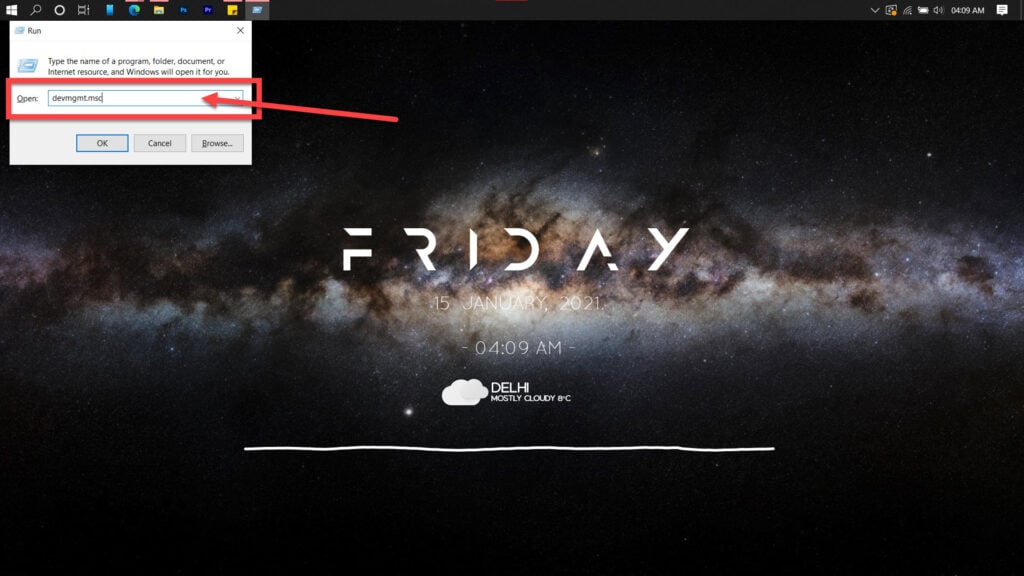
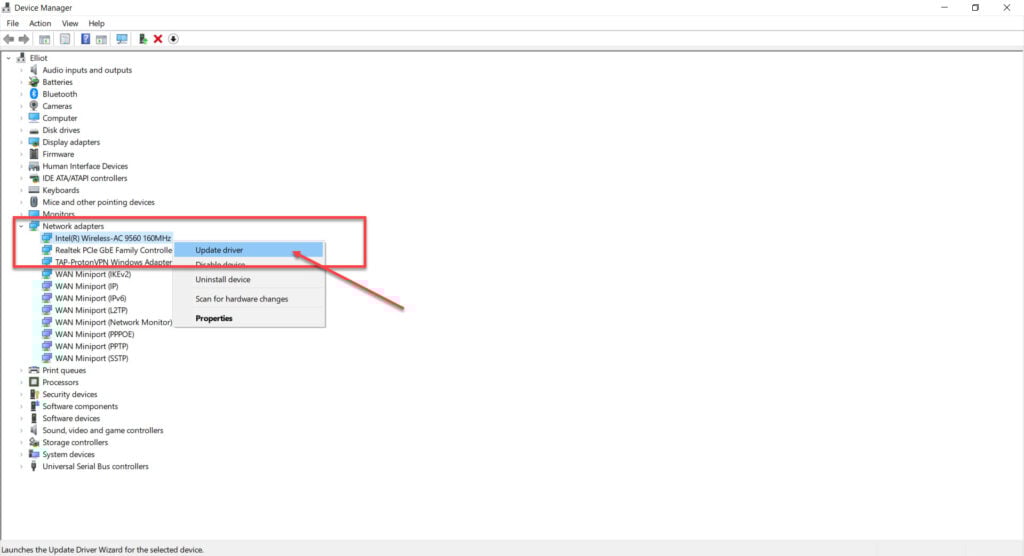
Step 2: Double click Network adaptors to expand it and right click your Wi-Fi card. Click on Update driver.
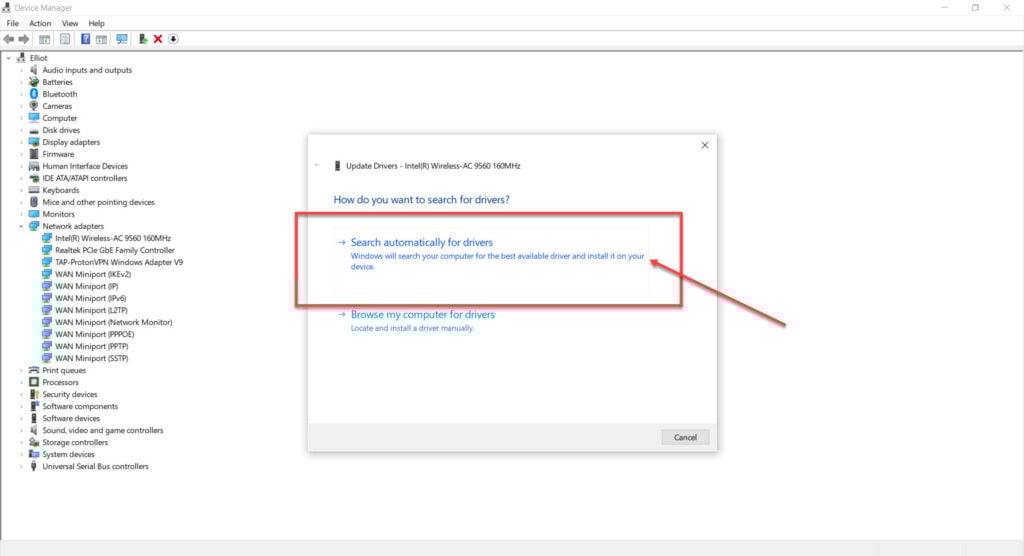
Step 3: Select Search automatically for drivers and Windows will find and install any available updates.
Reset your router
Resetting your router is pretty much the last option you’re left with. Do keep in mind that if your ISP has done some custom settings on your router, you will lose them and you’ll have to do everything all over again.
While you can reset routers using their settings page, we recommend using the physical reset switch on your router. Look up the instructions specific to your router accordingly and follow along.
Also read: What does ‘the number you’ve dialled is unallocated’ mean? 3 Fixes


