Google Docs is an online writing and editing tool where you can save your work hassle-free online and access it from anywhere with any device. Google Docs helps you to create the documents with a variety of inbuilt templates easily. Users can add from hundreds of fonts, images, links to their document.
Google Docs is entirely free and thus is posing a challenge to Microsoft Word, which was one of the most widely used writing and editing tools. In this article, we will explain how you can add a text box to Google Docs and also how you can customise the text box after inserting.
How to add a text box to Google Docs?
If you want to add text box in Google Forms, follow the steps given below.
- Open Google Docs.
- Select the Drawing option from the Insert drop-down menu.
- On the next menu, select New. If you have some previous document, then select that document from Google Drive option.
- Now, select the Text box option form the menu.
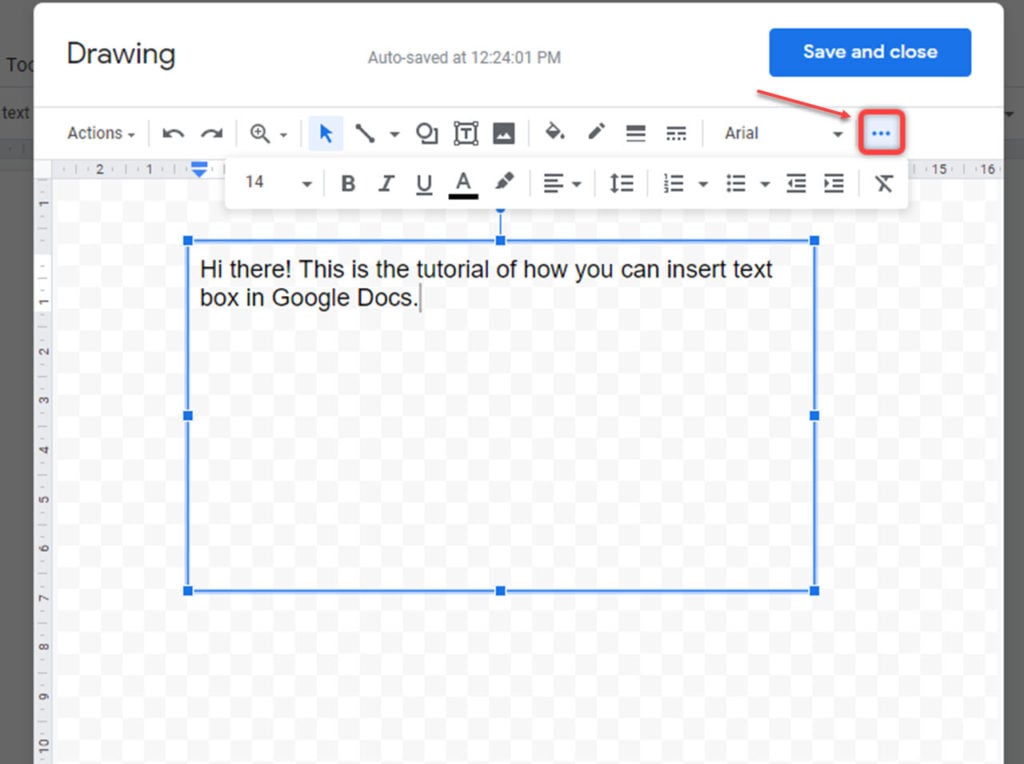
- Then, make the box and write the text in the box, as shown in the screenshot above.
- You can also enhance your text by clicking on the three-dot button, which will open a set of options such as colours, through which you can edit your text and make it more presentable.
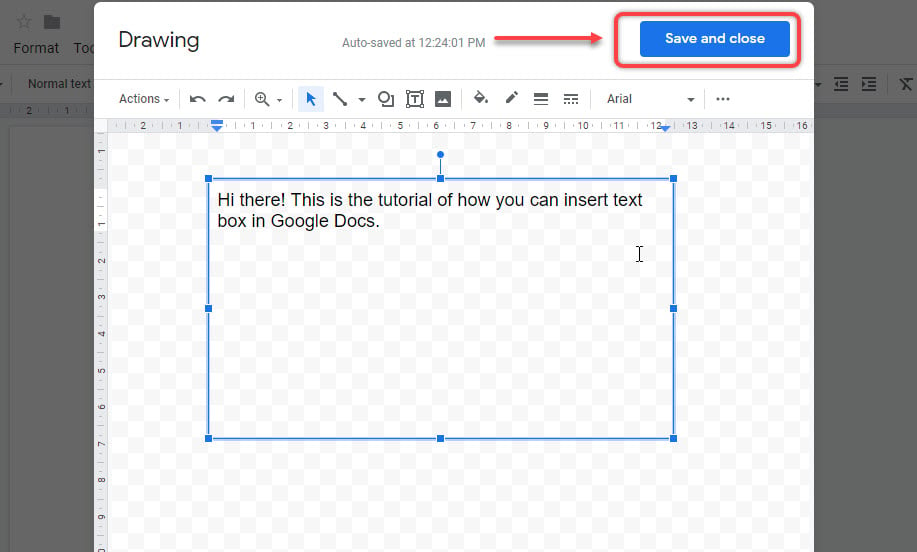
- After you are done enhancing the text, Save and Close option at the top right corner, as shown in the screenshot above.
- You will see that the text box will appear in your main document, where you can increase or decrease the size of the box.
If you have to edit the text box again, you can click on the Edit option at the bottom left of the text box.
How to customise the text box in Google Docs?
Now that you have inserted the text box, here are a few customising options.
Insert Images in the text box
To insert images in the text box, follow the instructions given below.
- Click on the text box.
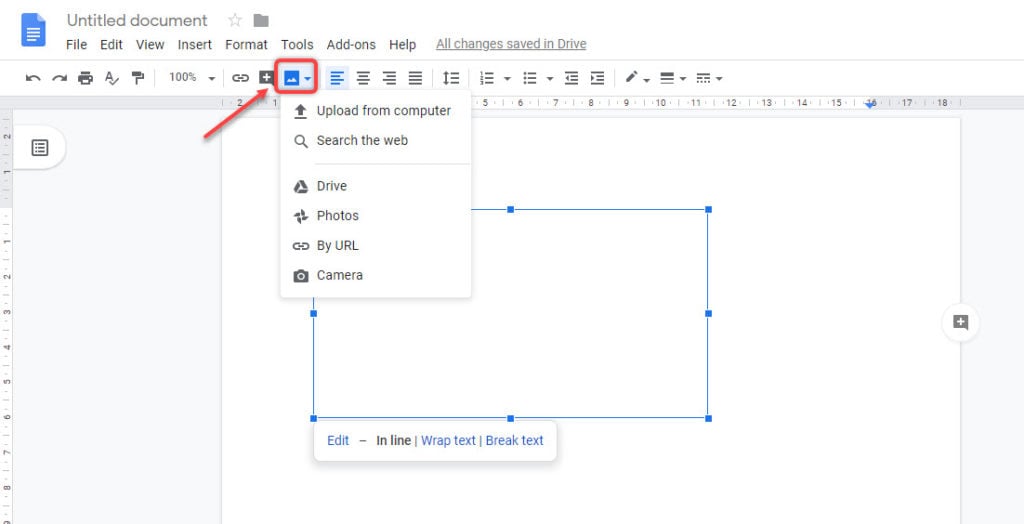
- Then click on the Insert image option as shown in the screenshot above.
- I have uploaded the image from the computer. Check out the screenshot above to get an idea. Note that the text is now gone and instead the image is now shown in the box.
Choose the border colour of the text box
To choose the border colour, follow the instructions given below.
- Insert the text box.
- Now, click on the Border colour option and then choose the colour you desire.
Fill colour in the text box
If you want to fill colours in the text box, follow the instructions given below.
- If you have already inserted the text box, then click on the text box and then click on Edit option. If you have yet to insert the text box, then follow the process given in the very beginning.
- When you click on Edit, the Drawing window will open as you can see from the screenshot above.
- Now, click on the Fill colour option and then choose the colour.
- The text box will look like the screenshot above. I have selected the red colour in Solid format.
We hope that you liked this detailed explanation. If you have any queries, feel free to write in the comment box below.
Also Read: How to create and embed Google Form in Gmail, WordPress and a website?


