Premiere Pro is one of the industry-leading programs for video editing and part of Adobe’s Creative Cloud suite of creative programs. It comes loaded with tools and features to make an editor’s life easy, including a bunch of default transitions that you can slide between clips in just a few clicks.
Editing videos requires creativity; simply putting video clips next to each other doesn’t always go well. Thankfully, Premiere Pro has default transitions to help you get started. In this article, we’re talking about how you can add transitions between clips in Premiere Pro.
Also read: The importer reported a generic error in Adobe Premiere: Quick Fix
Adding transitions in Premiere Pro
Adding transitions in Premiere Pro is surprisingly easy. Before starting, make sure you have at least two clips on your timeline to add a transition between, then follow these steps.
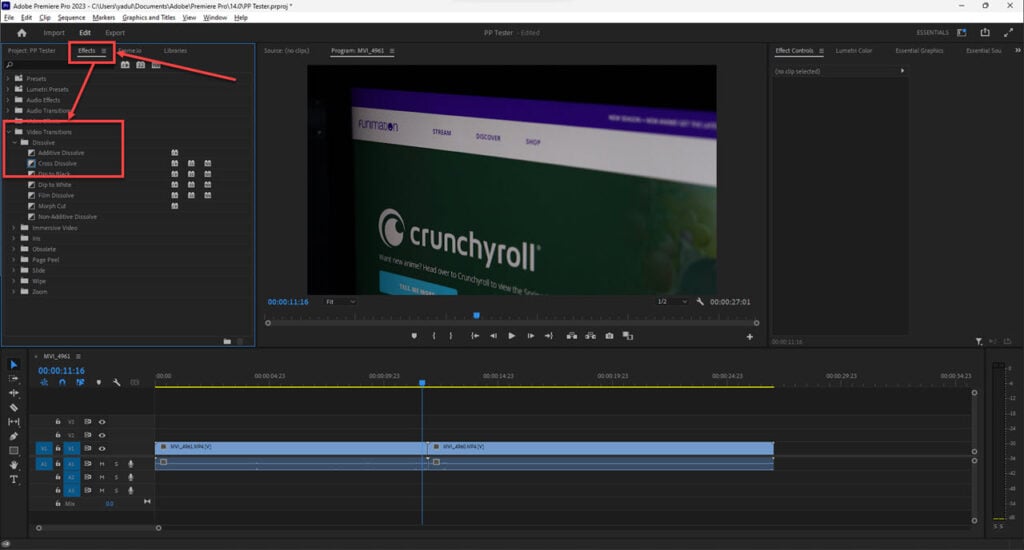
Step 1: Head over to the Effects panel, expand the Video Transitions folder, and expand whatever kind of transition you want. For this guide, we’ll use the Cross Dissolve transition, so expand the Dissolve folder.

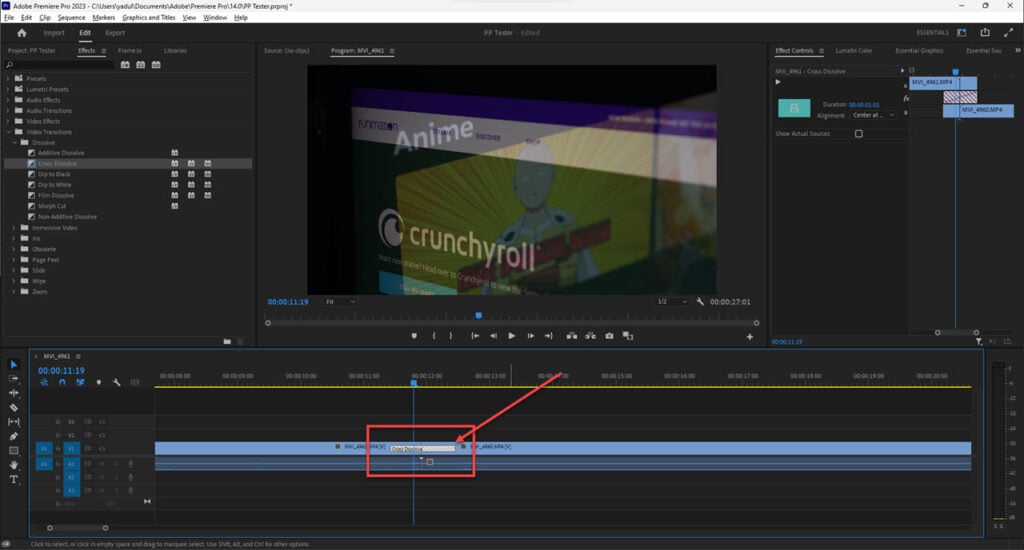
Step 2: Drag and drop the Cross Dissolve transition between the two clips.

Step 3: Once the transition has been applied, you can modify its length by zooming in and extending the transition from either side by clicking it and dragging it around.
Another way to quickly apply the default Premiere Pro video transition is to right-click the end of your first clip and select Apply Default Transitions.

Alternatively, you can use the Ctrl + D (Command + D for macOS) shortcut to apply the default video transition and Shift + Ctrl + D (Shift + Command + D for macOS) to apply the default audio transition.
Also read: File type is unsupported compression type in Premiere Pro: Quick Fix


