Google Sheets is a robust and easy-to-use tool for creating spreadsheets, providing various features to assist users in arranging and studying data. When dealing with data in Google Sheets, an essential aspect is handling column headers. Changing column names might seem like a basic task, but it’s important as it significantly improves the clarity and organisation of your spreadsheet.
This article discusses how to rename columns using column action and how to rename them using header row in Google Sheets.
Also read: How to create a pie chart in Google Sheets?
Rename using column action
You can give a column a unique name, making it handy and simpler to refer to when working with formulas. Here are the steps to do that:
Step 1: Open the Google Sheets on your device, then open the document you want to rename the column.
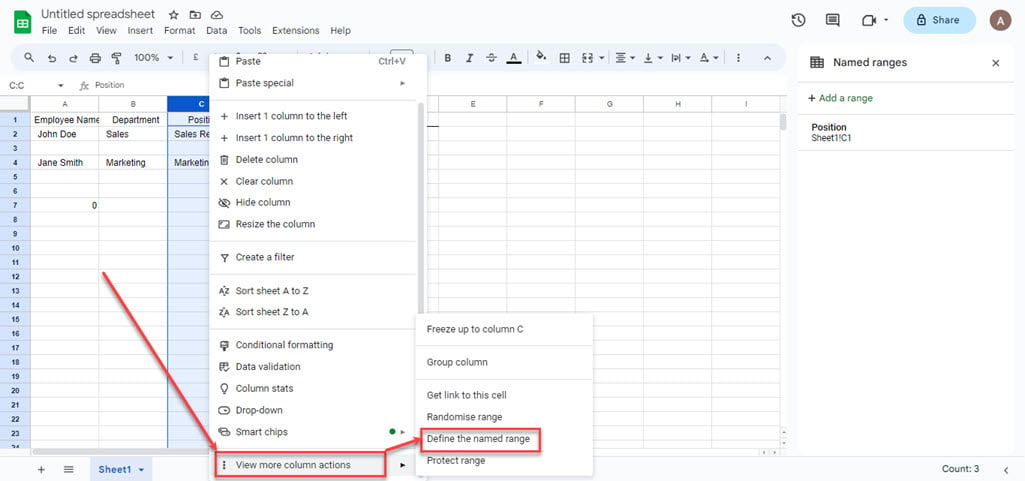
Step 2: Right-click on the Column header; in the dropdown menu, hover over the View more column actions, and then in the sub-menu, click on the Define the named range option.

Step 3: The Named ranged menu will appear on the right side of the screen; click on the Add a range option.

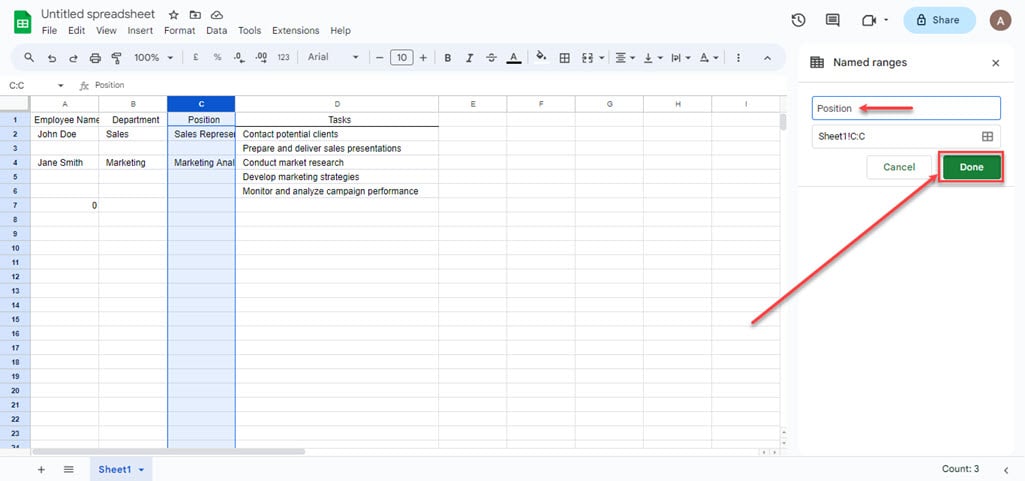
Step 4: Give the name you want and then click on the Done button.

Also read: How to convert Google Docs to Word?
Rename by adding Header row
You can include a header for a column in a dataset, making it easier to grasp the information it holds. Here are the steps to do that:
Step 1: Click on the topmost cell in the column and make sure it is empty, as you will name the column in it.

Step 2: Type the desired name for the column; we have used Position for example.

Step 3: Click and drag to highlight the text in the cell, then click on the B icon in the toolbar menu to make the text bold. Press Ctrl + B on your keyboard to bold the text.

Step 4: Your column header will be set.

Also read: How to make Google Slides vertical?


