Google Chrome is one of the most popular browsers the world has ever seen. The browser is available on all major platforms and enjoys a huge userbase.
In this article, we will take a look at how you can install Chrome on Ubuntu using the command terminal and directly through the website.
Also read; How to check the Ubuntu version?
How to install Chrome in Ubuntu using the terminal?
Since Chrome isn’t open-source, you can’t just apt-get install the browser. To download and install Chrome using the terminal, you’re going to download the .deb package and install it from there manually.
However, if you’re okay with using Chromium, the open-source version of Chrome, it can be found in Ubuntu’s software repos.
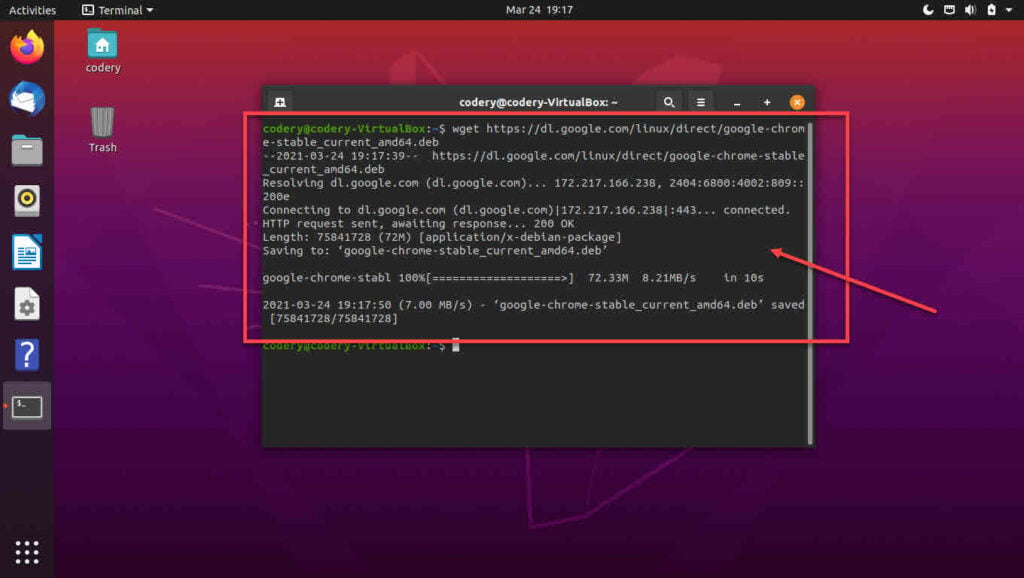
Step 1: Use the following wget command to download Chrome’s .deb package.
wget https://dl.google.com/linux/direct/google-chrome-stable_current_amd64.deb

Step 2: Install the downloaded package using dpkg.
sudo dpkg -i google-chrome-stable_current_amd64.deb

And that’s all you need to do to install Chrome. You can look it up in Ubuntu’s app drawer now and launch the browser from there.
Also read: How to fix the ‘SonyLiv not working on Chrome’ issue?
How to install Chrome in Ubuntu directly?
If you’d like to avoid the terminal, you can download Chrome from Google’s website and install it just like we do on Windows or macOS.
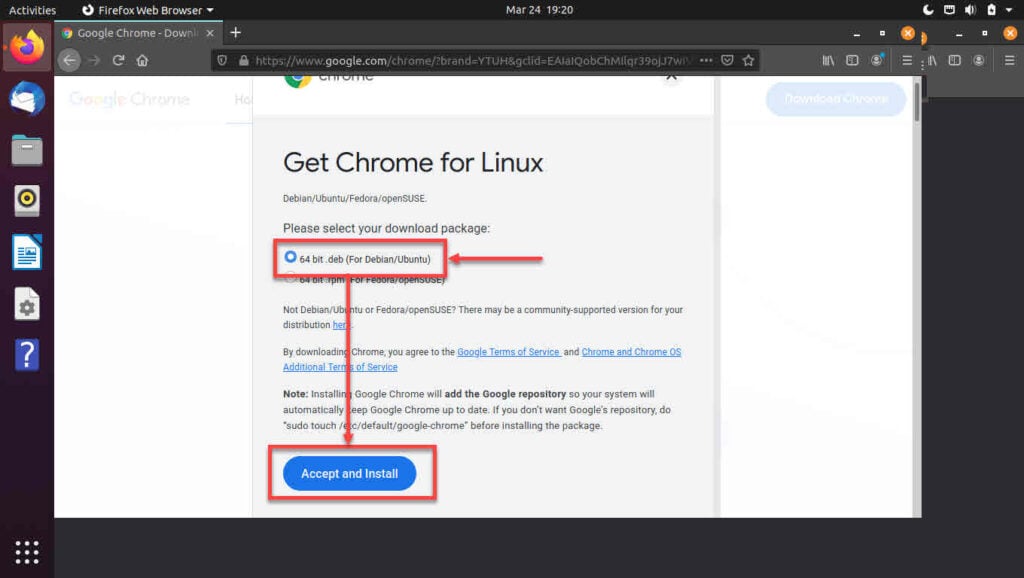
Step 1: Head over to the Chrome download page and click the Download Chrome button.

Step 2: Select the package based on your distro. Since we’re working with Ubuntu, we’ll be downloading the .deb package.

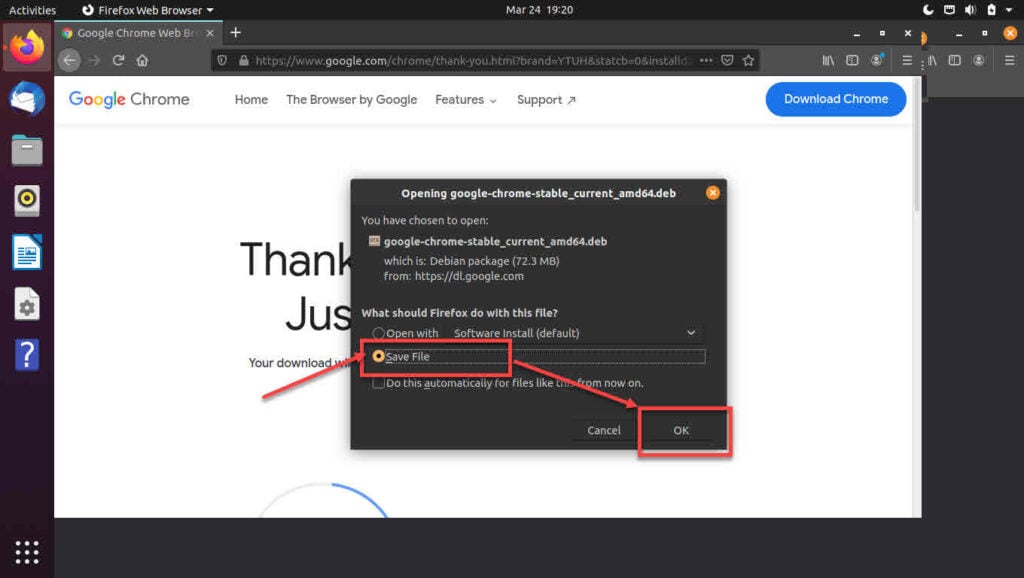
Step 3: Instead of opening the package directly with the software centre, save the file.

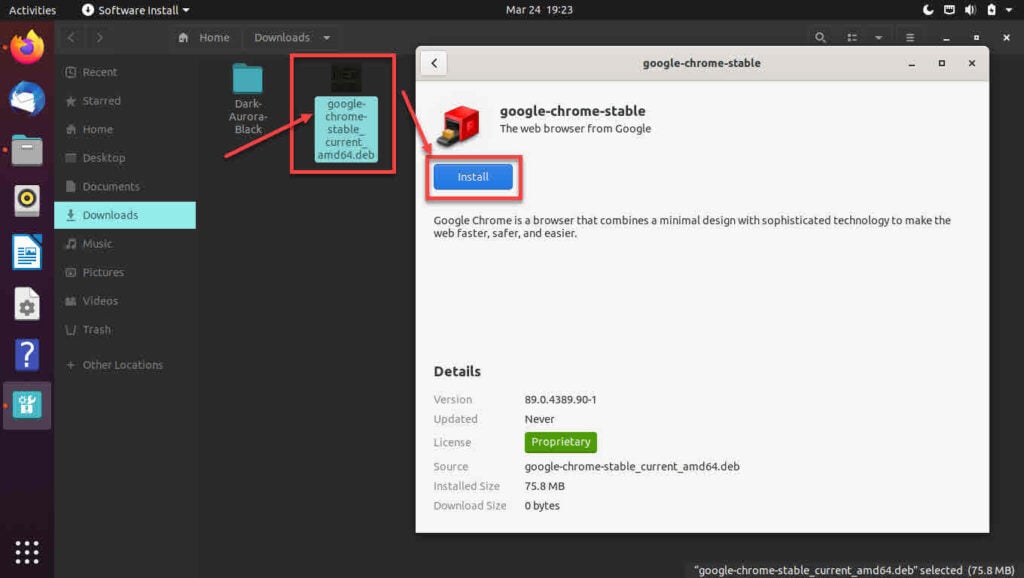
Step 4; Navigate to the directory to save the downloaded file and double-click it to launch the software centre. Click Install to install the browser. If prompted, enter your password.

Note that some Ubuntu 20.04 users may have to right-click the package and select Open with software centre.
Also read: How to fix ‘DNS Probe Finished NXdomain’ in Chrome?


