Python is one of the best languages to code in for beginners and pros alike. The power and control Python offers combined with its sheer ease of use and simple syntax makes it a very easy language to learn and master.
Now while a significant number of developers will choose to code on Linux, just because everything you need is already there, some prefer to stick to Windows. Whatever your reasons might be, if you’ve decided to install Python on Windows, we’re here to help you through the process.
Also read: What is the difference between Python 2 and Python 3?
What version of Python should you install?
Before we get to installing Python we need to make sure what version we need to install. Currently, there are two main versions of Python available:
- Python 3: This is the future and the present of Python. It has a very active community and dev support. If you’re picking up python as a first language to learn or to start a new project with, we suggest this option.
- Python 2.7: This is a legacy version of Python support for which was dropped on January 1, 2020. We do not recommend this version of Python unless you specifically need it for legacy projects.
You can, of course, install both these versions side by side without any problems and use them as per your convenience. In this article, we’ll be installing them both and set them up without a hassle.
Also read: How to enable Remote Desktop in Windows 10?
How to install Python 3?
The latest release right now for Python 3 is 3.9. Note that Python 3.9+ cannot be used on Windows 7 or earlier.
Step 1: Head over to the official Python website and download the Windows Setup file for the latest release available. At the time of writing this article, the latest release is Python 3.9.0
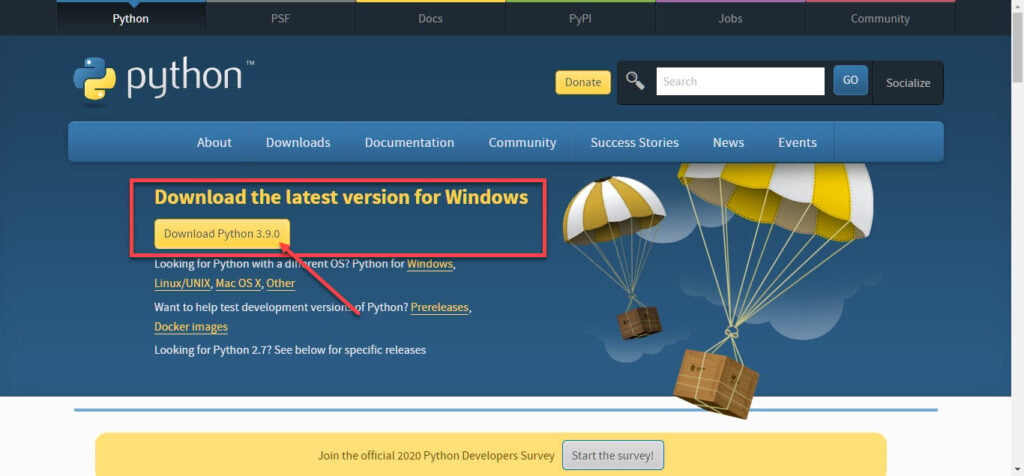
You'll find the download here
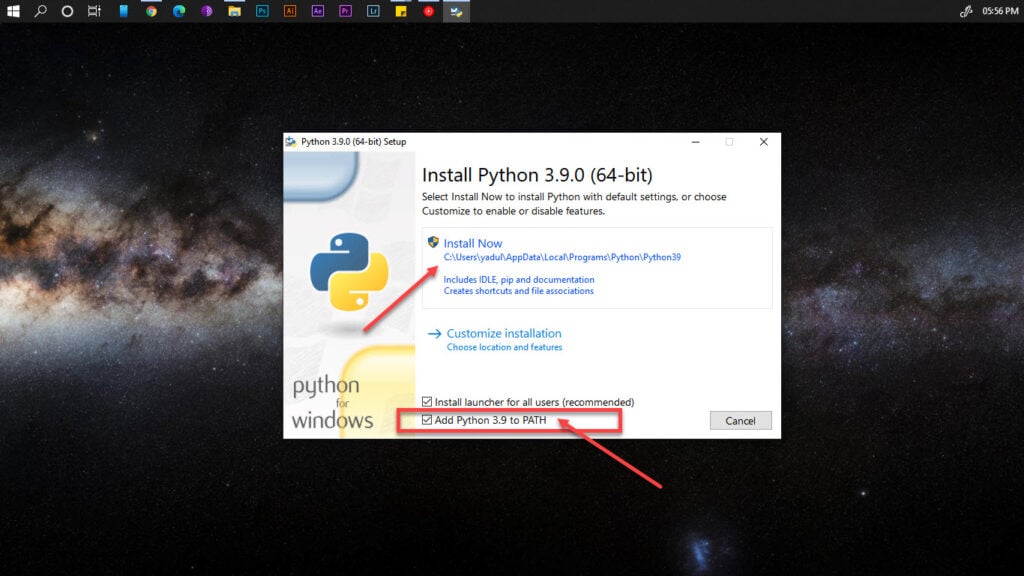
Step 2: Once you’ve downloaded the setup file, run the installer by double-clicking on it. You’ll see the installation dialogue box.

Step 3: You don’t really need to make any changes here. Just check the Add Python 3.9 to PATH checkbox and click on Install Now.
Step 4: Installation is almost done, except we need to make a small decision here. You’ll see an option called Disable path length limit. We recommend you select this option.
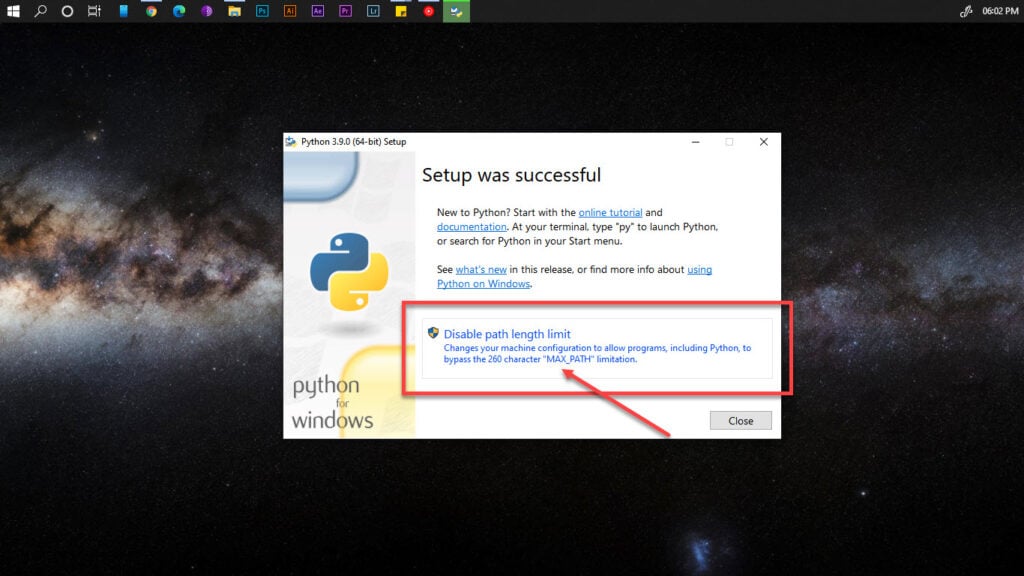
The reason behind is that a lot of developers write Python code in Linux or other Unix distributions that do not have path length limits, unlike windows. Checking this option allows Python to override any such limitations and save you headache further down the line.
Once you’ve done that you’ll see a Setup was successful message pop up and that’s it, you’ve installed Python 3.9 on your PC.

Just as a sanity check, open the Command Prompt and type in python -v. If Python is installed correctly it’ll show you the current version installed. The output should be similar to the image below.

Also read: How to enable Group Policy Editor (gpedit.msc) in Windows 10?
Installing Python 2.7 on Windows
If you need to install Python 2.7, the process is largely similar.
Step 1: Head over to the official Python website to download the Windows setup for Python 2.7. The latest release was 2.7.17 released on October 19, 2019.

You can find the download here
Step 2: Download and run the installer file. Select Install for all users and click on the Next button.

Step 3: You’ll now be asked to select an installation directory. Just go with the default one and click on the Next button.

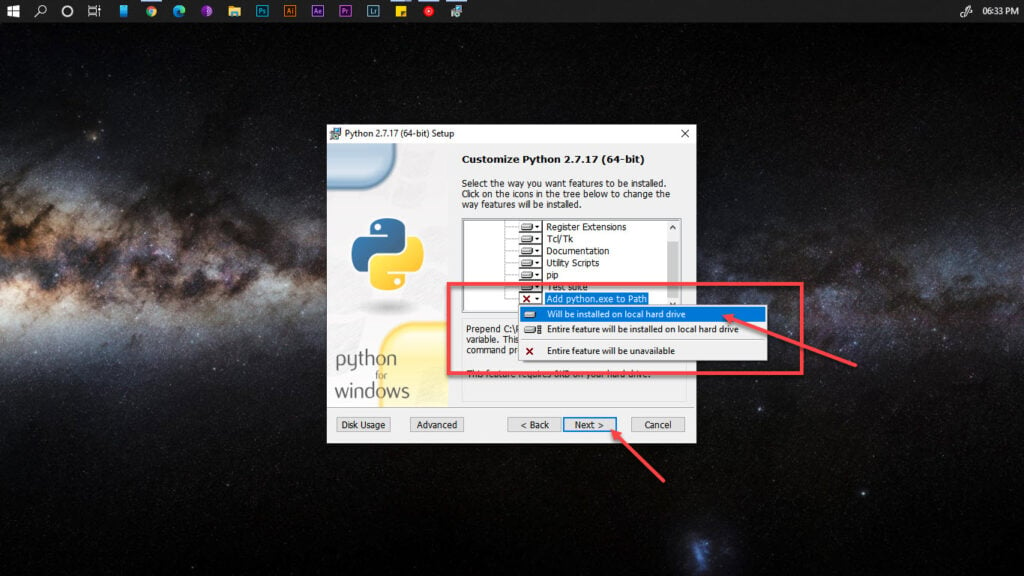
Step 4: The next screen has options for customising your installation. Scroll down to find Add python.exe to Path and allow it. Click on Next and wait for the setup to complete.
Just like before, we’ll run a sanity check. So head over to the Command Prompt and type in python -V. You’ll see the Python version installed. However, this time, it’ll be Python 2.7.17 and not Python 3.
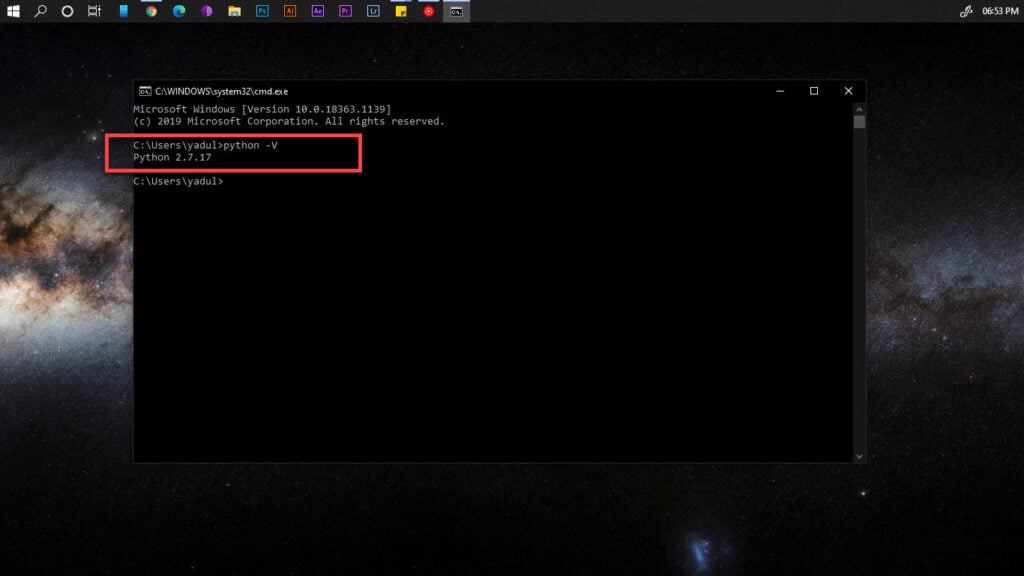
As you can see, our command-line path for Python 3 has been overridden by Python 2. We’re going to have to do make a slight adjustment so we can use both the versions straight from the Command Prompt.
Also read: How to change directory in Command Prompt (cmd)?
Using Python versions from the command prompt
The Python 2 setup edits a system-wide variable and the Python 3 setup creates a user variable. That’s what causes the Command Prompt to get confused when we type python and it gives precedence to the system-wide variable.
To fix this, head over to your Python 3 installation directory. By default, it should be C:\Users\yadul\AppData\Local\Programs\Python\Python39.
In this folder, you’ll see the Python executable called python.exe. Just duplicate this file and name it python3.exe.
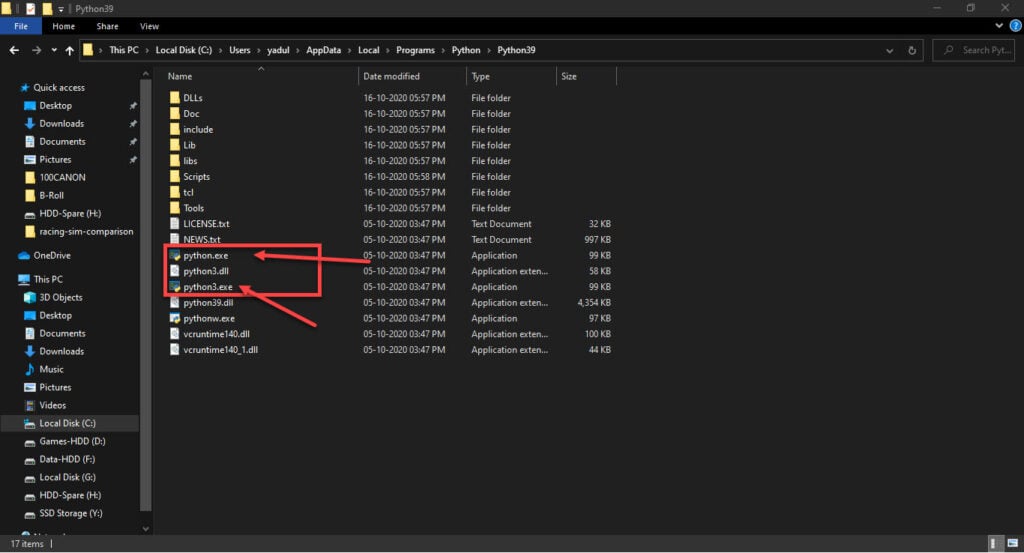
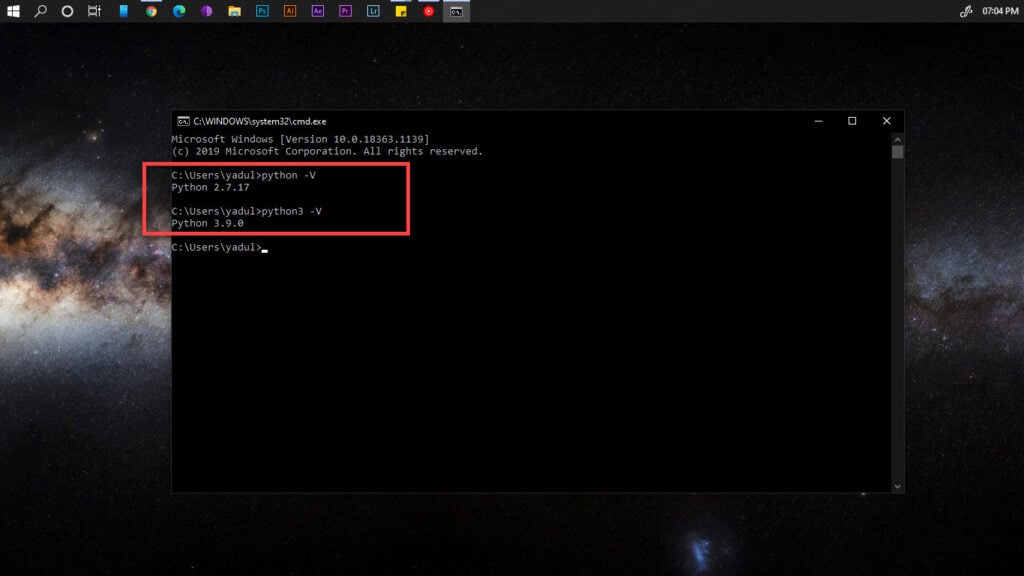
Now when you go back to the Command prompt, you can access Python 2 by simply typing python and Python 3 by typing python3.
Also read: How to open Command Prompt Window in a folder in Windows 10?


