Windows 11 features several security enhancements to protect user data and ensure a safer computing experience. One such security feature is Local Security Authority (LSA) Protection, vital in safeguarding critical system components and preventing unauthorized access. However, some users may encounter an issue where they receive an error message stating that Local Security Authority Protection is off.
In this article, we have discussed how to enable LSA protection and, if it is a false warning, then how to remove the warning.
Also read: Fix: Ethernet doesn’t have a valid IP configuration error in Windows 11
LSA Protection runs in the background by keeping the LSA process in a secure container, effectively stopping unauthorized processes like harmful actors or apps from getting to it. This makes LSA Protection extremely important for security, which is why it’s automatically turned on in all Windows 11 installations.
Check if the LSA protection is enabled
LSA protection is, by default enabled in Windows, but it is possible that it was disabled by you or some other minor issues in your PC. To enable LSA protection follow the steps below.
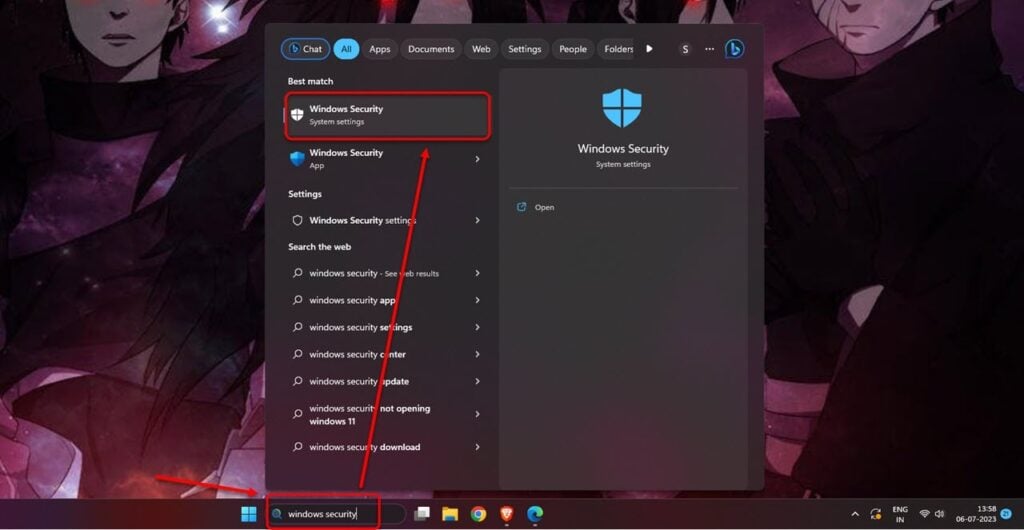
Step 1: In Windows search, type Windows Security and open the first option.

Step 2: In Windows security, click on the Device Security option and then in Device security click on Core isolation details under Core isolation.

Step 3: Make sure the toggle is On beside Local Security Authority protection.
How to remove the false LSA protection warning?
Windows 11 users are facing a persistent issue where they receive a warning message stating that Local Security Authority protection is off, making their devices potentially vulnerable.
This problem was initially identified in March 2023 and has persisted even after installing the April 2023 cumulative updates KB5025239 and KB5025224. Despite having LSA protection enabled, Windows 11 keeps displaying the warning message and prompts users to restart their systems, mistakenly assuming it will resolve the issue. Unfortunately, the alert persists even after a restart.
Remove the warning using Registry Editor
To remove the false warning, follow the steps below.
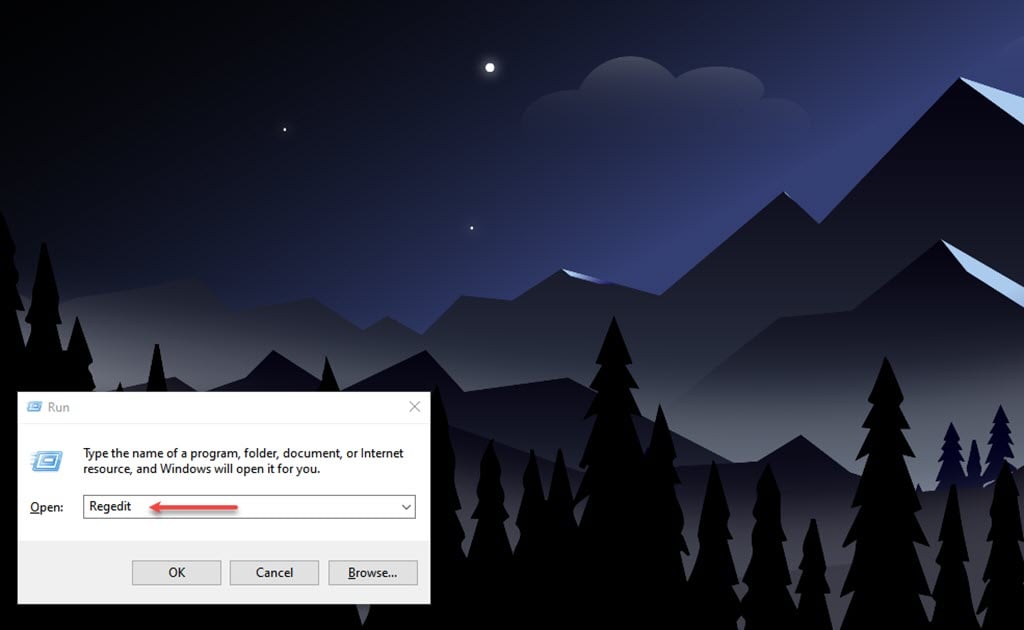
Step 1: Press the Windows + R to launch Run and type Regedit, and hit Enter.

Step 2: In Registry, navigate to HKEY_LOCAL_MACHINE\SYSTEM\CurrentControlSet\Control\Lsa. In the Lsa folder Right-click > New > DWORD (32-bit) Value and rename the DWORD as RunAsPPL, similarly create another DWORD and rename it as RunAsPPLBoot.

Step 3: Double-click on the DWORD you created, change the value to 2, and click the OK button. Similarly, double-click on the other DWORD and change its value to 2.

Step 4: After done with all the steps restart your PC.
Remove the warning using Windows PowerShell
To remove the warning through Windows PowerShell follow the steps below.
Step 1: In the Windows search, type Powershell and click on the Run as Administrator option available on the right side.

Step 2: In the PowerShell, paste the following command and hit Enter.
reg add HKLM\SYSTEM\CurrentControlSet\Control\Lsa /v RunAsPPL /t REG_DWORD /d 2 /f;reg add HKLM\SYSTEM\CurrentControlSet\Control\Lsa /v RunAsPPLBoot /t REG_DWORD /d 2 /f
Also read: What is Windows 11 taskbar grouping? How to enable/disable it?


