Mangago is a site that lets users read famous mangas for free. The site is still in beta but has quite a large collection of Manga to choose from. However, owing to copyright restrictions and piracy claims, you may or may not be able to access the site from your location.
In this article, we’re going over a few fixes you can try out if Mangago is not working.
Try incognito mode
In case you haven’t already, try using the incognito mode on your browser when accessing Mangago. This mode turns off a lot of trackers that may be interfering with the site otherwise and restricting access.
Also read: 7 best action movies every anime lover must check out
Try using a VPN or a different one
Another common reason you might not be able to access Mangago in your location could be that your country has flat out banned the site. In such cases, using a VPN set to a server location where the site is still accessible is your best bet.
It’s also possible that the server your VPN is pinging is causing issues with Mangago. Try a different VPN and see if that solves the issue.
Disable your VPN
On the flip side, at times, using a VPN can also restrict your access to the site. If Mangago is accessible without a VPN in your location, we suggest disabling your VPN when accessing the site. However, if the site is banned in your location, try changing servers to different locations until you find one that works.
Also read: Top 7 Anime series on Netflix you must check out
Reset your browser
Resetting your browser can help get of seemingly random issues that you might be experiencing while visiting sites.
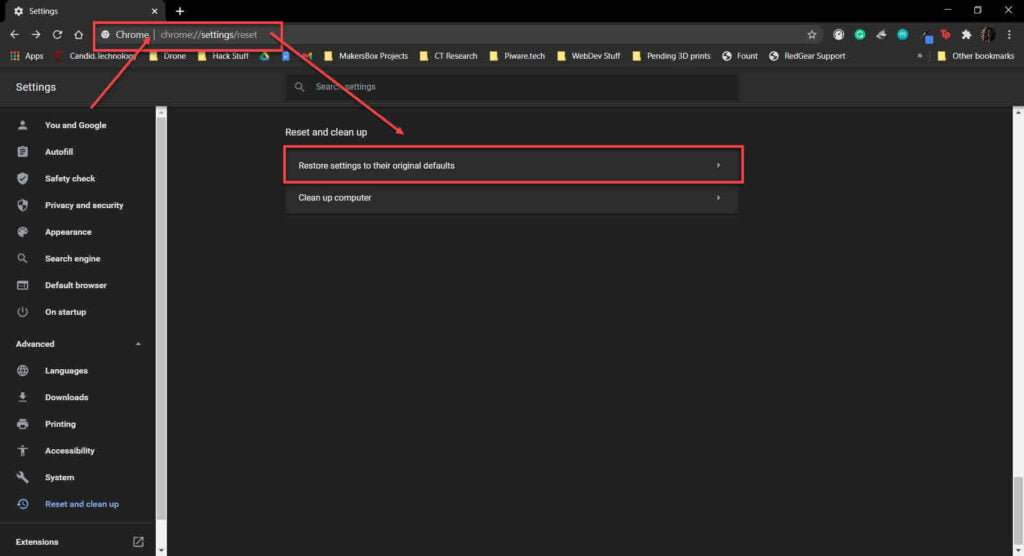
Step 1: Head over to chrome://settings/reset. Click on Restore settings to their original defaults.
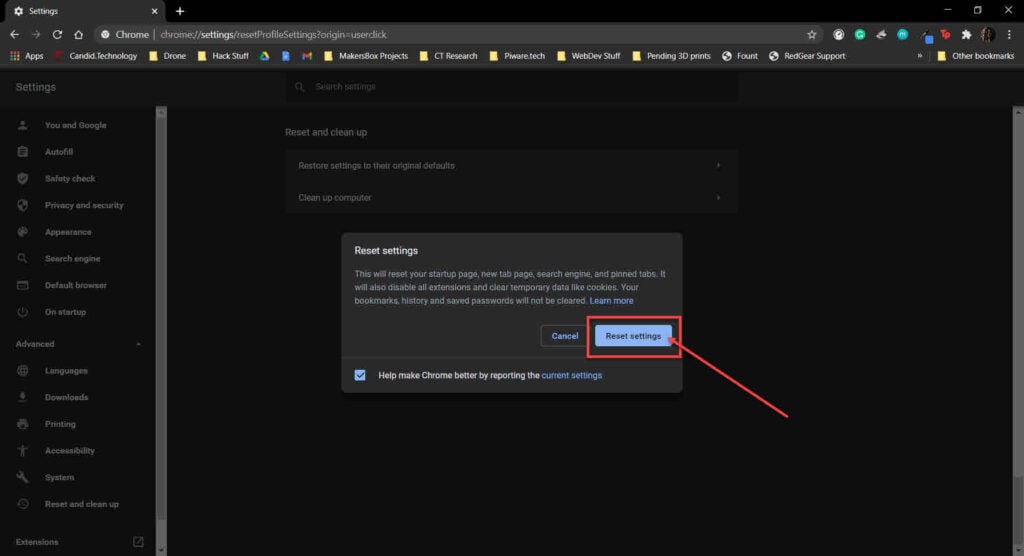
Step 2: Chrome will show you a warning prompt. Click on Reset Settings, and your browser will reset to default settings.
Also read: Top 7 anime apps for iOS
Clear your cache
Corrupt files in the cache can cause problems with several sites, including Mangago. Try clearing your browser’s cache to check if you can access the site.
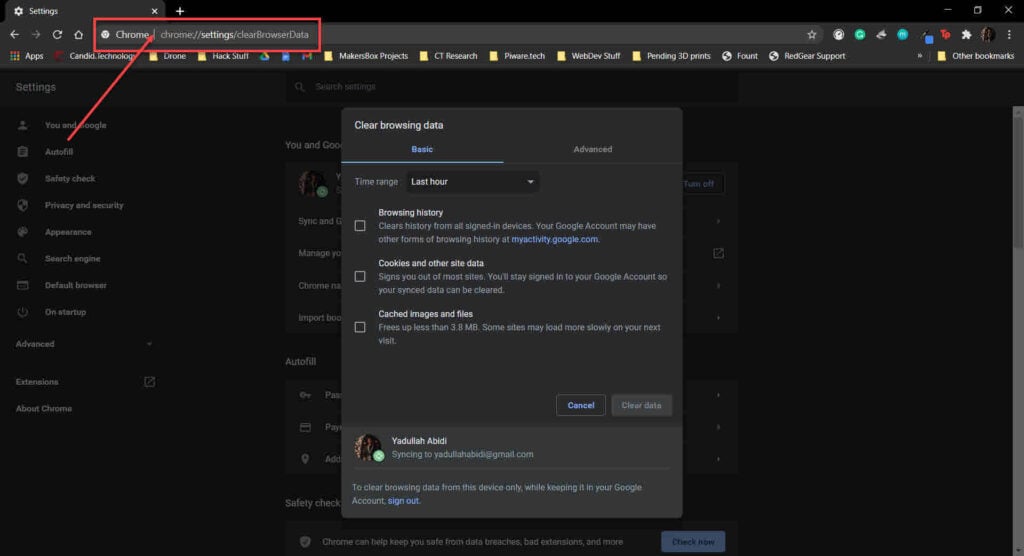
Step 1: Type chrome://settings/clearBrowserData in your browser’s address bar and hit Enter.
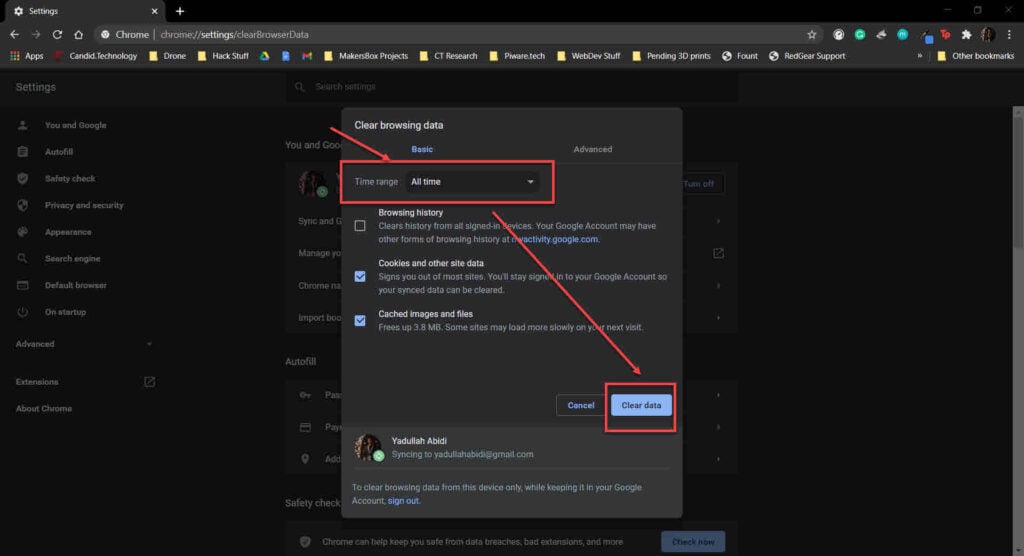
Step 2: Select the cache and cookies options and make sure the Time range is set to All time. Click on the Clear now button to clear out all the data.
Reinstall your browser
Finally, if nothing else works, you can try reinstalling your browser from scratch to check if the issue gets resolved.
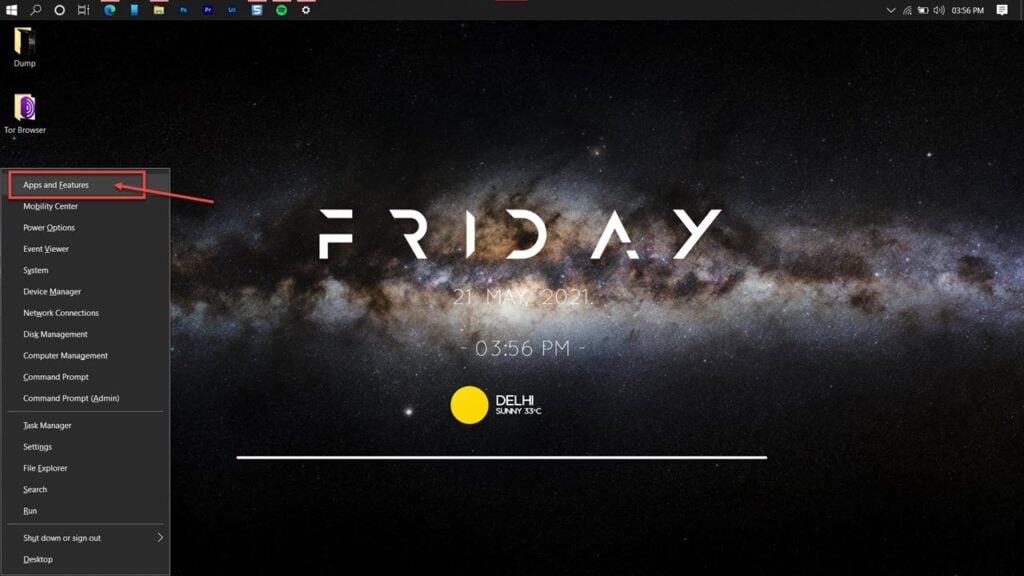
Step 1: Press Windows Key + X to open the Quick Access menu and click on Apps & Features.
Step 2: Find Chrome in the list of apps and use the Uninstall button to remove the browser.
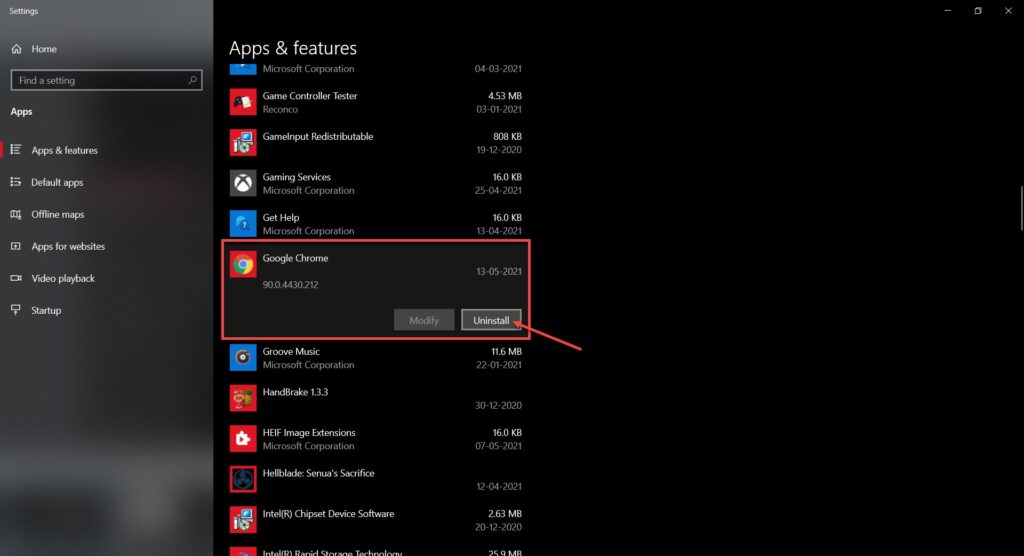
Now you can redownload Chrome and try installing it again to check if that resolves your issue.
Also read: How to fix ‘Chrome not opening Windows 10’ error?


