Outlook is one of the most popular email clients in the world and part of Microsoft’s famed Office suite of programs. However, as much effort as Microsoft has put into making its email client user-friendly and a breeze to use, it still runs into occasional bugs and glitches from time to time.
In this article, we’re talking about the next and previous email arrows missing from Outlook’s user interface, its causes and what you can do to fix the problem.
Why are the next and previous email arrows missing?
The main reason why the aforementioned arrows are missing is due to an update that changed UI elements and removed these arrows to make the email space less cluttered. However, there are other reasons why you might see missing UI elements in Outlook, including but not limited to:
- Corrupt or incomplete Outlook installation.
- Misconfigured settings.
- You’re using the web version of Outlook.
Also read: How to fix the Outlook stuck on loading profile error?
How to fix this?
Here are five fixes you can try out.
Update Office
As mentioned before, an update to Outlook changed its UI elements and removed the next and previous email arrows. If you haven’t updated your Outlook installation for some time, try looking for an update and if one’s available, install it right away. Alternatively, you can use the web version of Outlook as well.
Disable any add-ins
While add-ins can be extremely useful in Outlook, they can also cause issues or conflicts with some other features of the program.
Start Outlook in Safe Mode and check if you can expand your folders. If you can, chances are one of your add-ins is causing the problem. We recommend disabling all add-ins and then turning them on one at a time to single out the culprit.
Closing Outlook using Task Manager
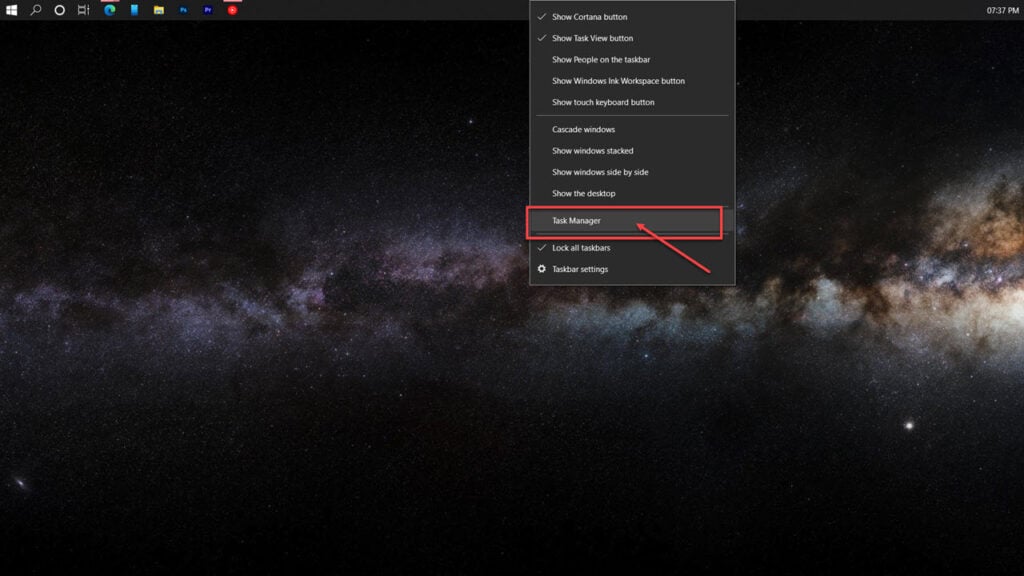
Ending the Outlook process from the Task Manager and restarting it can help resolve the issue.
Step 1: Right-click the Taskbar and click on Task Manager.
Step 2: In the Processes tab, close all the running Outlook processes.
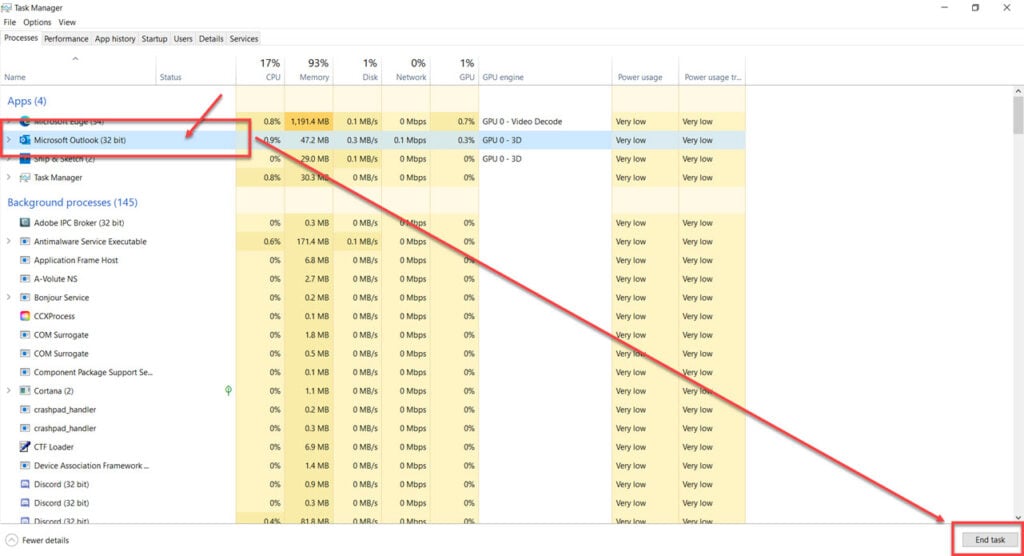
Restart Outlook and try accessing your profile now.
Also read: Why can’t I change the thumbnail on YouTube Shorts?
Create a new Outlook profile
Step 1: Delete your profile from the local Outlook profile directory. By default, the directory is at the following location. Reboot your computer once you’ve deleted the file.
C:\Users\[Your username here]\AppData\Local\Microsoft\Outlook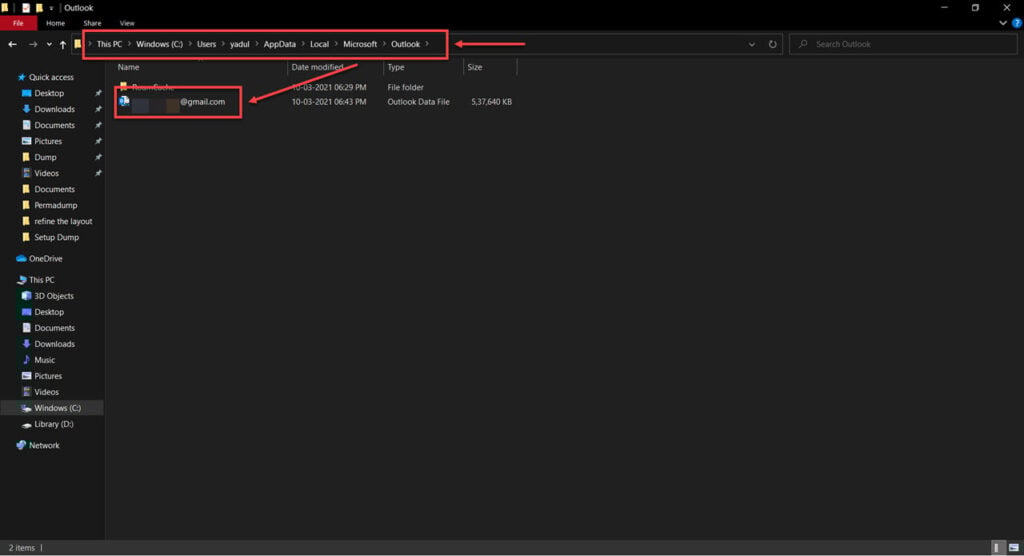
Step 2: Now open Outlook and click on File
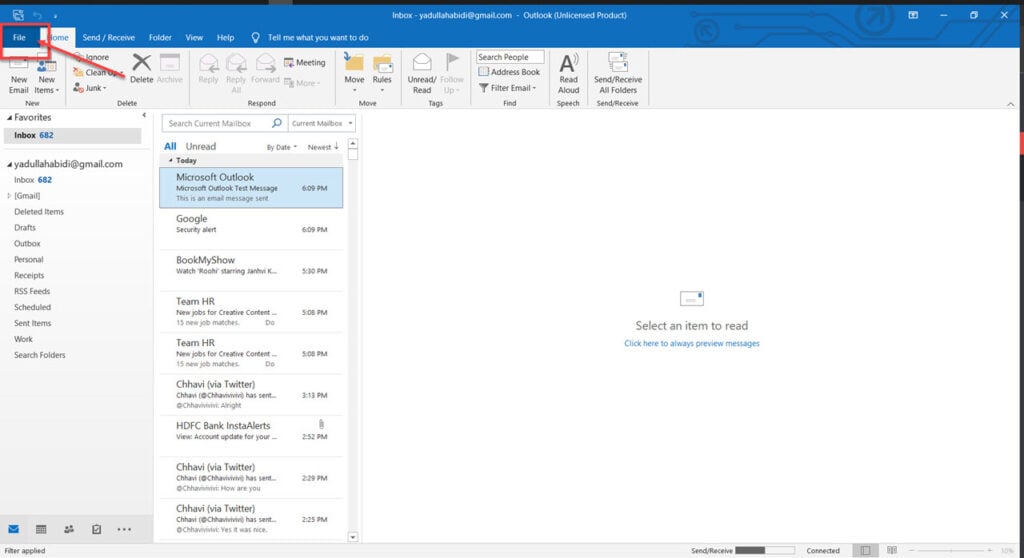
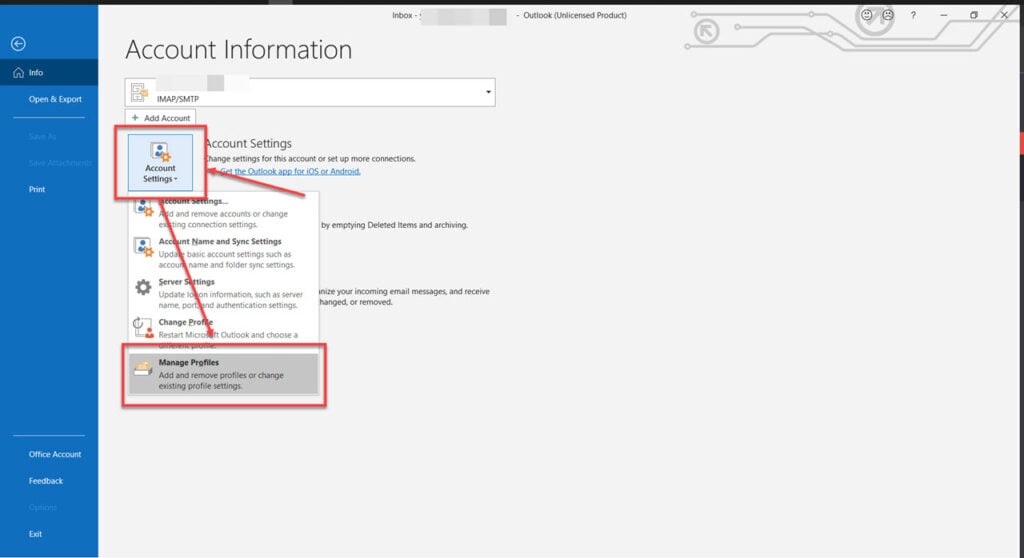
Step 3: Click on Account Settings followed by Manage Profiles
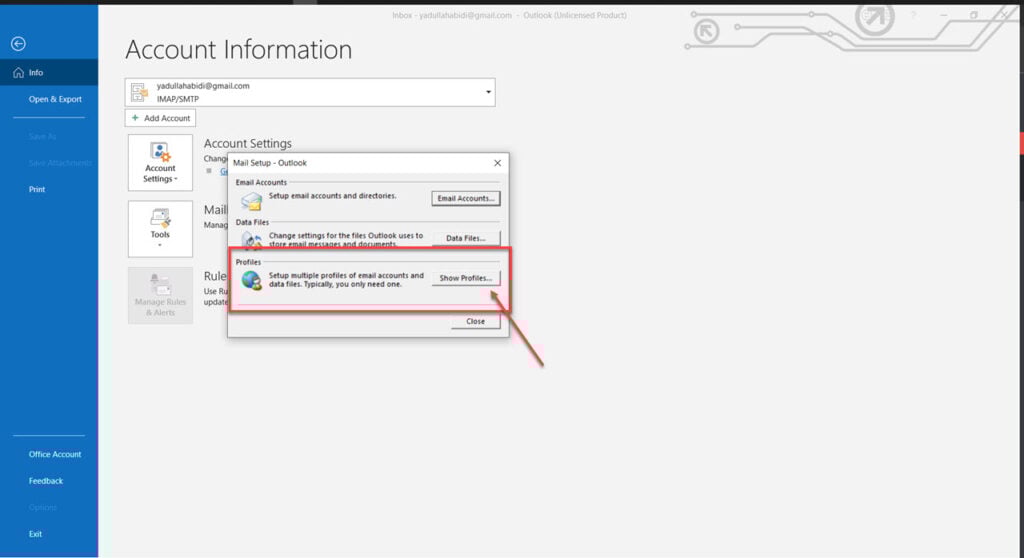
Step 4: Under Profiles, click Show Profiles…
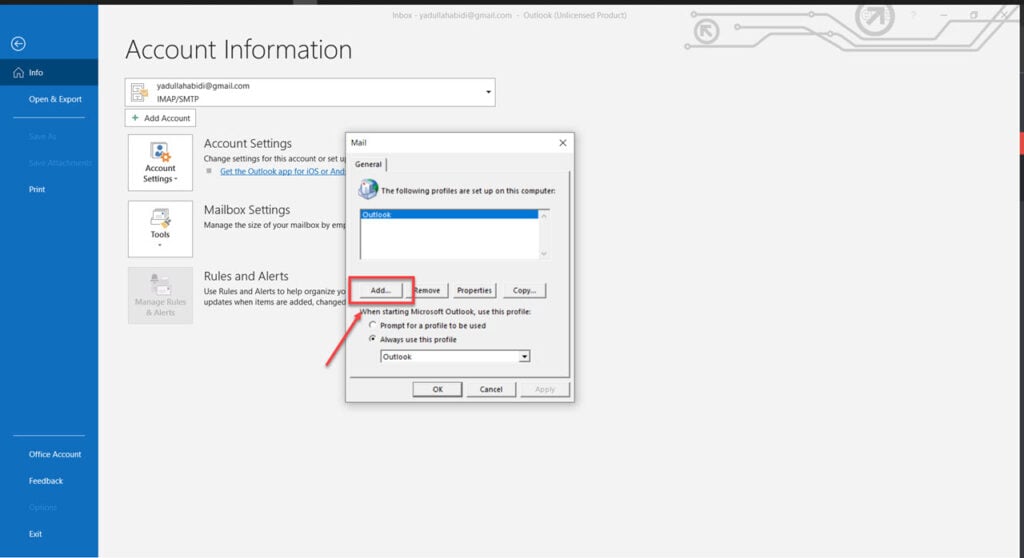
Step 5: Click the Add button to add an email account to the newly created profile.
Now restart Outlook and try again.
Repair your Outlook installation
Sometimes, you might have a broken Outlook install. Follow these steps to repair your installation.
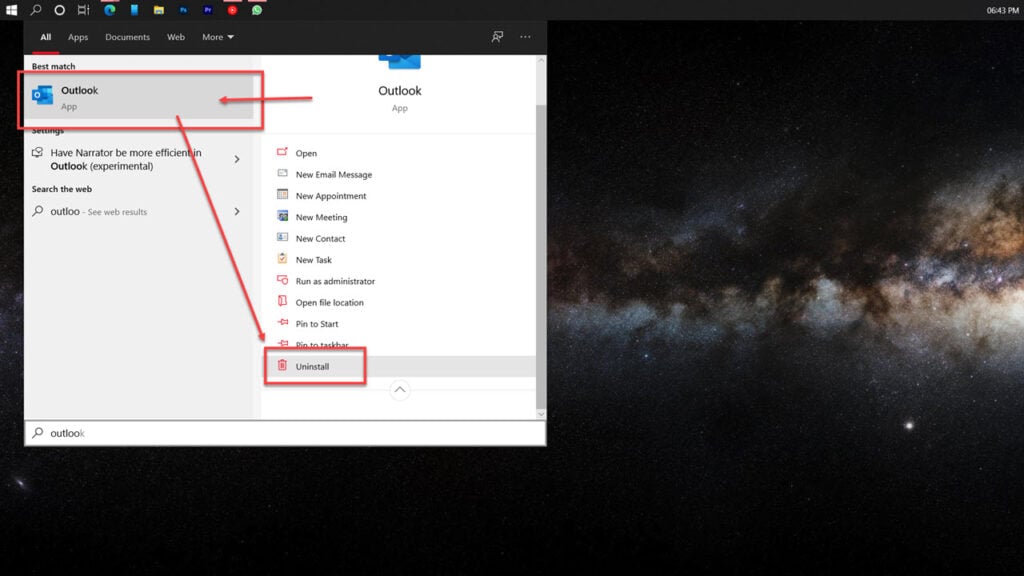
Step 1: Press the Windows key and search for Outlook. Click on Uninstall from the right side pane.
Step 2; Find your version of Outlook in the list of programs. If you’ve installed the entire Microsoft Suite at once, search for that instead, click it and click the Change button.
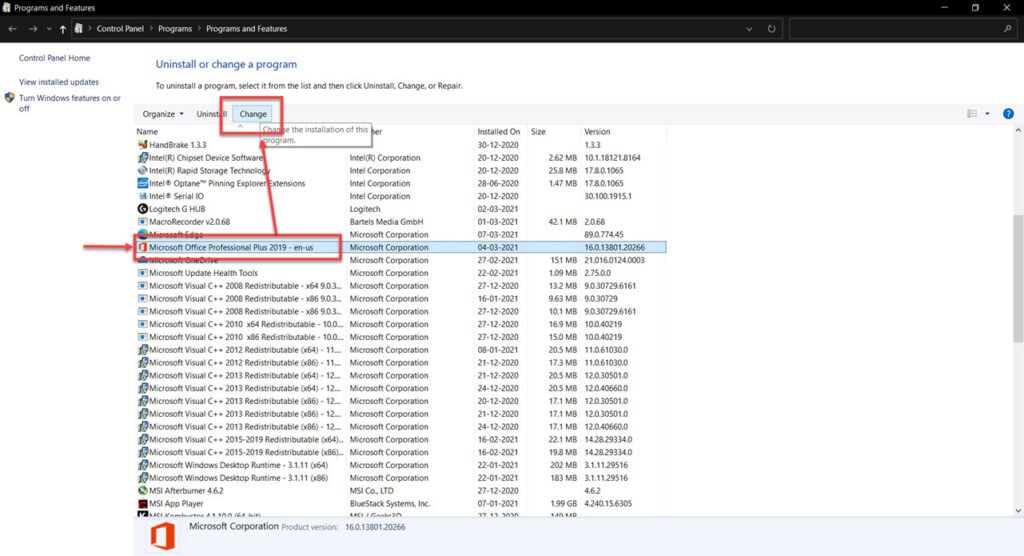
Step 3: You’ll see two options as explained below.
- Quick Repair: This will work offline and resolve the most common issues with your Outlook Installation.
- Online Repair: As the name suggests, this option uses the internet and performs a more thorough installation repair.
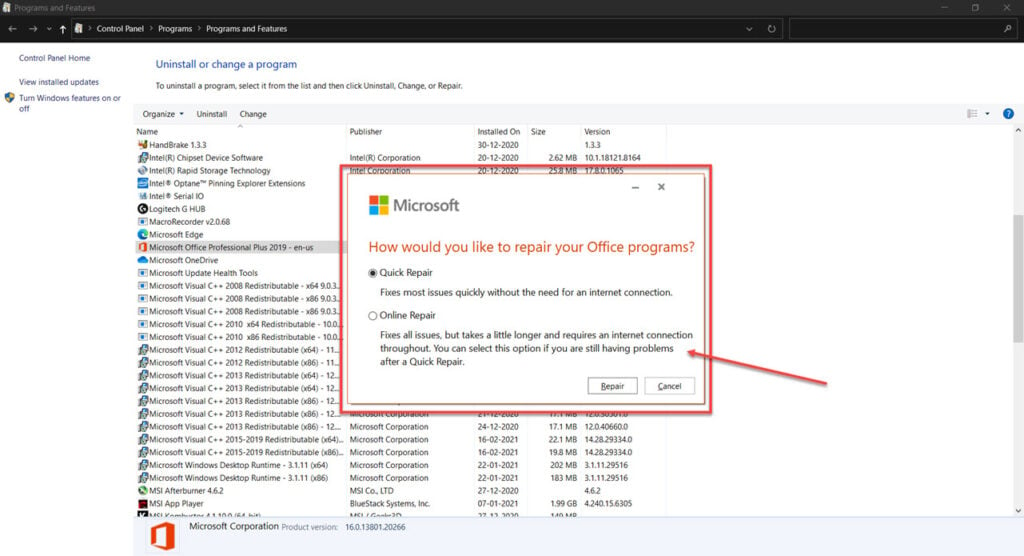
We recommend trying quick repair first and then moving on to online repair if the former doesn’t solve the error.
Also read: How to update OBS?


