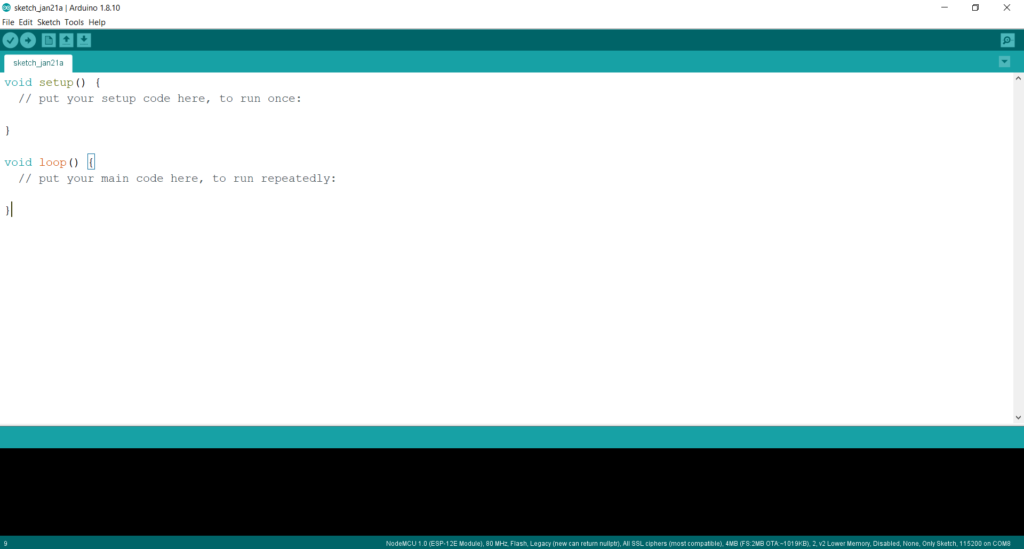
An Arduino is a hardware and software platform widely used in electronics. The Arduino software is an open-source and easy to use platform which configures the Arduino board into functioning in a certain way. An Arduino code is written in C++ but with additional functions and methods.
In this guide, we will learn how to stop an Arduino program.
Arduino setup
A new project or sketch is auto-created with the void setup() and void loop() blocks when the Arduino software is opened. All the import libraries and assignment of Arduino pins to input or output is done in the setup block. The main functioning code goes in the loop block.

The five icons on top are for:
- Verify: To compile the Arduino code.
- Upload: To upload the code into the Arduino board. It also complies the code before uploading. This requires the Arduino board to be connected to the device using the USB.
- New: To create a new Sketch.
- Open: To open a previously written program.
- Save: To save the current Sketch.
The icon on the right-hand corner is the Serial Monitor. It prints any value or statement as per the sketch and input from the Arduino board.
Also read: NodeMCU vs Arduino vs Raspberry Pi.
How to stop the sketch from execution?
After verifying and uploading the sketch to the Arduino board, the code runs continuously until the board connects. Output on the board is seen in blinking LEDs, rotating motors, and any other hardware connected to the pins. In the software, the output is seen on the Serial Monitor.
There are multiple methods to stop the sketch from execution.
Disconnect the board
The simplest method to stop the sketch from execution is disconnecting the Arduino board from the system. With the board disconnected, the sketch isn’t uploading anymore and hence isn’t executing.
Although this method works great, it may be inefficient because you may want to run the same code multiple times with a few changes.
Save the code
Even when the code is executing, you are entitled to make changes as per wish. By saving (Ctrl + S) the code again, the sketch stops uploading and executing. You can also directly verify the code again using the icons available. When a code is verified, the software automatically saves the code, stopping the execution.
Also read: Arduino UNO vs Arduino Mega.
Turn off the Arduino
This method is similar to the first method, but you don’t disconnect and reconnect the board multiple times. When the Arduino is turned off, it resets all the pins and functionality. Unless the board turns on again, the code will not execute. If not directly, another way to turn off the Arduino is by cutting off the Power Supply, which is given externally to the board. You can also reset the board using the reset button on the board or the external reset available.
Loops
A smart way to put the Arduino board to rest is by capturing the Sketch code in a forever loop. The Arduino will stop executing that sketch forever unless you exit the loop using the break statement when put in an infinite loop. There are two ways to write an infinite loop:
- while (true) or while (1)
- for ( ; ; )
With no statements within the block, both these loops are infinite loops that stop the sketch from executing.
Also read: What is the difference between a Microprocessor and a Microcontroller?
Watchdog timer
The watchdog timer is a hardware timer that initiates a system reset automatically. This is very helpful in cases where the hardware or software is crashing. Resetting the system stops the sketch from executing. Execution of the watchdog timer is relatively easy. To your Arduino code, there are just two additional statements to be added.
In void setup(), we set up the watchdog timer using wdt_enable(WDTO_1S); statement.
In void loop(), the statement wdt_reset(); is written.
Sleep mode
Depending on the Arduino board, there are three sleep functionalities available. In sleep mode, the Arduino stops executing most functions and reduces power consumption.
- For slight reduction in power, the idle sleep mode is used,
- For higher power reduction than that idle mode, we use the standby sleep mode.
- The maximum power reduction is attained in the power-down sleep mode.
The implementation of the sleep mode is rather easy. In void setup(), along with the other configurations, we add set_sleep_mode(SLEEP_MODE_{the mode}); statement. To put the Arduino in sleep mode, call the sleep_mode() function in the void loop(); section.
- The configuration syntax for the idle sleep mode is set_sleep_mode(SLEEP_MODE_IDLE)
- Similarly, for the standby sleep mode, the syntax is set_sleep_mode(SLEEP_MODE_STANDBY)
- For the power-down sleep mode, the syntax is set_sleep_mode(SLEEP_MODE_PWR_DOWN)
Also read: What are Favicons? Are they tracking you on the Internet?


