VLC Media Player is a popular and flexible tool for playing different media types. One of its impressive features is how easily it adds subtitles, but sometimes, when you want to see subtitles while watching a video, they might not appear as they should. There can be possible causes, but the issue is easy to fix.
In this article, we have discussed the cases of the VLC subtitles not showing the issue and a few ways to help you fix the issue.
Causes of the VLC subtitles not showing issue
Below we have mentioned a few possible reasons that might be causing issues with the VLC subtitles.
- The file is empty or corrupted.
- Name mismatch.
- Subtitle settings are disabled.
- Unable to load the subtitles automatically.
- Subtitles are not using UTF-8 text encoding.
Also read: How to add and sync subtitles in VLC?
How to fix the issue?
If you cannot see the subtitle while playing a video, then we have explained a few methods below to help you fix the issue.
Check whether the subtitle file is empty or corrupted
If the subtitle file is empty or broken, VLC won’t be able to use it. You can test this by opening the subtitle file with apps like Notepad. If it doesn’t look right, you can go to the website and download a new subtitle file for the video and replace it.
Make sure the subtitle file name matches the video’s name
For subtitles to work correctly, both the subtitle file and the video file should have the same name and be in the same folder. If your subtitle is saved somewhere else or has a different name, then rename it to match the video’s name and put it in the same folder.
Enable the Subtitle settings
You may be unable to see the subtitles because it has been disabled mistakenly, so check the settings and enable them if it is disabled. To enable it follow the steps below.
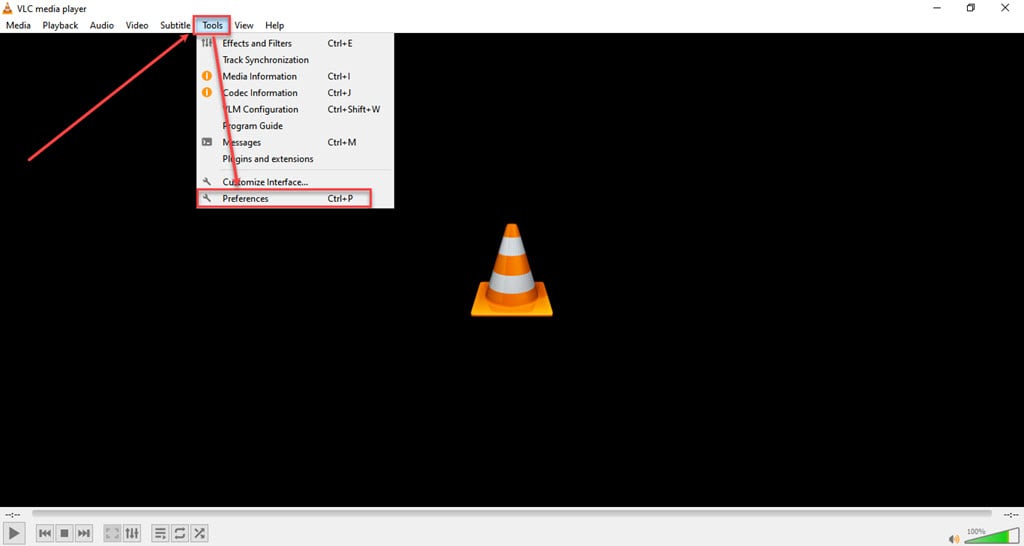
Step 1: In the VLC media player, click on the Tools tab in the toolbar and then click on the Preferences option in the dropdown menu.

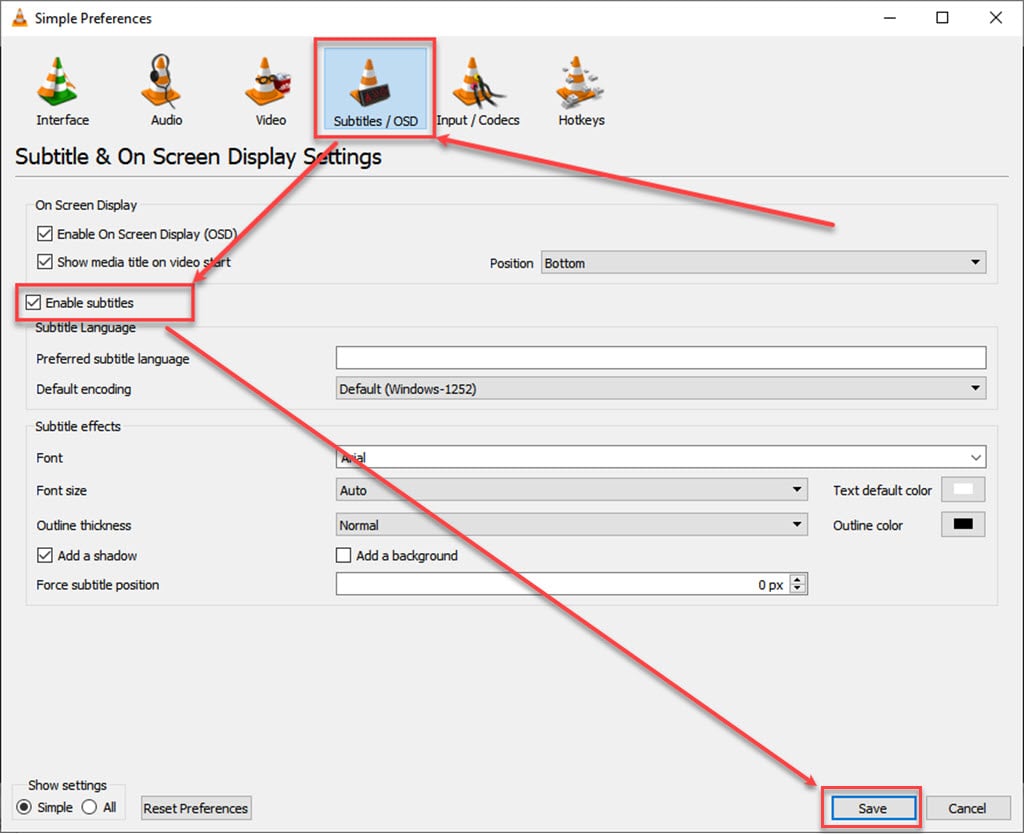
Step 2: Click on the Subtitles / OSD and then check mark the box beside the Enable subtitles and then click on the Save button.

Also read: How to crop a video in VLC?
Load the subtitles manually
Sometimes, VLC couldn’t load the subtitles automatically from the folder. When you play a video and subtitles don’t appear, you can add them manually. To do that, follow the step below.
Step: Open the VLC player, play the video, click on the Subtitle tab, and then click the Add Subtitle File option.

Step 2: In the folder choose the SRT file and click on the Open button or double-click on the SRT file.

Convert the SRT file to UTF-8 encoding
If you still face issues with VLC subtitles not showing, another helpful step is to convert the SRT subtitle file to UTF-8 encoding. Sometimes, subtitles are saved in different encoding formats that VLC might struggle to read.
Also read: How to loop a song on Spotify?
Reset the VLC media player
If none of the above methods works for you, then the last resort is to reset the preferences in the VLC media player, which will reset the VLC media player to default settings.
Step 1: In the VLC media player, click on the Tools tab in the toolbar and then click on the Preferences option in the dropdown menu.

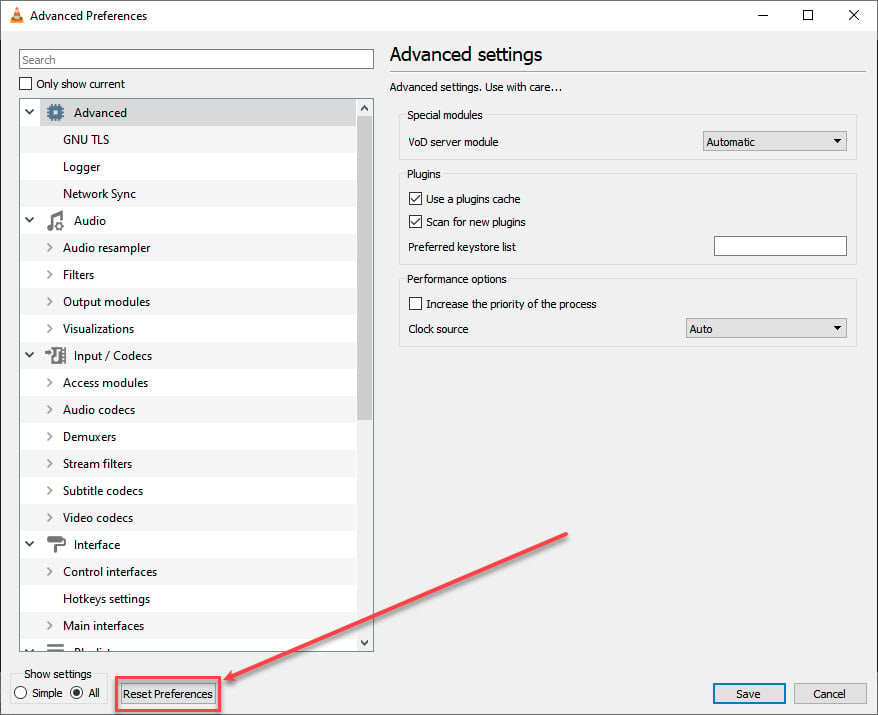
Step 2: Choose All in the Show Settings at the bottom left corner of the preferences window.

Step 3: Click on the Reset Preferences button.

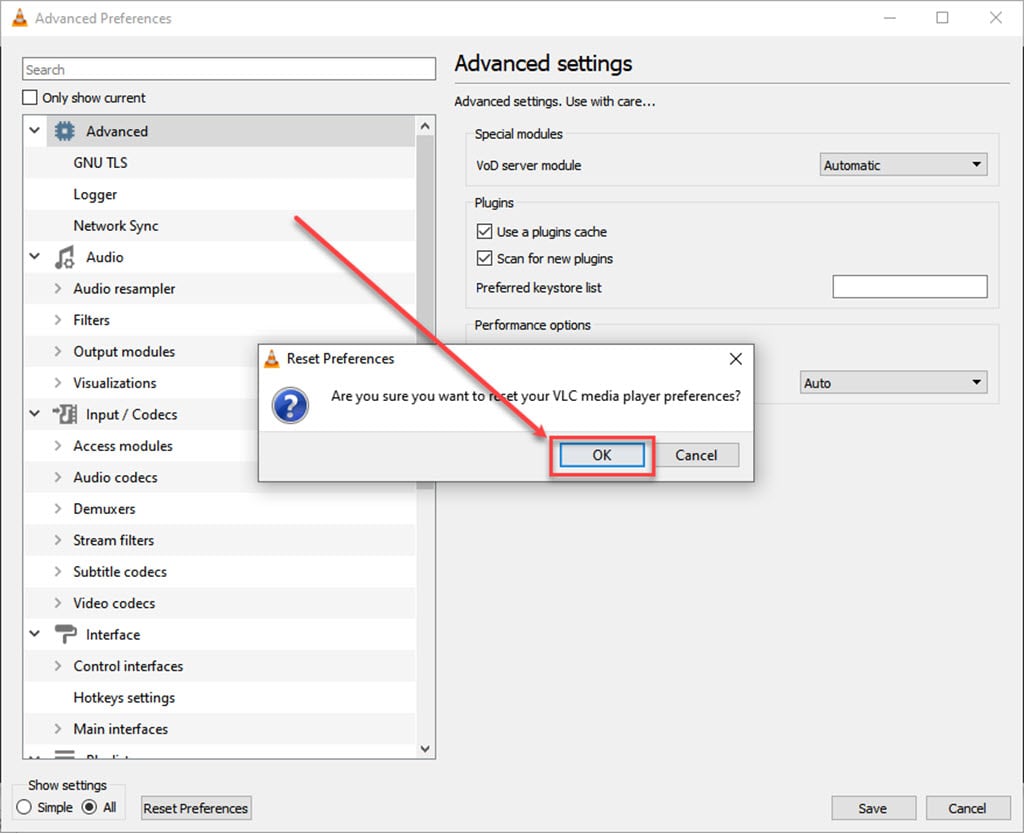
Step 4: Press the OK button to reset your VLC media player preferences.

Also read: VLC Is unable to open the MRL: 4 Fixes


