Grammarly has become a go-to choice for students as well as professionals over the past decade as the Ukrainian writing assistant that’s headquartered in San Francisco has grown to over 20 million paid users worldwide.
In addition to being used online in-browser for your emails as well as in google docs via its online plugin, Grammarly can also be added to Microsoft Word and other Office products.
If you’re an existing Grammarly user or thinking of buying the paid plan in hopes of using it while writing on Microsoft Word, here is a guide to help you add Grammarly to Word.
Also read: What are writing assistants? Why should you use them? Top 6 assistants
Download Grammarly add-in for MS Office
You’ll first need to download Grammarly for MS Office add-in from the official download page and then run the setup file to get started. This add-in is only available for Windows and won’t run on macOS, which at the time isn’t supported. You can still use Grammarly’s browser extension for Safari, Chrome and Firefox on Mac. Before you download the file, make sure your system and office software are compatible. Following is a list of compatible OS and Office with the Grammarly add-in.
- OS: Windows 7, Windows 8, Windows 8.1, Windows 10.
- MS Office: 20007, 2010, 2013, 2016, 2019. Office 365 subscription with a supported version is also compatible.
- File formats: Doc, Docx, Odt, Txt and Rtf.
Grammarly isn’t compatible with the Starter version of Office or XP and Vista. It also doesn’t support Outlook web app.
If your version of Microsoft Office isn’t supported by Grammarly, it’ll show the following warning: “We weren’t able to find a supported Microsoft Office product on your computer. The Grammarly add-in support Microsoft Office versions 2007 and newer, including Office 365. Would you like to continue the installation anyway?”.
Here you can choose to continue by pressing the Yes button to try your luck.
Also read: How to repair Microsoft Outlook PST file?
Add Grammarly to Word
Step 1: Run the setup file. Then click on Get started as soon as the window below appears.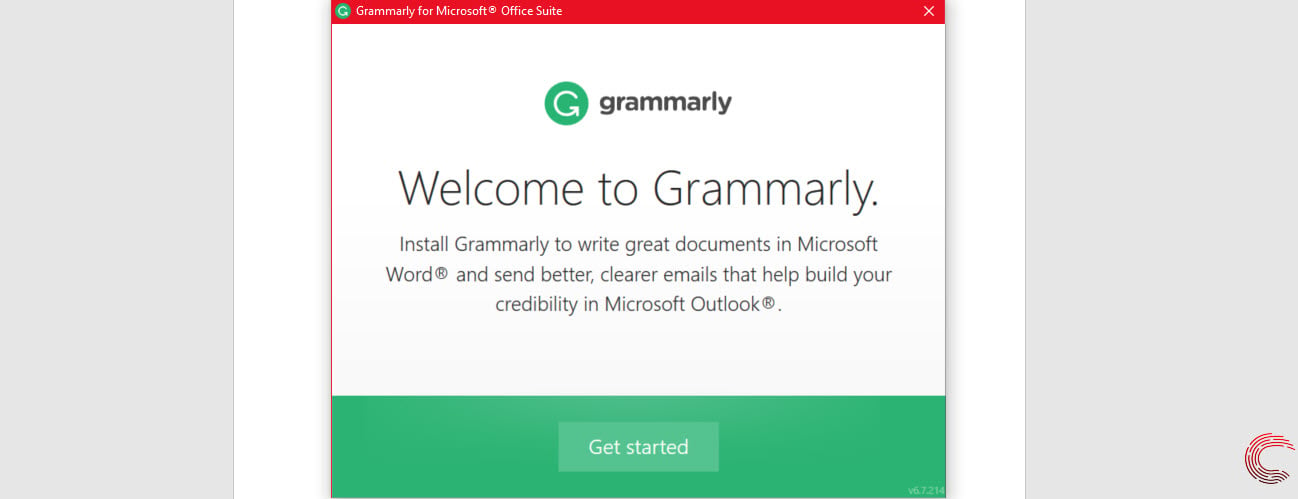
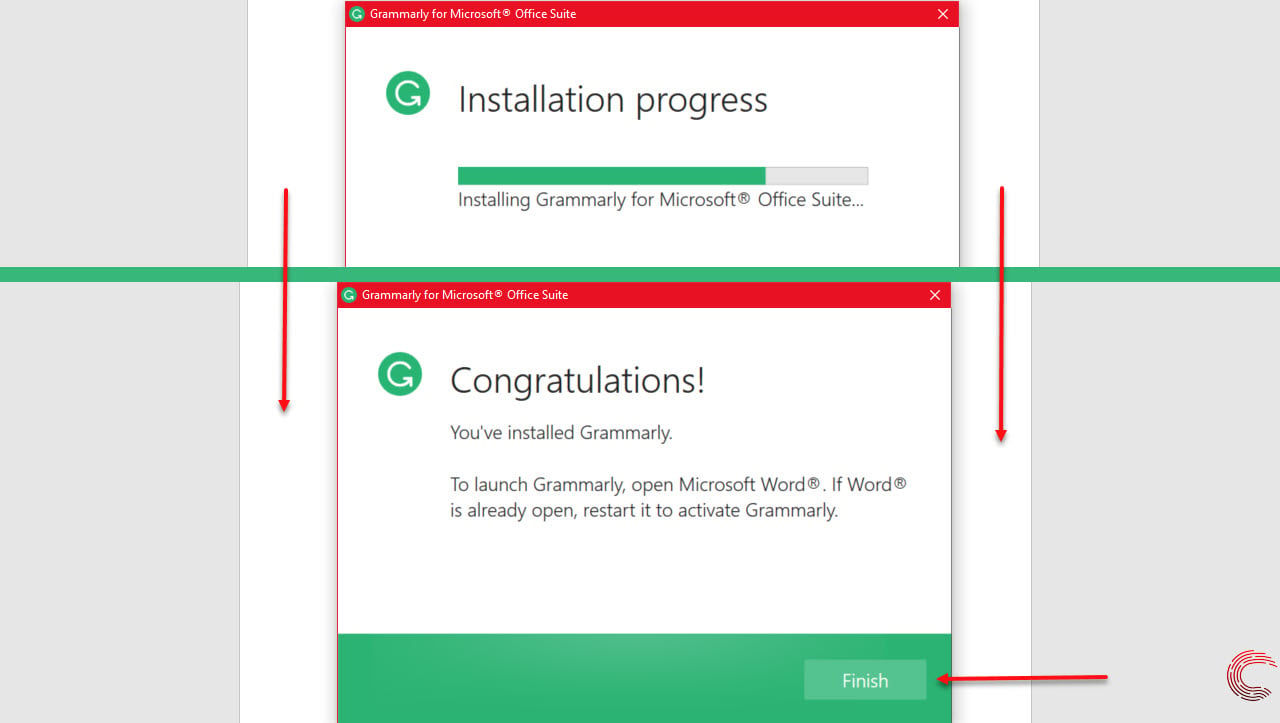
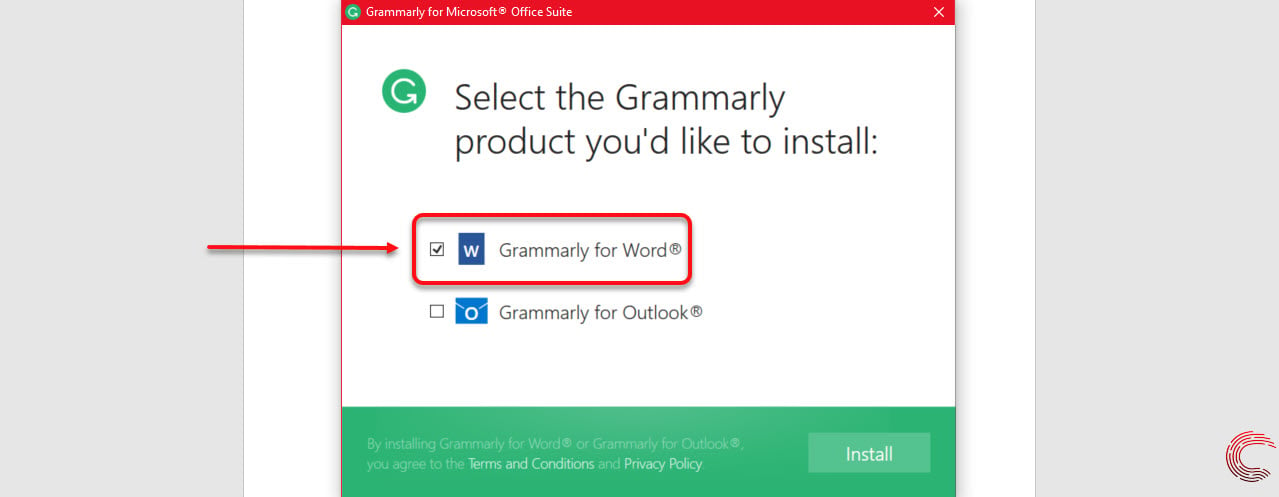 Step 3: Wait for the software to complete installing. Then click on the Finish button on the next prompt. Note that if you’ve got the Word app running, you’ll need to close it and start again for Grammarly to appear.
 Step 4: Once you restart the Word app, you’ll see Grammarly option in the toolbar at the top. Click on it, and then from the dropdown options, click on Log In. If you don’t wish to log in, skip to Step 6.
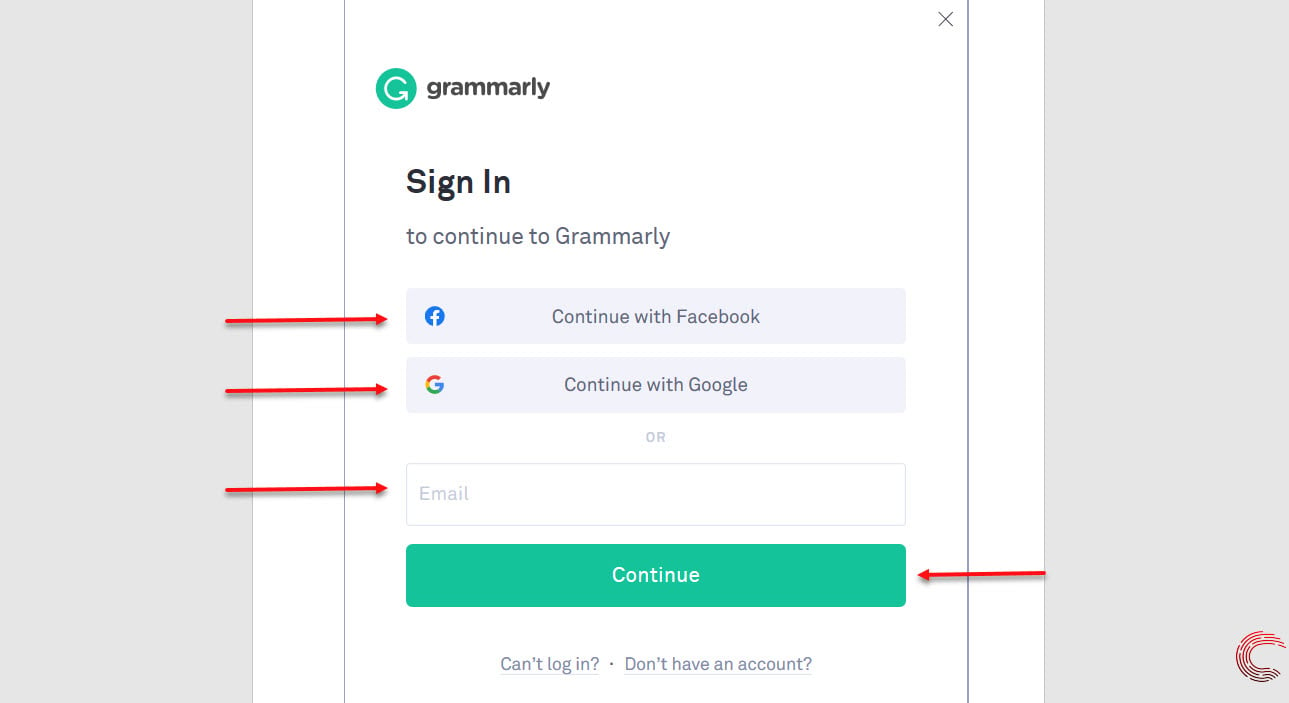
 Step 5: To login, you can use either your Facebook account, Google account, or email and password credentials.
 Step 6: Click on the Grammarly option from the toolbar at the top and then click on the Open Grammarly option.
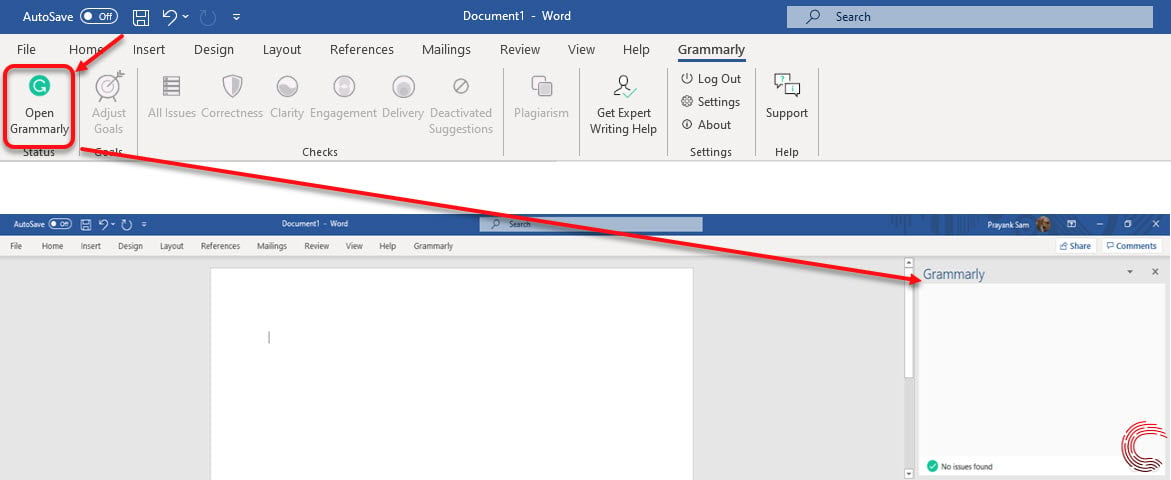 Grammarly will now be activated on Microsoft Word.
Also read: Top 5 Microsoft Visio alternatives


