Audacity is a free-to-download, open-source, cross-platform audio editing software that puts much power into just about anyone willing to fiddle with the interface a little.
Since its release over 20 years ago, Audacity has been developed and updated by volunteers who keep adding new functionality to the software and providing stability and bug-fix updates.
Almost all basic tasks are simple to achieve with only a few clicks. This article will examine how you can cut and move audio around inside Audacity.
Also read: How to record on Audacity? A brief guide
How to cut Audio in Audacity?
Step 1: Open Audacity and load the audio file you want to edit.

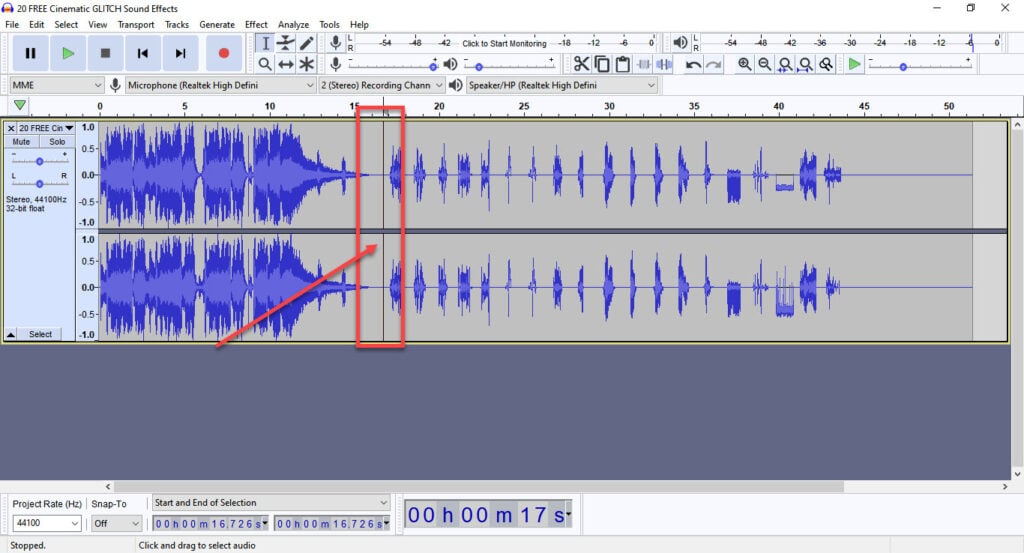
Step 2: Drag on the waveform and select the bit you want to cut.

Step 3: Once you’ve selected the part you want to cut out, head over to Edit > Cut to cut it out. Alternatively, you can use the keyboard shortcut CTRL + X for this.

You’ll see that the part you just cut has gone from the waveform timeline and is now on your clipboard. You can now move this part to anywhere else in your timeline in the same clip or paste it into an entirely different audio clip.

Also read: How to record desktop audio using Audacity?
How to move audio in Audacity?
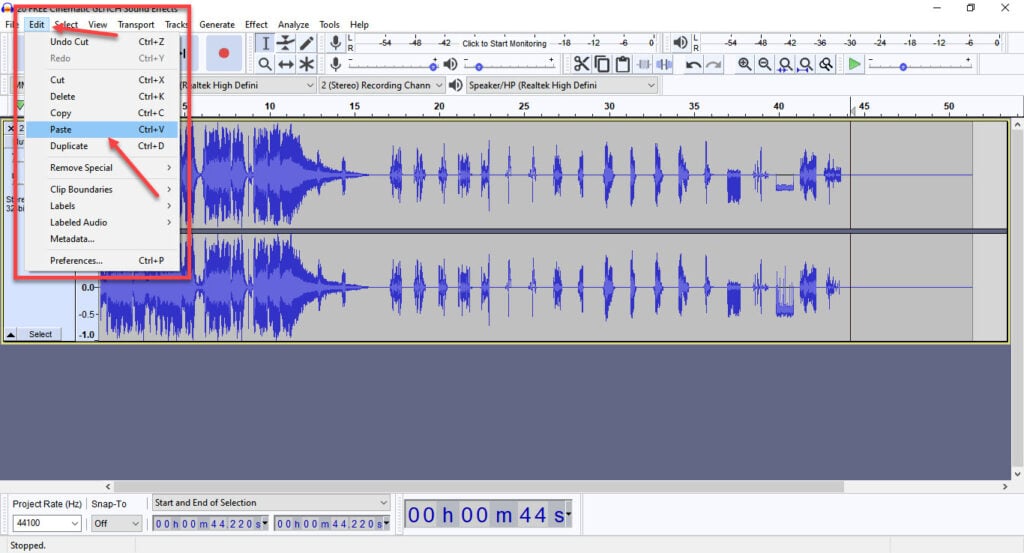
Step 1: Once you’ve cut the part you want to move, head over to the audio file where you want to move it and place your cursor at that exact point.

Step 2: Head to Edit > Paste to move the cut-out part there. Alternatively, you can also use the CTRL + X keyboard shortcut.

This is how the final file will look. Note that the part you wanted has been moved to the position of your cursor on the timeline.

Also read: How to loop on Audacity?


