As wonderful a browser Chrome is, it isn’t perfect. For starters, Chrome is notorious for eating up all possible system resources even when you have like two tabs open.
There are a bunch of reasons why this could be happening and in this article, we’re going over why Chrome might be hogging your system resources and how you can fix the issue.
Also read: How to check GPU temperature in Windows 10?
Keeping an eye on your system resources
I use a desktop customisation tool called Rainmeter to pin widgets regarding CPU and RAM usage to my desktop. You can try it out or use something like Wise System Monitor to keep an eye on your resources.
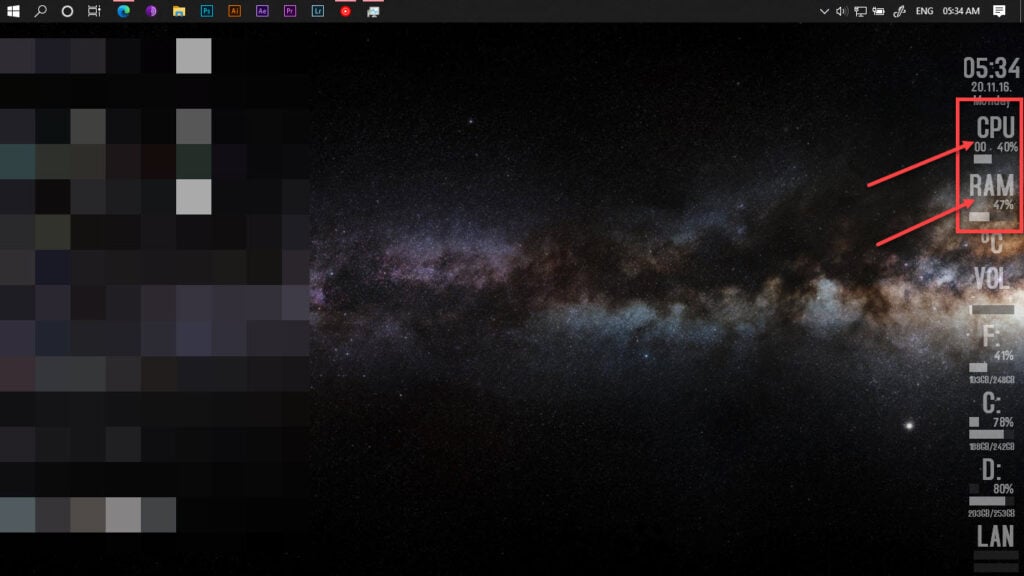
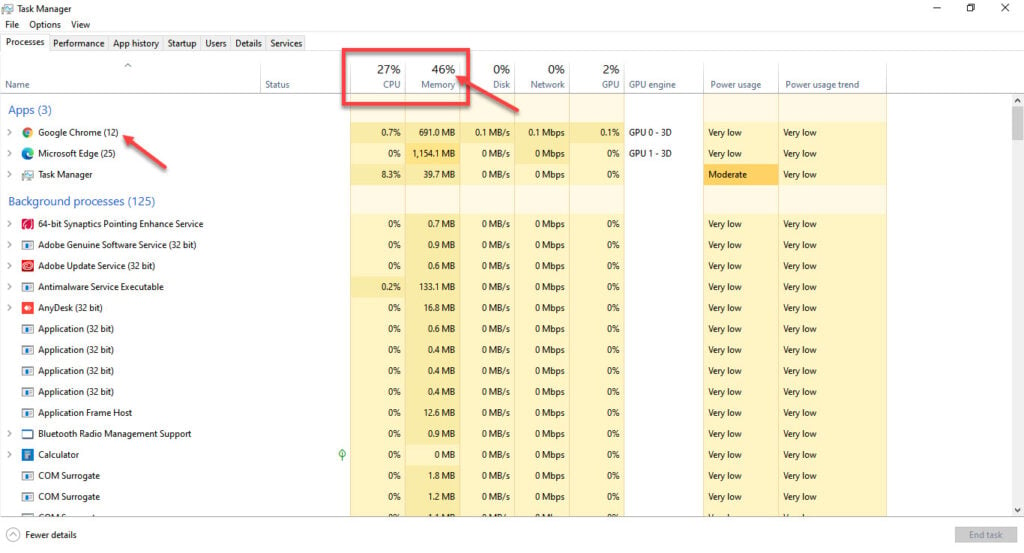
If you’d prefer an in-built utility, you can just open the good old Task Manager to do the job for you. It’ll also tell us the culprit which’ll most likely be Chrome.
Also read: How to enable virtualisation in Windows 10 bios?
Why could this be happening?
Now when you’re running a bunch of tabs on Chrome, it’s understandable. Chrome does have a tendency to eat up your RAM and CPU. However, there are a few other reasons why it could be happening
- Using CPU intensive apps or extensions.
- Your system is infected by a malware that’s impacting Chrome in some manner.
- As mentioned above, you’re running way too many tabs or windows.
Also read: How to disable anti-virus in Windows 10?
How to fix this issue?
Now there are a number of steps that you can take to fix this thing, here’s how
Checking Chrome’s in-built task manager
Taking a look at Chrome’s in-built task manager will quickly help you narrow down your problem.
Step 1: To launch the task manager inside of Chrome, either right-click on the title bar or press Shift + Esc on your keyboard.

Step 2: Here you’ll be able to see all the processes running inside of Chrome. Select one that you don’t need and click the End process button in the bottom right.

Also read: How to change the taskbar colour in Windows 10?
Disabling Extensions
Step 1: Type in chrome://extensions/ in your address bar. This will take you to the Extensions page in Chrome.

Step 2: Try disabling any CPU intensive extensions that you might be running. Once you narrow down the faulty extension(s), avoid running it or look for alternatives.

Alternatively, you can disable all apps and extensions that you’ve installed to check if a combination of them is causing any problems.
Also read: How to check VRAM in Windows 10?
Reducing Chrome’s background CPU usage
Even when Chrome’s not running, it can still eat up your CPU and RAM by running unnecessary background processes. Here’s how you can disable them
Step 1: Open Chome’s advanced settings by typing chrome://settings/system in the address bar and hit Enter.
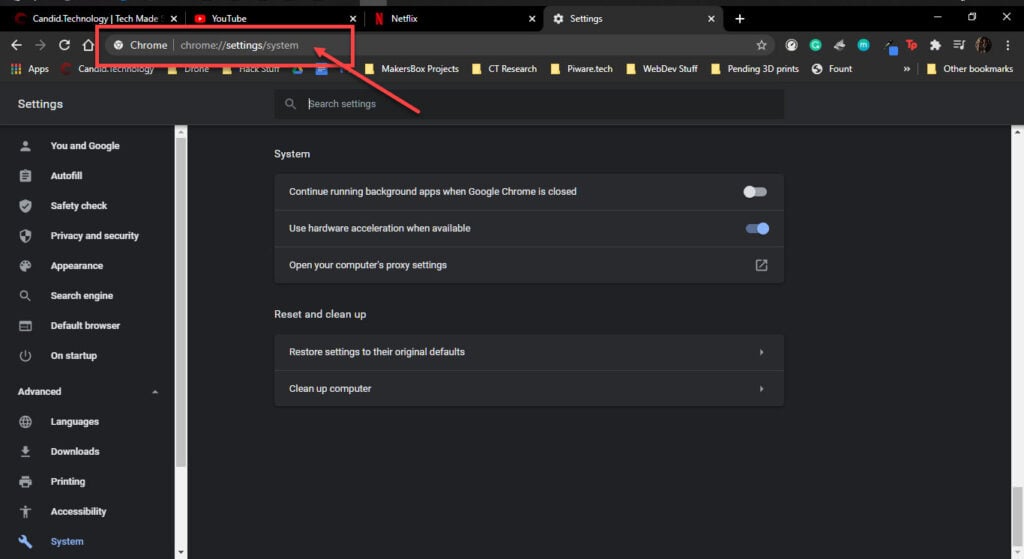
Step 2: Disable the Continue running background apps when Google Chrome is closed setting.

Also read: How to remove the Pin from Windows 10?
Clearing out the cache
This is also a very popular method that can do a lot more than just freeing up resources from your browser.
Step 1: Type in chrome://settings/clearBrowserData into the address bar and press enter.

Step 2: Under the Advanced tab, check all the boxes and click on the Clear data button. This will clear out all the data that Chrome is working on and should clear up any annoyances.

Also read: How to check RAM frequency in Windows 10 and macOS?
Resetting Chrome to factory defaults
Step 1: Type in chrome://settings/reset in the address bar and press enter.

Step 2: Click on the Restore settings to their original defaults setting.
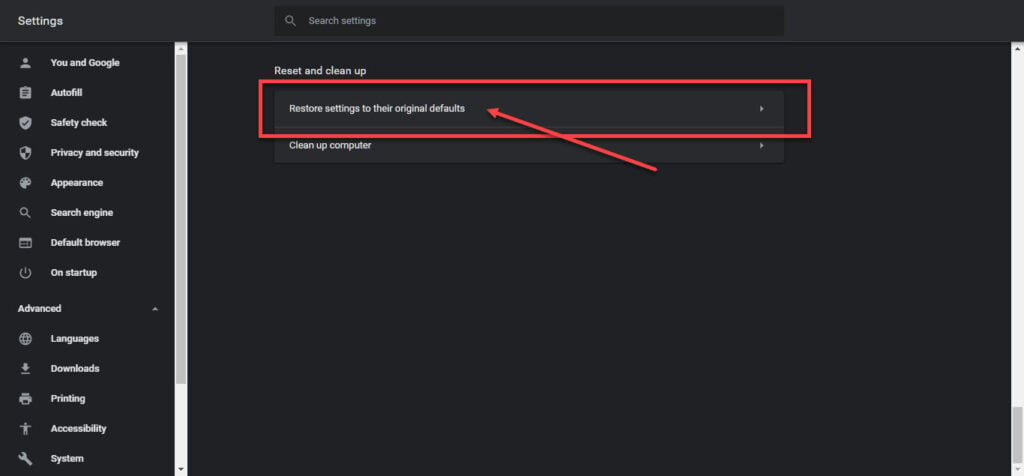
Step 3: Chrome will give you a warning regarding restoring the browser. Click on Reset setting and you’re good to go. You can also choose to report your current settings to Google to help make Chrome better.
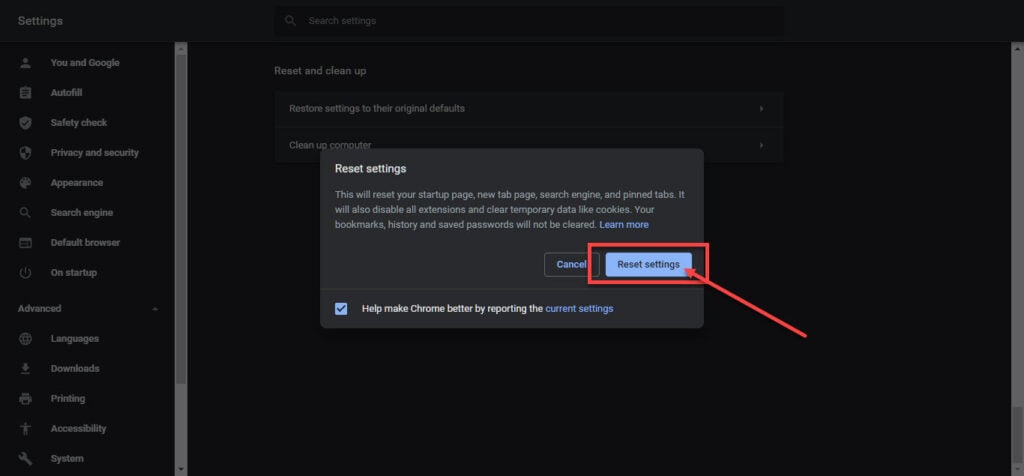
If this doesn’t work either, your last resort is to reinstall Chrome and start from scratch.
Also read: How to unhide a folder in Windows 10?
Limiting system resources that Chrome can use
Now, this method will effectively revoke Chrome’s access to the system resources you have and will only let it access what you let it.
This can be helpful if Chrome is interfering with any other apps on your machine but keep in mind it can severely impact Chrome’s performance.
You can basically do two things here
- Lower them affinity of Chrome’s process so that the processor doesn’t give it as many cores as before.
- Lower the process affinity.
Step 1: Right-click on the taskbar and click on Task Manager

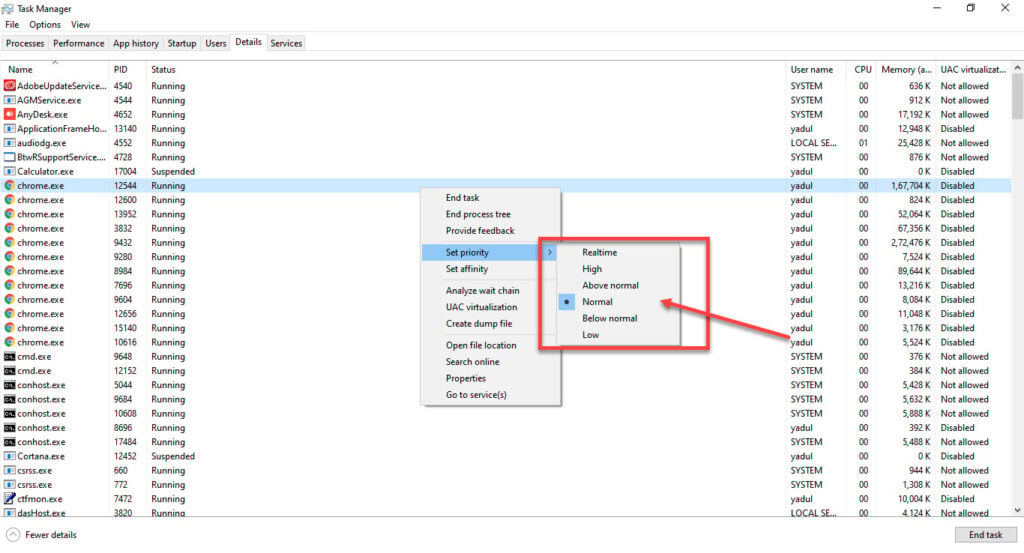
Step 2: Head over to the Details tab and find the Chrome process you need to tone down.
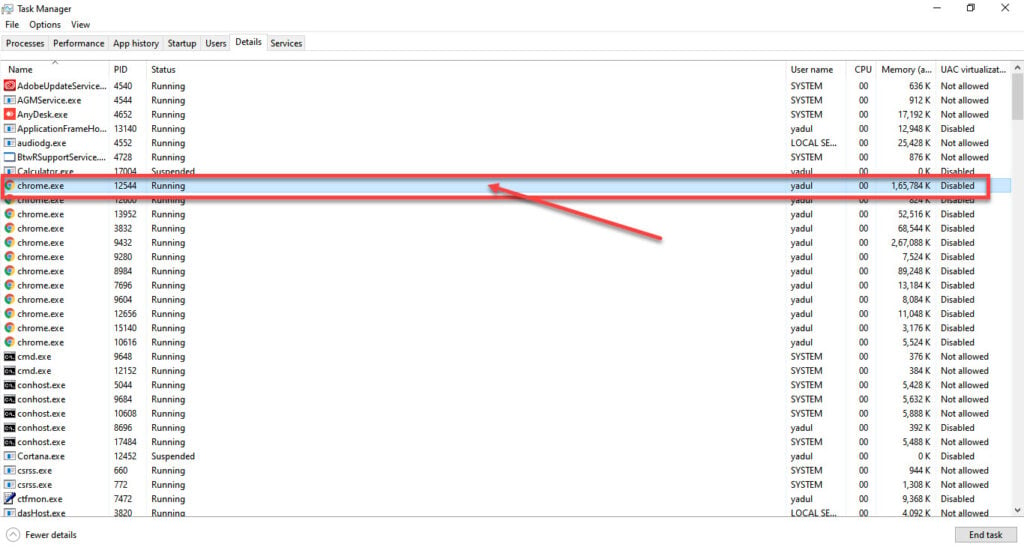
Step 3: Right-click on the process and click on Set affinity.
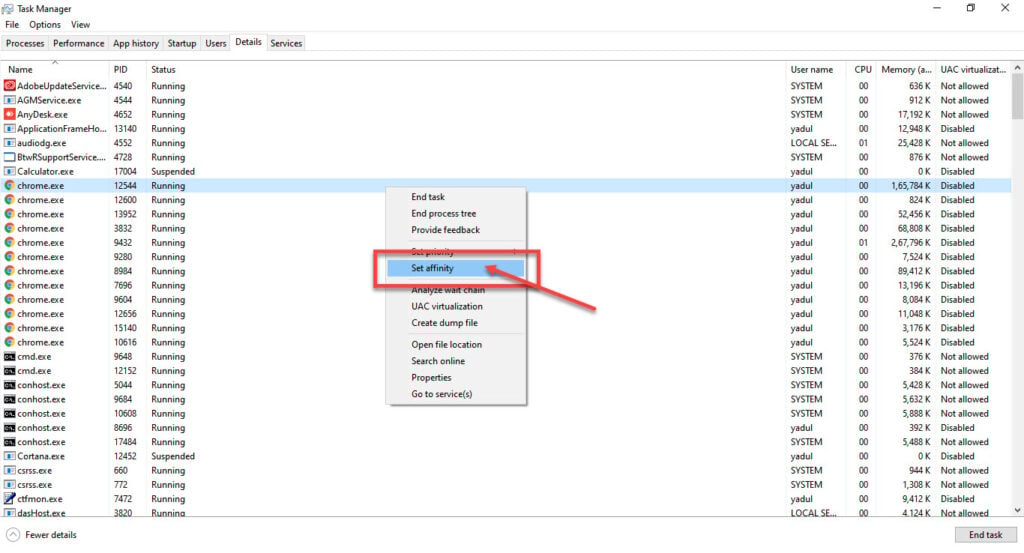
Step 4: Here you can select what cores and how many cores can run that particular process.
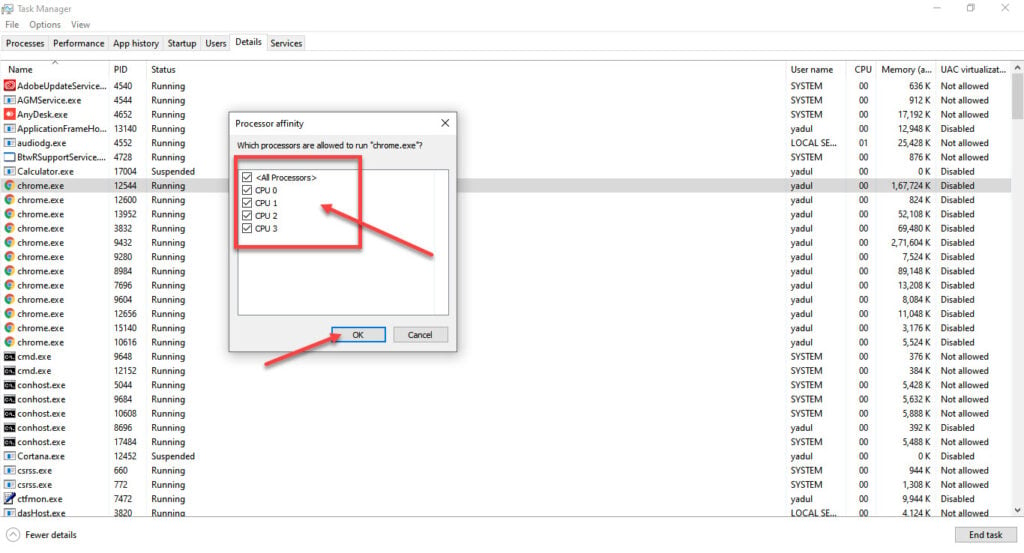
Step 5: Alternatively, you can also lower the process priority to save on system resources.
Also read: Can’t type in Windows 10 Search Bar fix


