Premiere Pro is one of the world’s most popular video editing programs and is part of Adobe’s creative suite of programs. However, with such a capable and powerful tool, sometimes even the most basic tasks can be complicated.
One of the most basic actions you should know how to do is exporting videos in Premiere Pro. In this article, we’re going over the basic settings you need to master when rendering finished videos in the program.
Also read: How to add transitions in Premiere Pro?
Exporting Premiere Pro videos
Exporting videos from Premiere Pro is a matter of a few clicks. Here’s what you need to do.
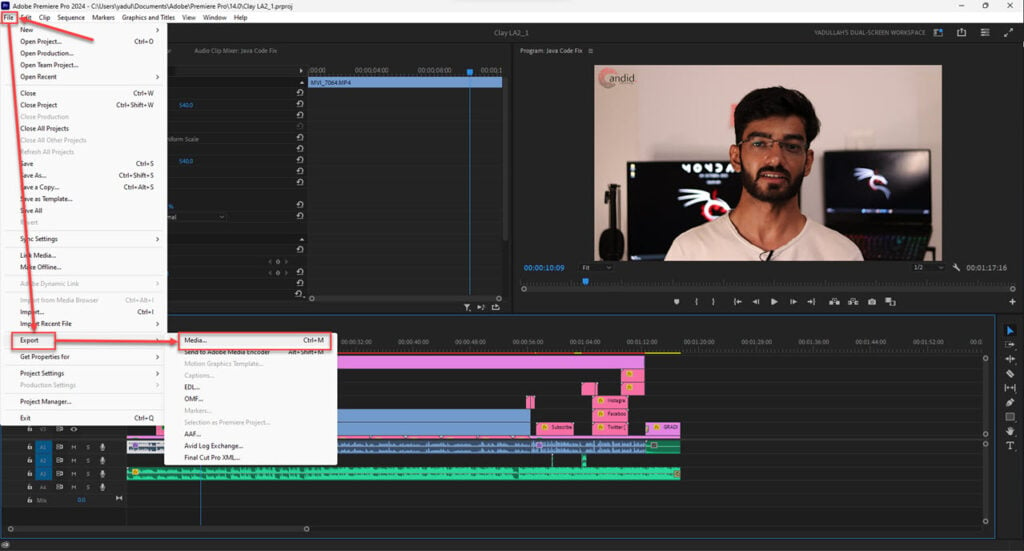
Step 1: Once you’re done editing, click on the timeline and ensure the sequence you want to render is open.

Step 2: Go to File, then Export and finally Media. Alternatively, you can also use the keyboard shortcut: Ctrl + M.

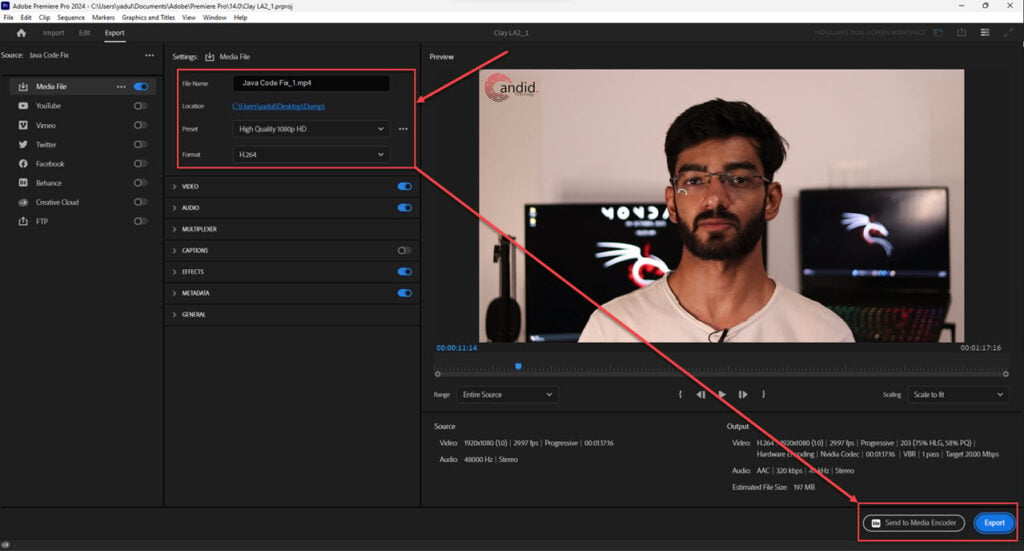
Step 3: You’ll see all sorts of options and settings here to determine your videos’ audio and video quality. Once everything is in place, click the Export button to render the video. In most cases, the default settings will produce the exported video in the same quality as the source footage.

Premiere Pro gives users a bunch of export options for their videos. In case you don’t want to dabble in the manual controls given in the program, you can choose the output type from the Preset dropdown and be good to go. Common rendering options such as YouTube 720p, 1080p and even 4K are available here.
Last but not least, you can also send the video to the Adobe Media Encoder here to be queued up and rendered later if you’re rendering multiple videos simultaneously.
Also read: How to remove the background in Photoshop?


