Macros can significantly improve efficiency, enhance gaming performance, and simplify repetitive tasks. These are automatic sequences that you can record and play to perform those tasks flawlessly.
If you own Logitech peripherals, chances are that you use macros in Logitech G Hub to customise and optimise your setup.
Here’s a YouTube video explaining how you can set up macros in G Hub:
In this article, we’ll walk you through creating and assigning macros in Logitech G Hub step by step.
Here we've covered:
Getting started with Logitech G Hub
Before you can start recording macros, ensure that Logitech G Hub is installed and running on your system. Here’s how:
Step 1: Launch Logitech G Hub by clicking its icon in the taskbar or searching for it in the start menu.

Step 2: Once the software is open, it will display all connected Logitech devices. Click on the peripheral you want to assign macros to. Navigate to the Assignments tab, then select Macros from the available options.
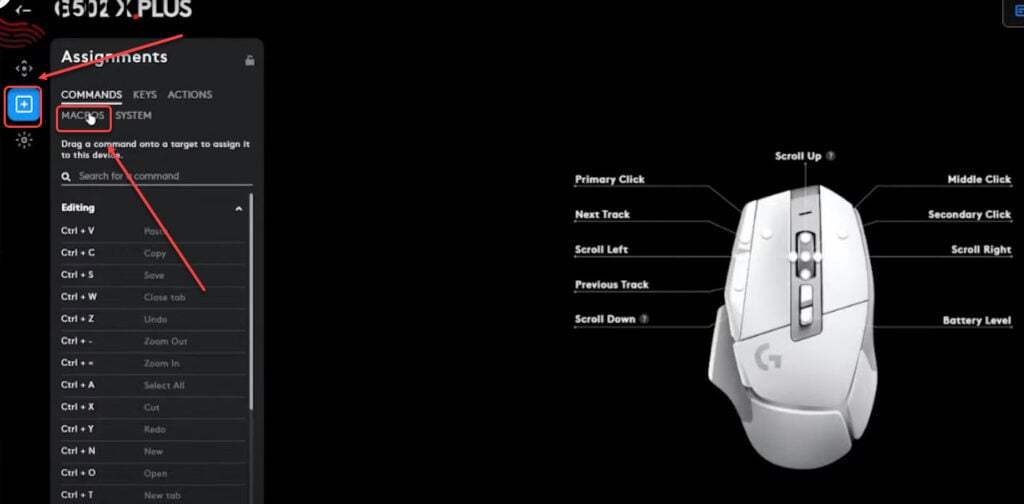
Also read: How to 1v1 in CS2 (Counter-Strike 2)?
Create a new macro
Once you’re in the Macros section, follow these steps to create a new macro:
Step 1: Click Create New Macro and a new window will appear, prompting you to name your macro. Enter a relevant name (e.g., Test Macro) and hit Enter.

Step 2: Choose one of the four macro types:
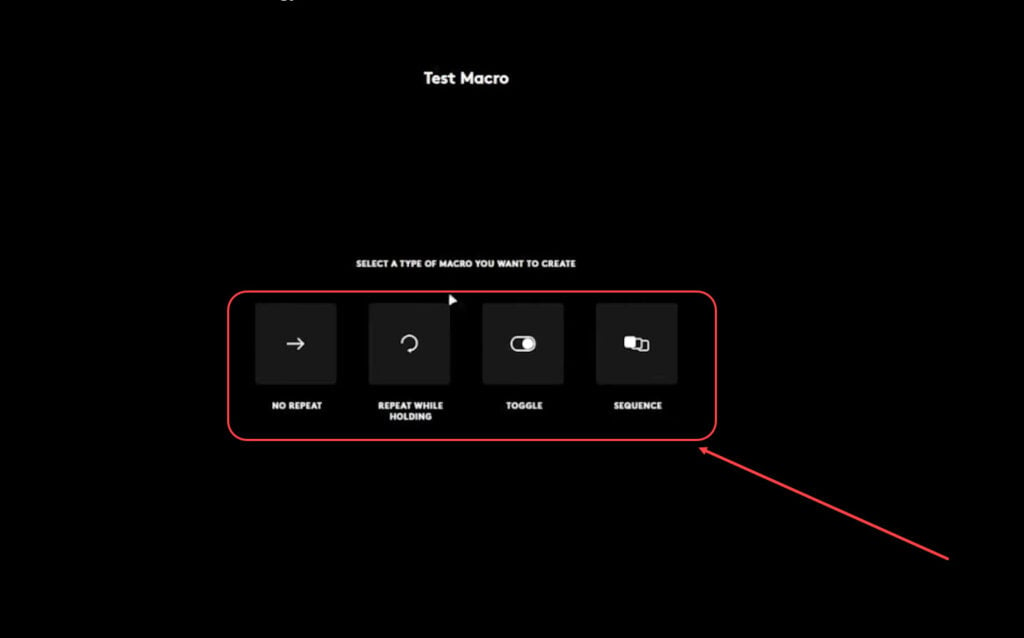
- No Repeat: The macro executes once when triggered.
- Repeat While Holding: The macro runs continuously as long as the button is pressed.
- Toggle: The macro loops until toggled off manually.
- Sequence: Executes once on press but can be held down for repetition.
Also read: How to reset Logitech G HUB mouse settings? 2 Quick Methods
Recording and customising your macro
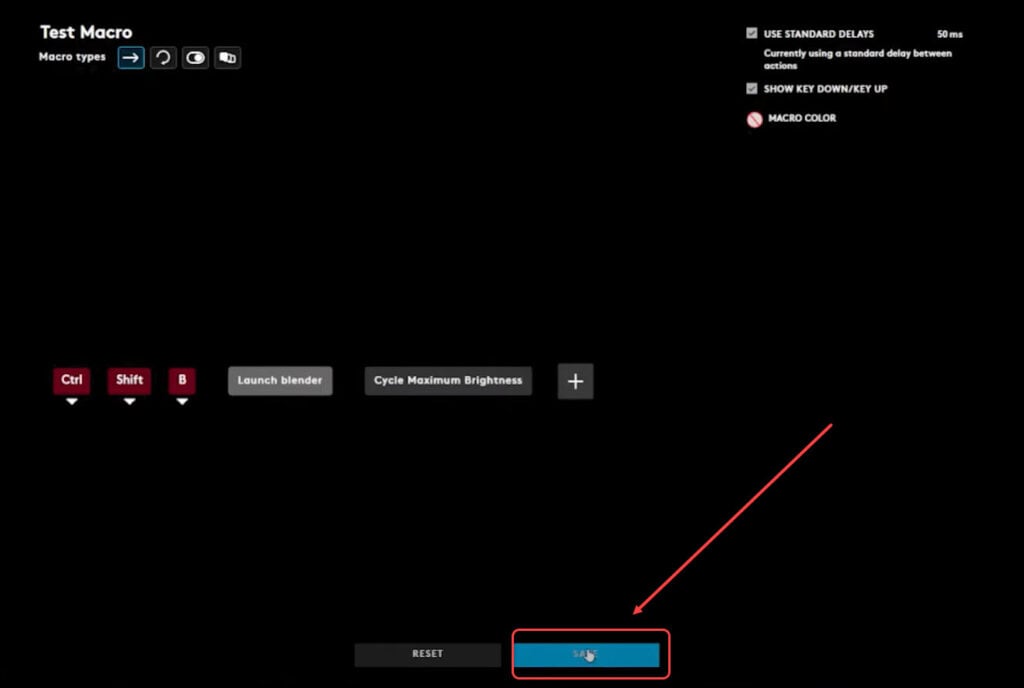
Now that you’ve created a macro, it’s time to add actions:
Step 1: Click Start Now to begin recording.
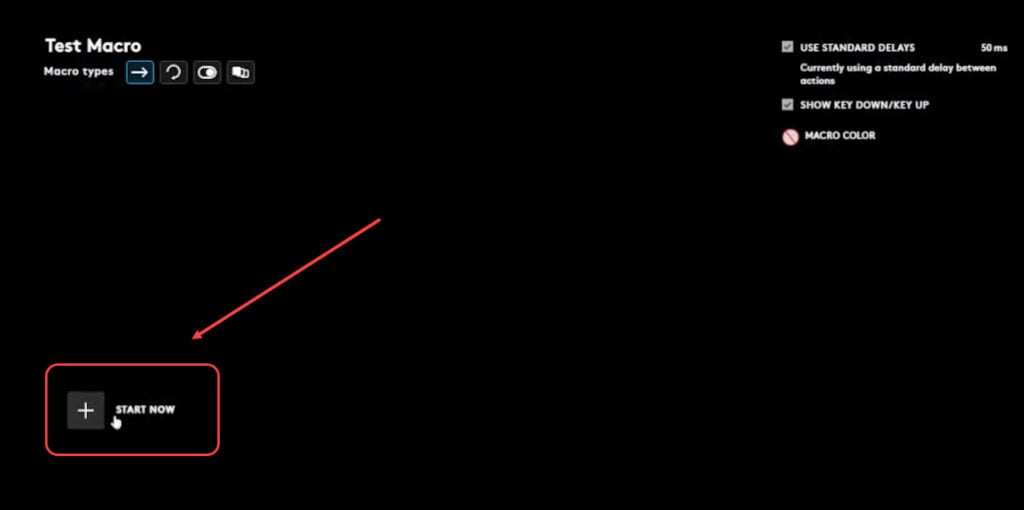
Step 2: Choose from various input types:
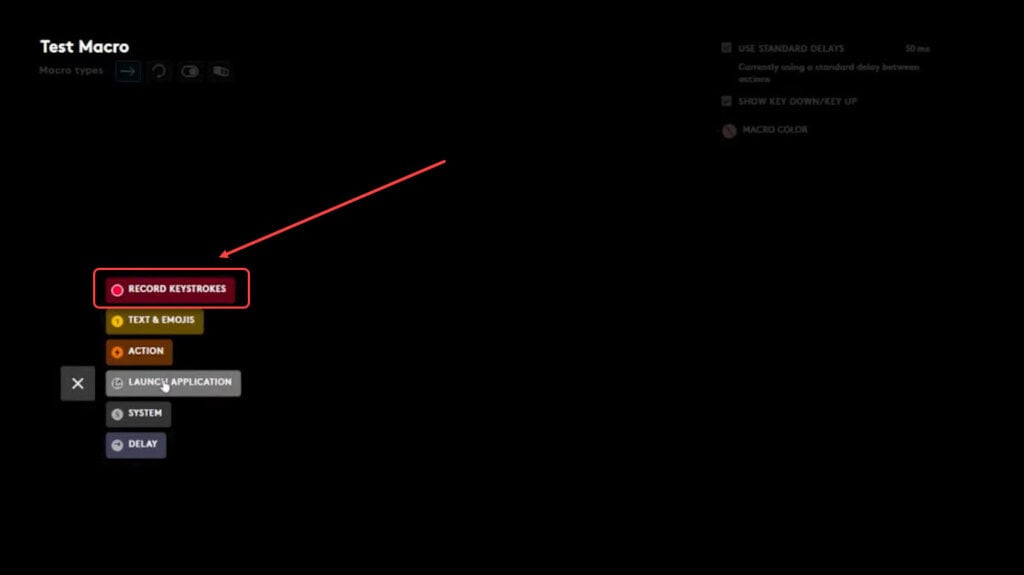
- Record Keystrokes: Record keyboard shortcuts.
- Text/Emojis: Insert preset text or emojis.
- Actions: Automate tasks such as opening an application.
- System: Adjust system settings like volume of brightness.
- Delays: Introduce pauses between actions.
To enhance the macro, you can also assign it additional actions such as ‘opening an application (e.g., Blender)’ or ‘adjusting system brightness.’ Once satisfied, click Save to finalise the macro.
Also read: Fix: MSI Center User Scenario not working
Assigning the macro to a button
With the macro ready, assigning it to a button is easy. Just drag and drop the macro onto a customisable button on your Logitech device. Alternatively, use G-Shift mode to assign macros to unassigned buttons for extended functionality.
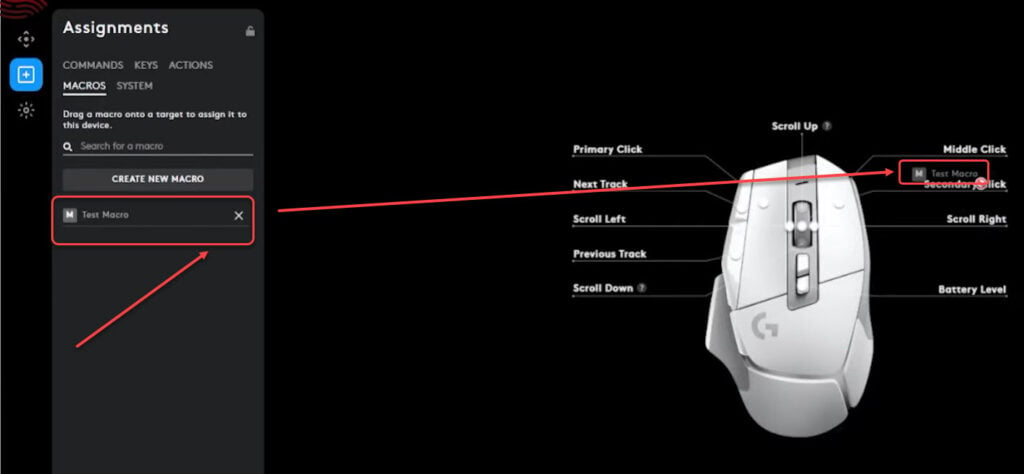
Once assigned, test the macro to ensure it functions as expected.
Logitech G Hub’s macro functionality provides endless possibilities for gamers, content creators, and power users. Whether you’re looking to execute complex in-game actions, automate workflows, or streamline repetitive tasks, macros can help you work smarter and play better.
Also read: How to fix the “Origin not installed” error in FIFA? 6 Quick Solutions


