Whether you’re into streaming or using it, you’ve heard the name OBS. OBS is the go-to software for everyone looking to stream whatever they want from their computers to wherever they want.
Owing to its huge popularity, the development team behind the software works tirelessly to bring new updates, more performance and bug fixes to users.
For some reason, though, people look at these updates and nuisances as by the time an update arrives, a user is generally pretty well-dialled in terms of settings, overlays and scenes and how they use the software. So if installing an update is too much of a hassle, they tend to ignore them.
We’re guilty of it too, and when you’re just looking to stream casually, it becomes all the easier to click on that skip button on update notifications.
However, some updates bring essential security patches and keeping that in mind, we’re going to correct our mistakes today and look at how to update OBS.
Also read: How to add Twitch chat to OBS?
Updating OBS
OBS has come a long way since its humble beginnings. It’s easy to use and update.
The software automatically checks and asks you to install an update, if available, every time you launch. In case that doesn’t happen, here’s how you can do it on your own
Launch OBS. and follow the steps mentioned below.
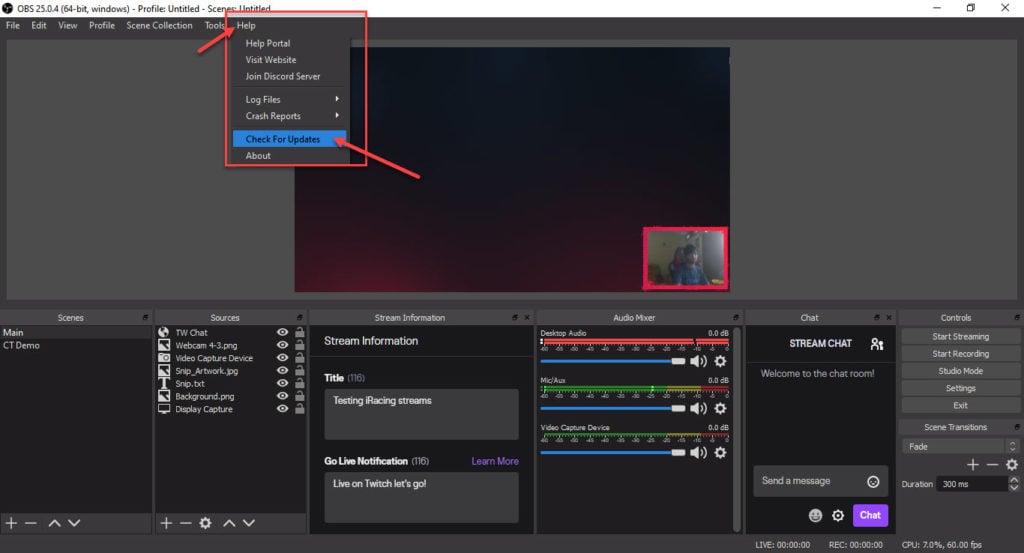
Step 1: Click on the Help menu in the menu bar. In the menu that opens, click on Check for Updates.

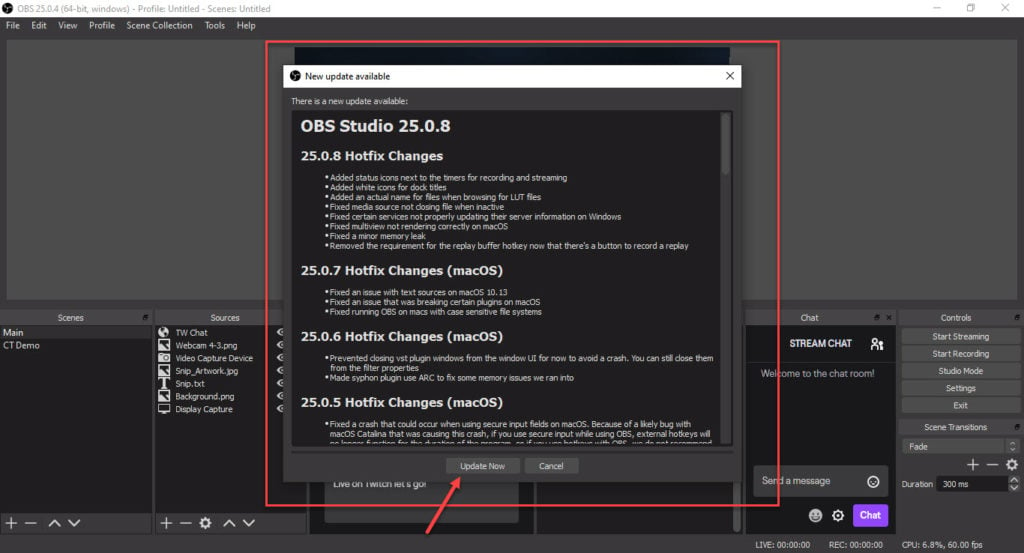
Step 2: OBS will check for an update; if one’s available, show you a prompt with the update information and an Update Now button.

Step 3: The OBS Updater will start and automatically download and install the update. When done, click the Launch OBS button to return to the app.

And you’ll find your good old OBS exactly how you left it, albeit with more features, performance fixes and everything else that’s been done under the hood.
Also read: How to record with OBS? Where are OBS recordings saved?


