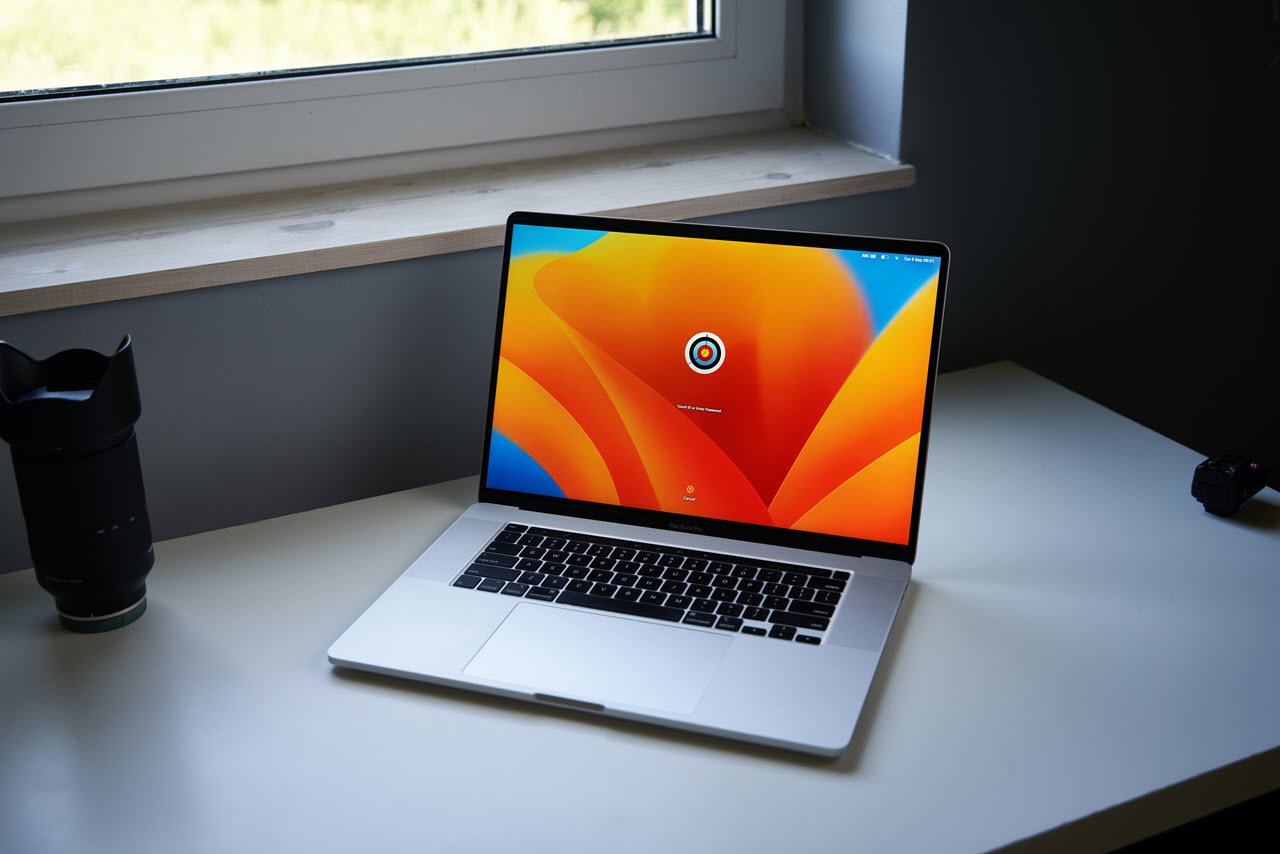
The USB-C port provides a versatile way to connect various devices to your Mac, from external hard drives to monitors and everything in between. However, there can be instances where you encounter issues with your Mac’s USB-C port not working as expected
This article discusses various causes of the Mac USB-C port not working and a few ways to help you fix it.
Why is your Mac’s USB C port not working?
Various reasons might be causing issues with your Mac’s USB-C port, and they are mentioned below:
- Accumulated dust and debris in the port.
- Faulty cable.
- Temporary system glitch.
Also read: Fix: Spacebar preview not working on Mac
How to fix the issue?
Here are a few ways that will help you fix the issues with your Mac USB-C port:
Check for dust and debris
Sometimes, the simplest solutions are the most effective. A clogged USB-C port might not make a proper connection. Carefully inspect the port for any visible debris or dust. If you spot any, gently clean it out using a can of compressed air or a soft brush. Make sure your Mac is powered off before attempting this.
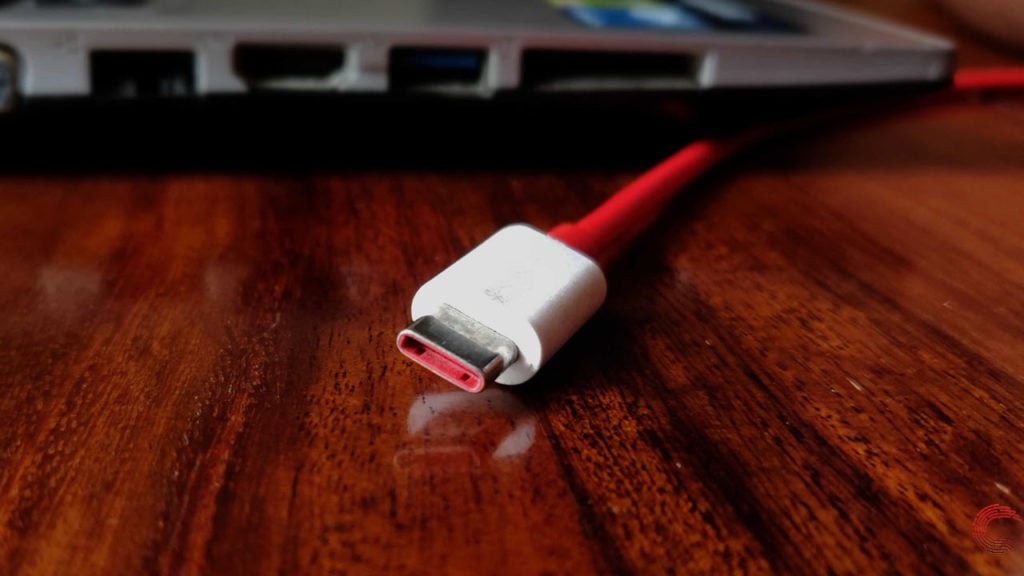
Try another cable
Sometimes, the issue may not be with the port itself but with the USB-C cable you use. Cables can wear out over time, leading to connectivity problems. Test your USB-C port with a different cable to see if it resolves the issue. If it does, you’ll know the cable was the problem.
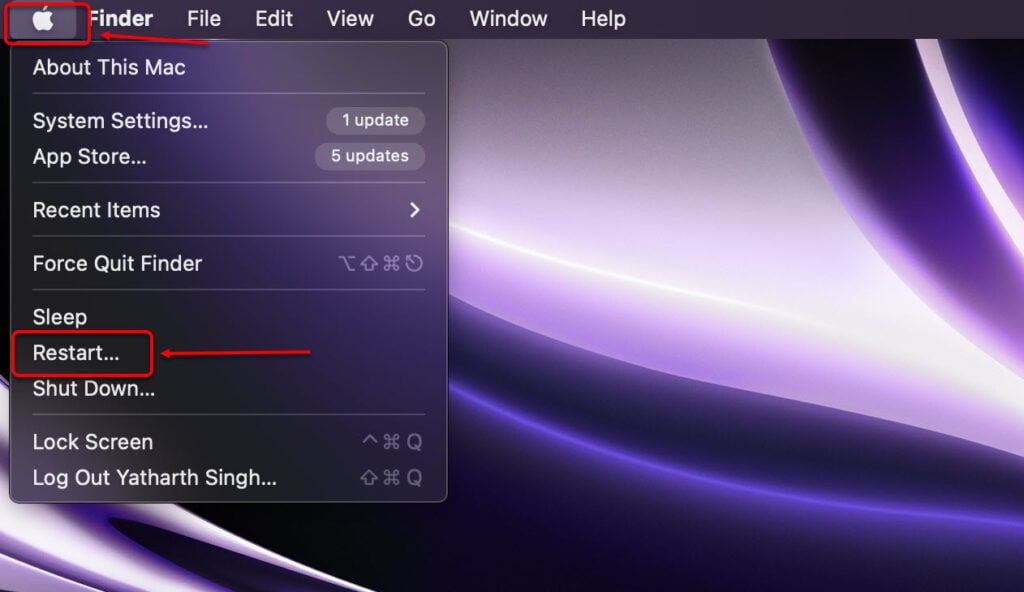
Restart your Mac
Occasionally, software glitches can cause USB-C port issues. A simple restart of your Mac may clear any temporary glitches or conflicts. After the reboot, check if the USB-C port is working correctly.
Run Apple Diagnostics
Another solution is to use Apple Diagnostics, which is a built-in tool designed to scan your computer for potential hardware issues thoroughly. The process varies depending on whether you have an Apple silicon or Intel-based Mac. Here are the steps to follow:
On Mac with Apple silicon
Step 1: Start your Mac.
Step 2: As your Mac powers up, continue holding down the Power button.
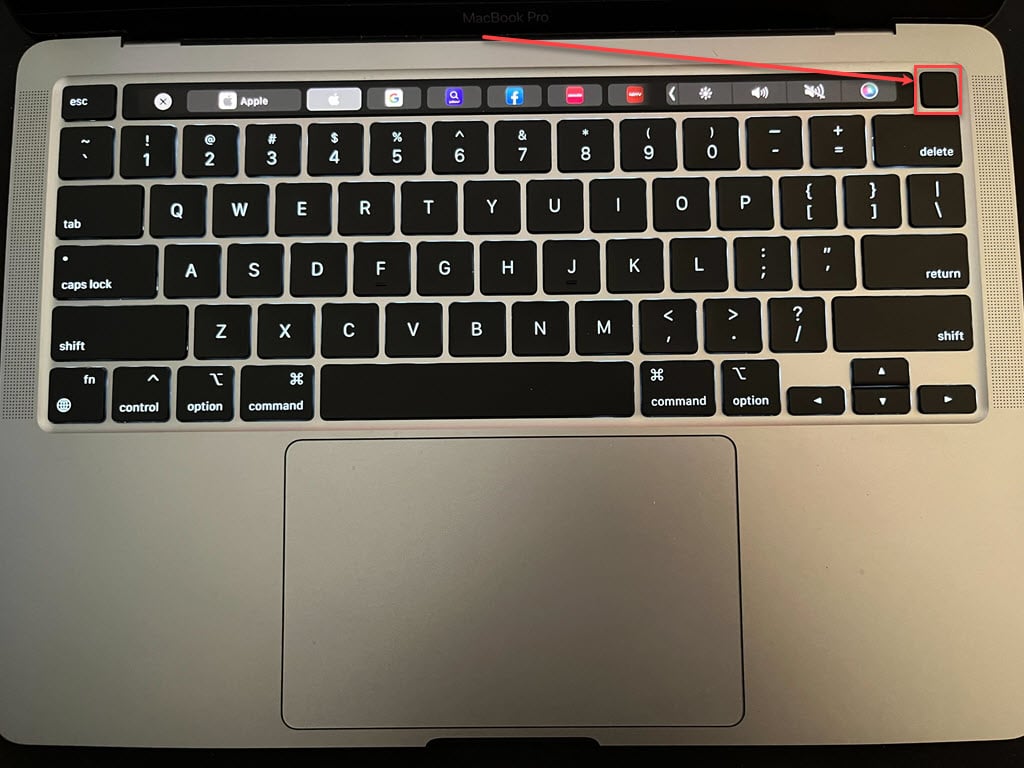
Step 3: Release the Power button when you see the startup options window.
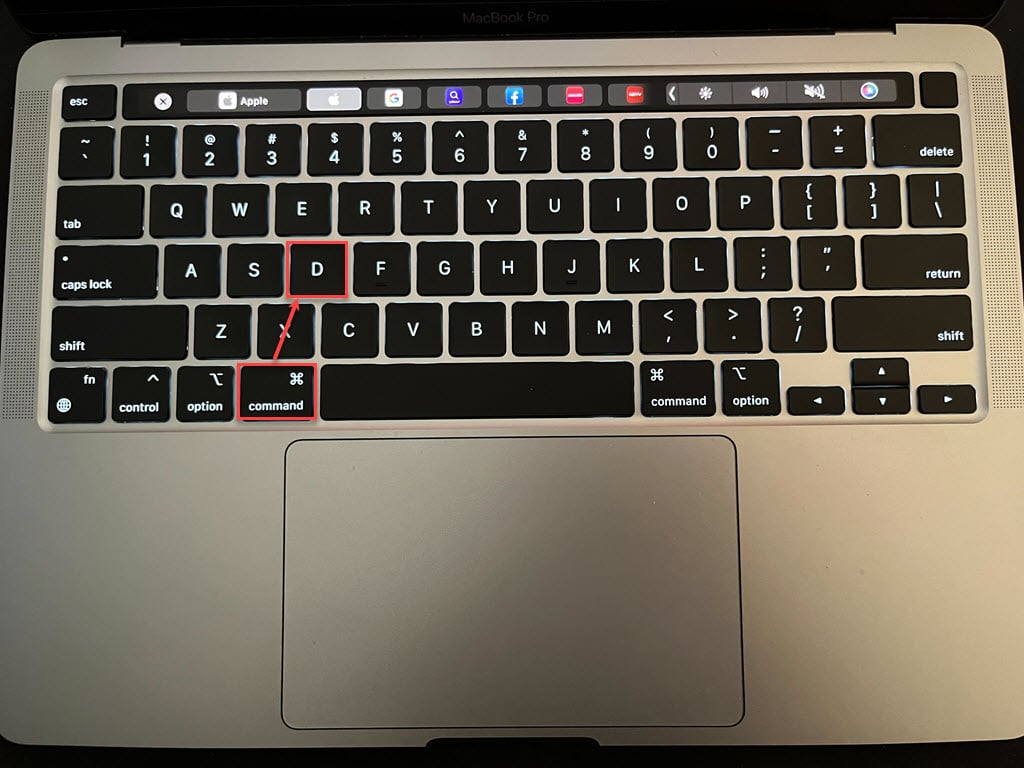
Step 4: Press the Command + D buttons to initiate the Diagnostics.
On Intel-based Macs
Step 1: Start your Mac.
Step 2: While it boots up, press and hold the D button.
Step 3: Release the button when the progress bar is visible, or language selection windows appear.
Once the diagnostics process is complete, you’ll receive a list of any problems encountered in the form of reference codes. Be sure to note these codes, as they will be helpful if you ever need to contact Apple support or visit an authorised repair centre for assistance.
Also read: Fix: USB-C to HDMI is not working from Android to TV
Reset NVRAM/PRAM
NVRAM, which stands for Non-Volatile Random-Access Memory, and PRAM, which stands for Parameter RAM, are small portions of memory that store crucial settings on your Mac. Resetting these memory components can, at times, fix hardware-related problems, including issues with your USB-C ports. Follow these steps to reset NVRAM/PRAM on an Intel-based Mac:
Step 1: Shut down your Mac.
Step 2: As you turn on the Mac, press and hold the Command + Option + P+ R buttons.

Step 3: Hold the keys until you hear the startup sound twice.
For Macs with Apple silicon, simply restarting your Mac should do the trick.
Reset the SMC
The System Management Controller is responsible for various hardware functions in your Mac, including the USB-C ports. Resetting the SMC can sometimes resolve issues with port functionality.
Reset the SMC in a Mac with the T2 chip
Step 1: Shut down your Mac
Step 2: Press and hold the right Shift key + left Control key + left Option key for about seven seconds and hold the Power button.
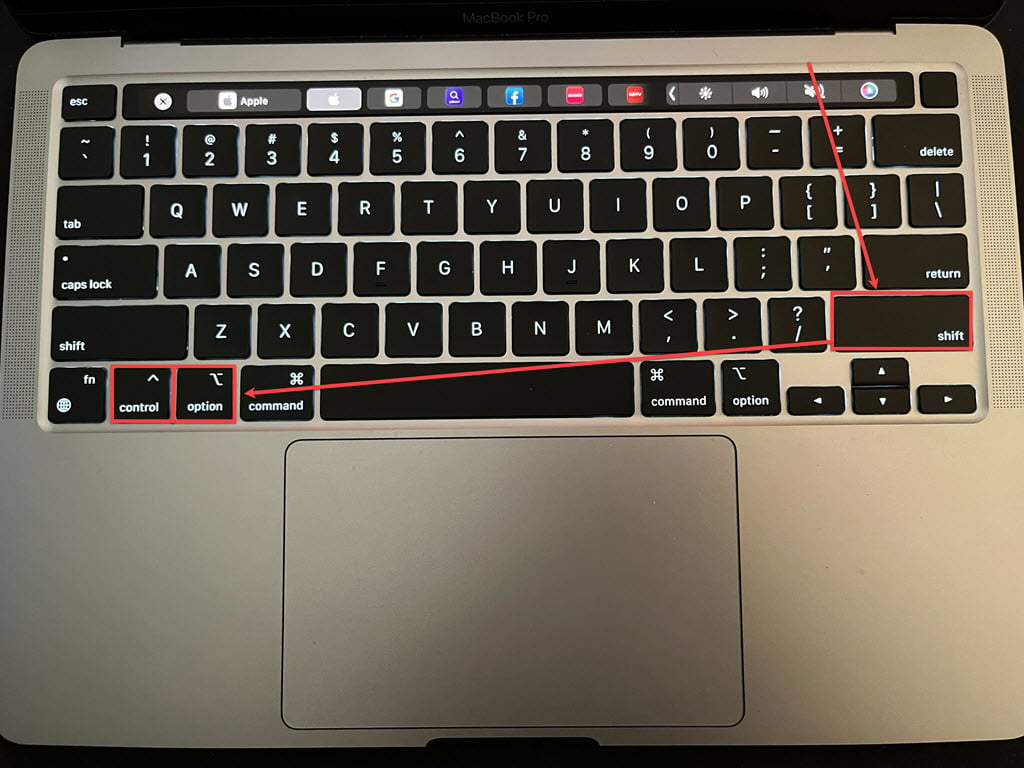
Step 3: Keep holding all four keys for another seven seconds. If your Mac is turned on, it will turn off on its own while you are holding these keys.
Step 4: Release all the keys, wait a few seconds, and press the Power button to turn on your Mac.
Reset the SMC in an Intel Mac with a removable battery
Step 1: Shut down your Mac and remove the battery.
Step 2: Hold the Power button for about five seconds.
Step 3: Reconnect the battery and turn on your Mac.
Reset the SMC in an Intel Mac with a non-removable battery
Step 1: Shut down your Mac.
Step 2: Press the Shift + Control + Option keys on the left side of the keyboard. While holding these keys, press the Power button and hold them all for 10 seconds.
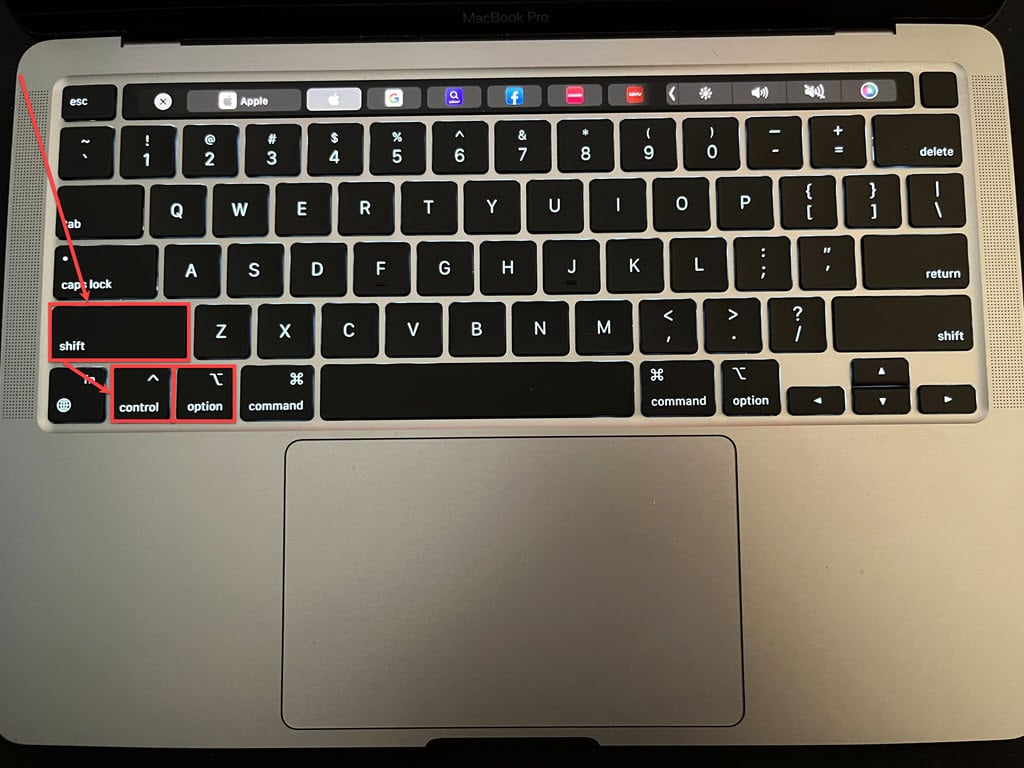
Step 3: Release the keys and press the Power button to turn on your Mac.
For those using Apple Silicon Macs, a simple restart would reset the SMC on your Mac. That’s because these new Mac models no longer have the system management controller, all embedded in the M-series processors.
Also read: How to change the scroll direction on a Mac?

