If you are a power user and use processor-intensive apps, you know how app performance degrades when you go into an app switching frenzy, but what causes your apps to run slow when multitasking?
To put it simply, all the apps running on your system share system resources, and as the number of apps increases, the resources each app gets decreases. Not only this, as the number of apps running on your system increases, the operating system has to manage many processes simultaneously.
Although this behaviour of the operating system can’t be changed, there are ways by which you can make certain apps run faster when multitasking.
So if you are tired of slow workflows while multitasking, we have a fix for you, but before that, let’s look at how Windows manages processes and how you can use it to make apps run faster.
However, if you want to skip to prioritising processes in Windows 10, click on the relevant topic below.
Also read: How to choose which GPU is used by a game in Windows 10?
Schedulers and priority levels in Windows 10
Modern operating systems are an engineering marvel, and when it comes to managing processes, the operating system uses special software called the scheduler.
Every process running on your system requires resources, and the scheduler assigns a priority to every process running on the system. This priority assignment helps the operating system decide the criticality of a process and assign system resources accordingly.
By default, Windows has six priority levels, and the details for the same are given below.
- Low: A process running on a low priority will consume fewer system resources. So if you have a lot of time on your hands and want a particular task to be carried out in the background and not hamper your workflows, you can select this priority for a process.
- Below normal: This priority level allots more system resources when compared to the low priority setting.
- Normal: This is the default priority level for most of the apps running on your system.
- Above normal: A process running with the above normal priority will get more resources when compared to a process running on the normal priority.
- High: If you want an app to get more system resources and process data faster, this is the priority level you should use.
- Realtime: This is the highest priority a process can get on your system. Using this priority level for an app cause the system to get unstable as it consumes all system resources, ignoring critical system interrupts. Therefore it is advised to not use this priority level for any processes on your system.
The priority of a process goes back to default settings when an app is closed. Therefore you have to change the priority of a process every time you launch it on your system.
So to make an app run faster, all you need to do is change its priority, and the operating system will assign more resources to it.
So that is what we will help you do in this article, change the priority of a process so that the system allots more resources to it, so apps run faster.
Also read: Windows Task Manager: A breakdown
How to change the priority of processes using Task Manager in Windows 10?
The easiest way to change the priority of a process is by using the task manager. To change the priority of a process using the task manager, follow the steps given below.
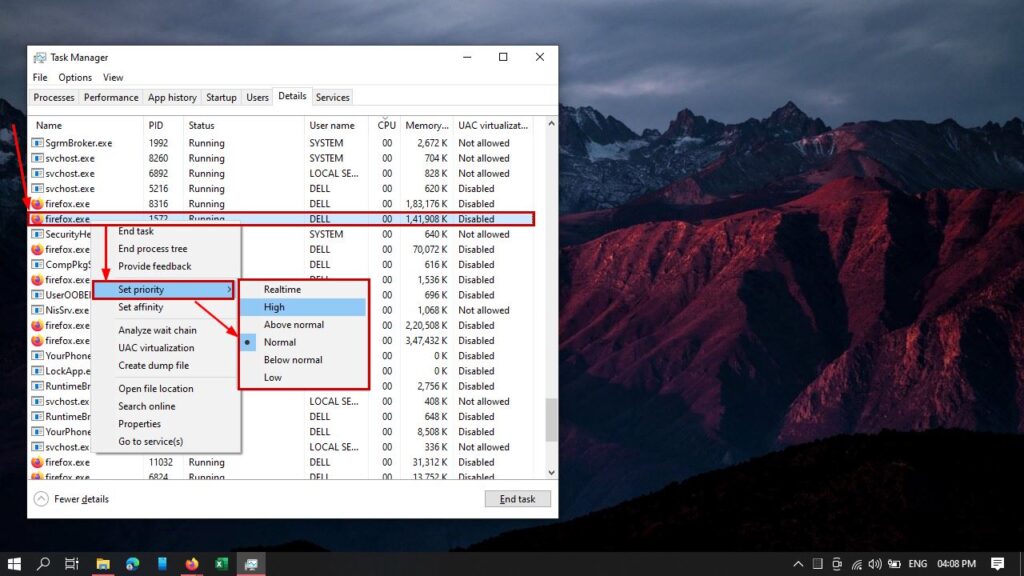
Step 1: Open the task manager on your system using the ctrl+shift+esc shortcut and click on the Details tab.

Step 2: Right-click on the process whose priority you want to change and select the Set priority option from the dropdown menu. Thereafter select the priority level you want to assign to that particular process.

Step 3: Click on the Change priority button in the new dialog box to alter the priority of the process.

Also read: How to assign a Bullet Point shortcut key in Word?
How to use the Command Prompt to start a process with a specific priority?
Although the task manager lets users change the priority of a running process, the command prompt enables users to start processes with a particular priority. To do the same, follow the steps given below.
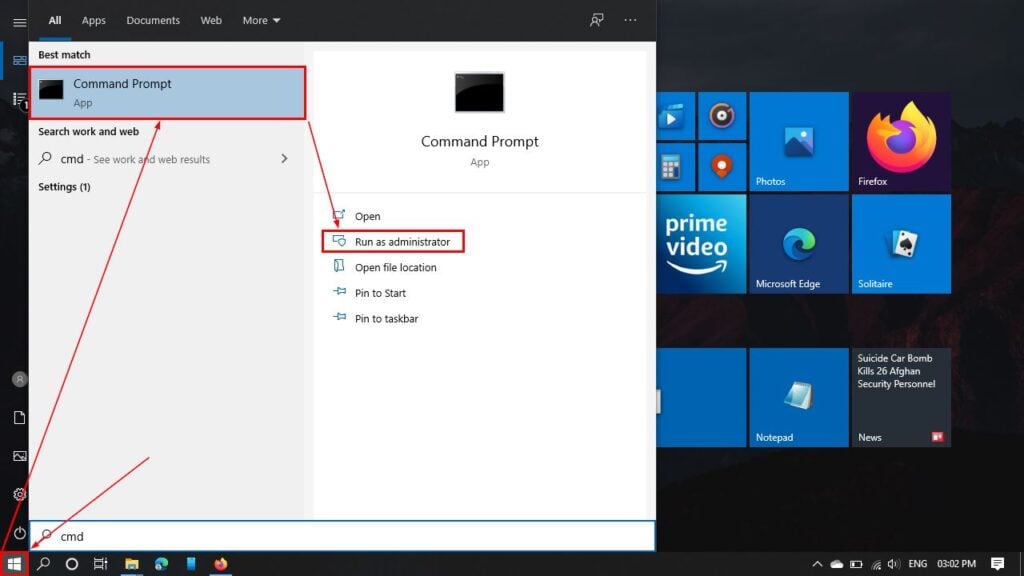
Step 1: Open the command line on your system and run it as administrator.

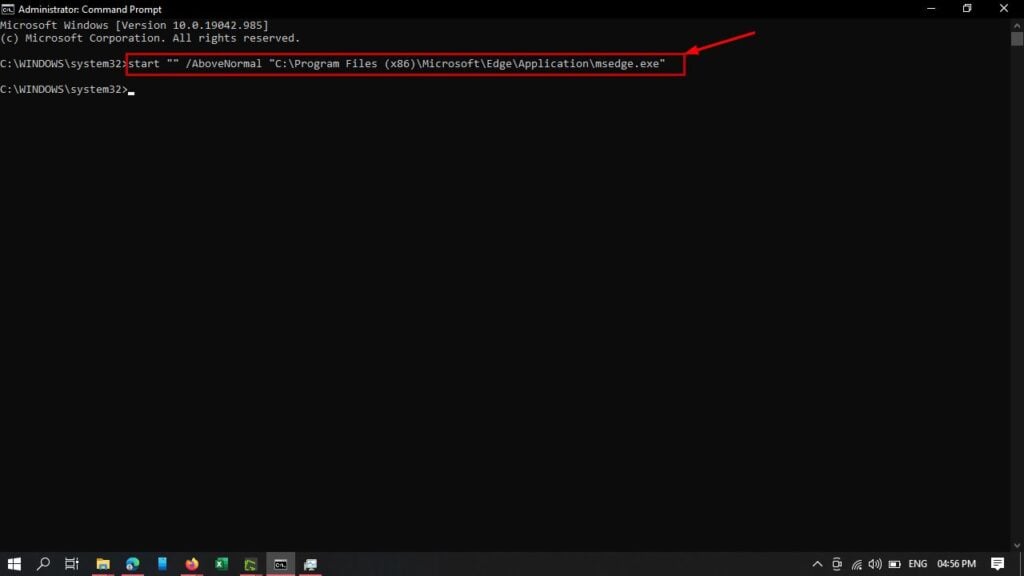
Step 2: Enter the command start “” /priority level “file path” to start an app with a particular priority level.

Although the Windows operating system does a good job in managing priorities, setting them up manually can make workflows faster.
Also read: How to uninstall programs using Command Prompt on Windows 10?


