Often in the heat of the moment, we as photographers miss the most crucial detail of a picture, the focus. If you’re shooting events or sports, it’s usual to end up with an out-of-focus photo.
Usually, these photos would end up in the bin. However, thanks to the power of photo editing tools, you can save some of them. If you’ve missed an important picture because you couldn’t focus on time, here’s how to restore them
Also read: How to fix rough edges in Photoshop?
How to restore out-of-focus photos in Photoshop?
Before we start fixing photos, know that this method won’t magically bring back a picture that is entirely out of focus. No method will. This will only bring back several details to make those photos presentable on a digital screen.
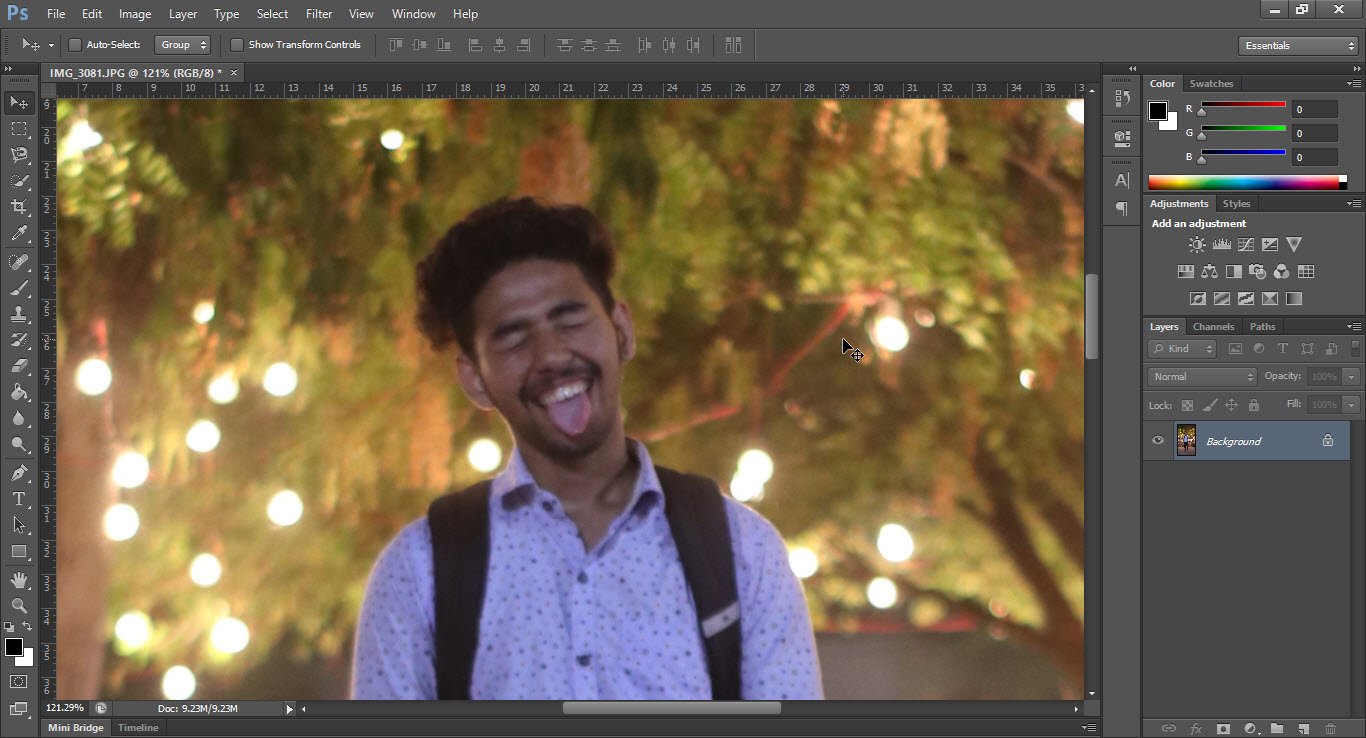
Step 1: Go ahead and fire up Photoshop. Load up the image you need. In this example, I will use this photo of a friend.

You’ll notice that I slightly missed focus and ended up with a picture with a lot of noise and no focus. We’re going to try to fix that.
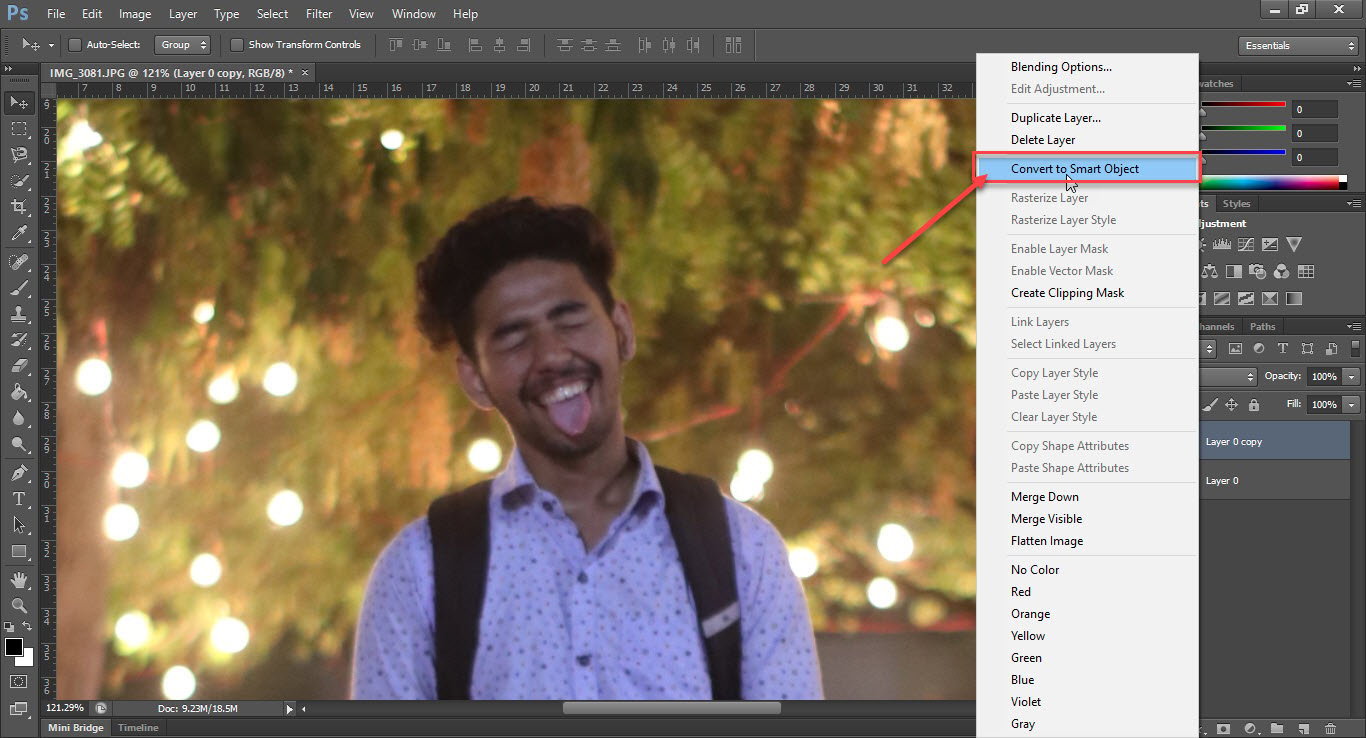
Step 2: Create a duplicate of the original layer. Then Right-click on the image and select Convert to Smart Object. Converting the layer into a smart object allows us to change the sharpness values later.

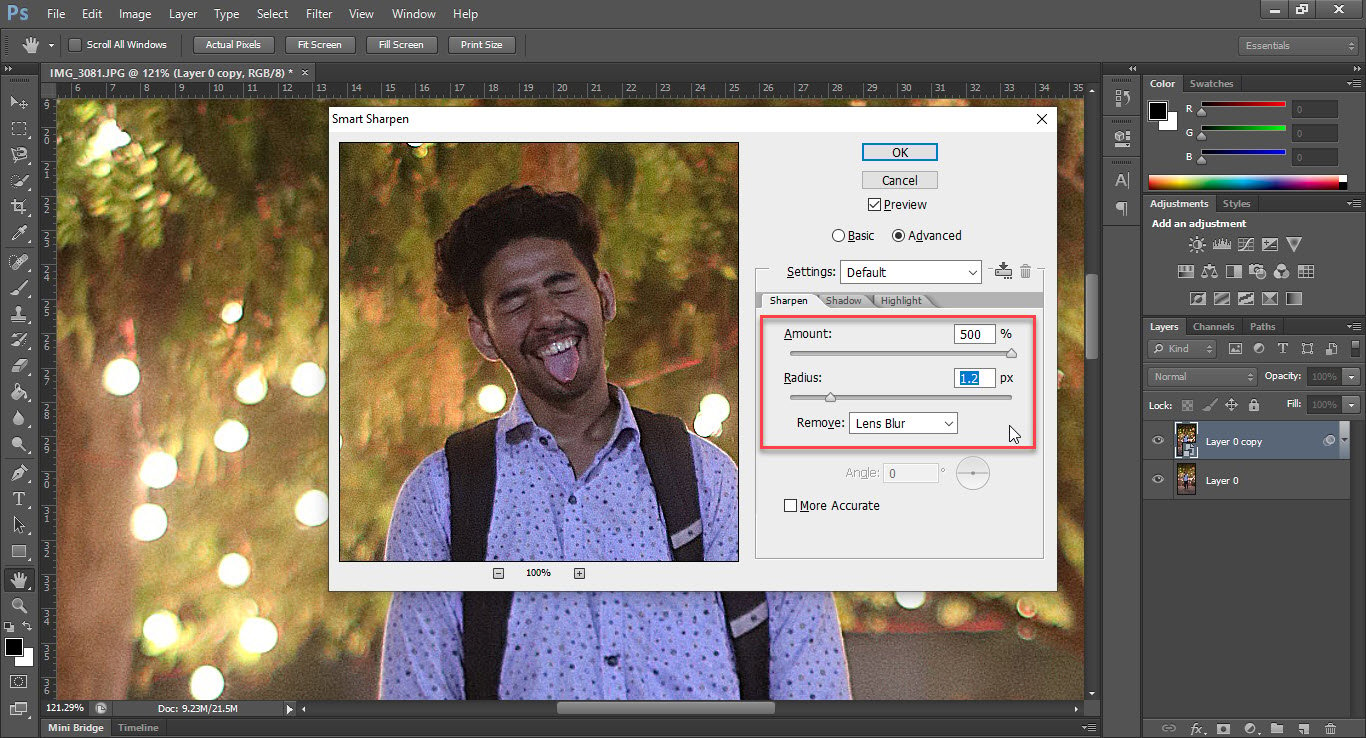
Step 3: Next, click on Filter from the toolbar at the top and go to Sharpen > Smart Sharpen. Now focus on the most crucial area of your image.

Step 4: Select Lens Blur in the ‘Remove’ dialogue box. Play around with the sliders until you notice that the area is sharpened, but at the same time, the edges are not accentuated.

I do it by increasing the Amount slider to the right and then increasing the Radius slider slowly until I get the desired result.
Press Ok when you’re done.
Step 5: Now, the advantage of converting the layer into a smart object will come in handy. You see, every smart object comes with a mask. This means we can invert the mask using Ctrl + I and then paint the mask over the areas we need it to be.
To invert the mask, click on it in the layers section and press Ctrl + I. You’ll notice that the image goes back to what it was.

Step 6: We’re going to paint our mask now. Select the Brush tool and go; reduce your flow to about 15-20%, get the radius down to your liking and turn the softness up. Now start painting. Also, make sure that the foreground colour is white.

This step is best done with a stylus, but I’ll stick to a mouse.
And there you have it. The image should be usable enough now. You still might not be able to use it for commercial purposes, but you can still upload it online.
Also read: 65 Photoshop keyboard shortcuts to make your workflow quicker


