Chrome offers one of the best and most complete browsing experiences out there. Google has spent a considerable amount of time developing and perfecting the browser, and it’s gone to good use.
However, just like everything else, Chrome isn’t free of problems. In this article, we’re taking a look at how to fix ‘this site can’t be reached’ error in Chrome.
Restart your router
Power cycling your network equipment is the fix to more issues than you can think. More often than not, connectivity issues can be caused by an underlying bug in your router and can be fixed by rebooting.
Also read: How to fix Err_Cache_Miss in Google Chrome?
Reset your TCP/IP stack
In some cases, resetting the TCP/IP stack on your computer can help resolved unforeseen errors. To do so, follow these steps.
Step 1: Press Windows Key + X or right-click on the Start button and click on Command Prompt (admin).

Step 2: Type in the following two commands after each other
ipconfig /release
ipconfig /renew
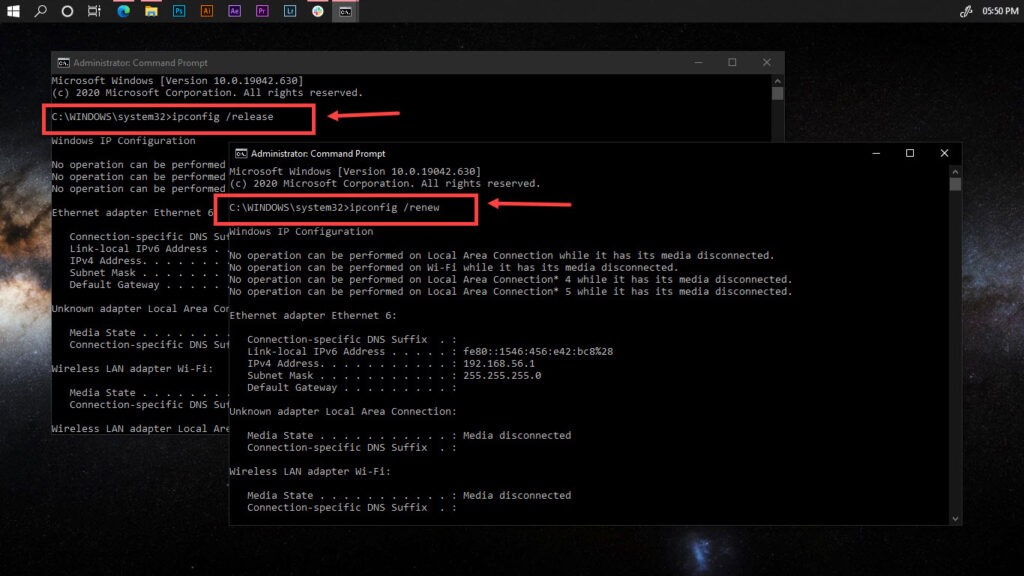
Now try revisiting the site. The ‘this site can’t be reached’ error it should work just fine.
Clear the Chrome DNS cache
At times, a buggy DNS cache can redirect your browser to the wrong site and hence cause this error. You can try clearing Chrome’s DNS cache to see if the issue gets resolved.
Step 1: Fire up Chrome and head over to chrome://net-internals/#dns
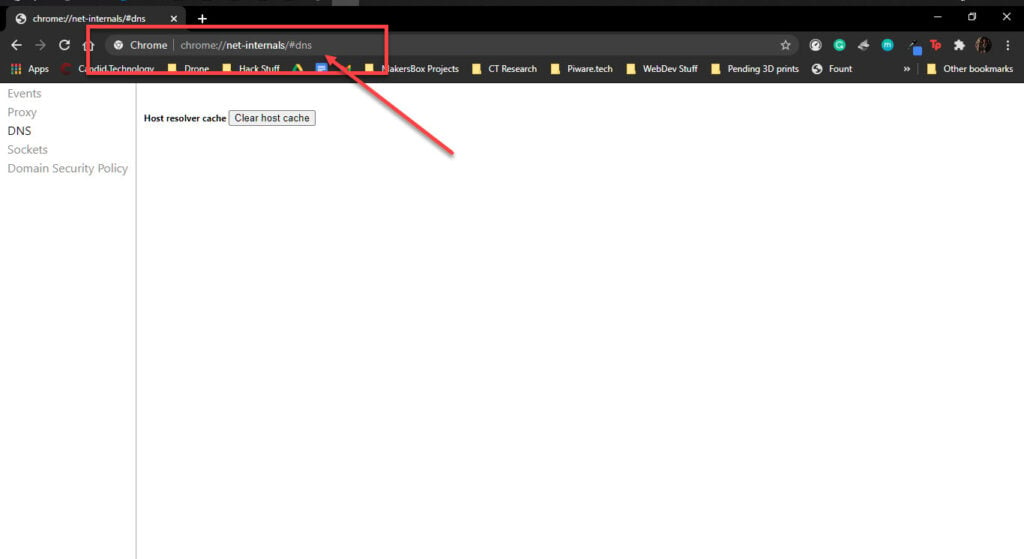
Step 2: Click on the Clear host cache button to clear out your DNS cache.
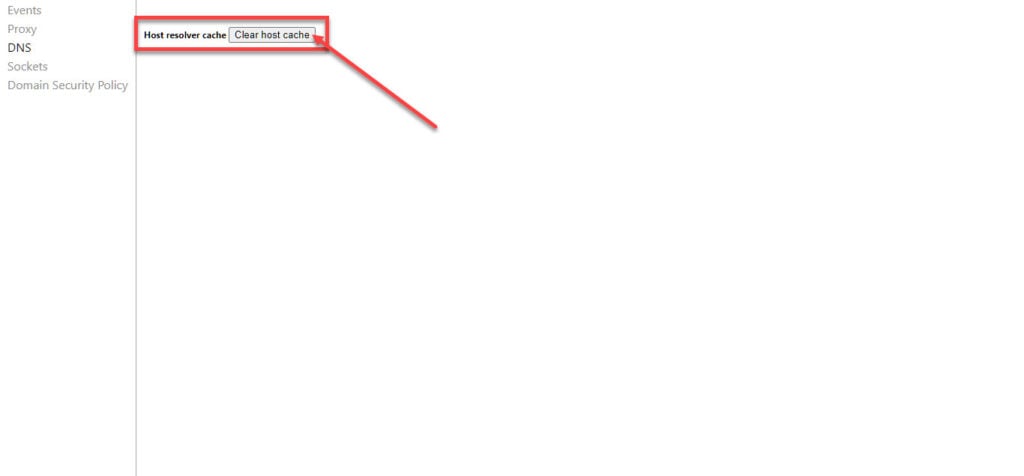
Restart the browser and try to access the site you were having issues with again.
Disable DNS Prediction
Just as a buggy DNS cache can confuse your browser, so can Chrome’s DNS Prediction services. While they work just fine usually, sometimes you might have an issue.
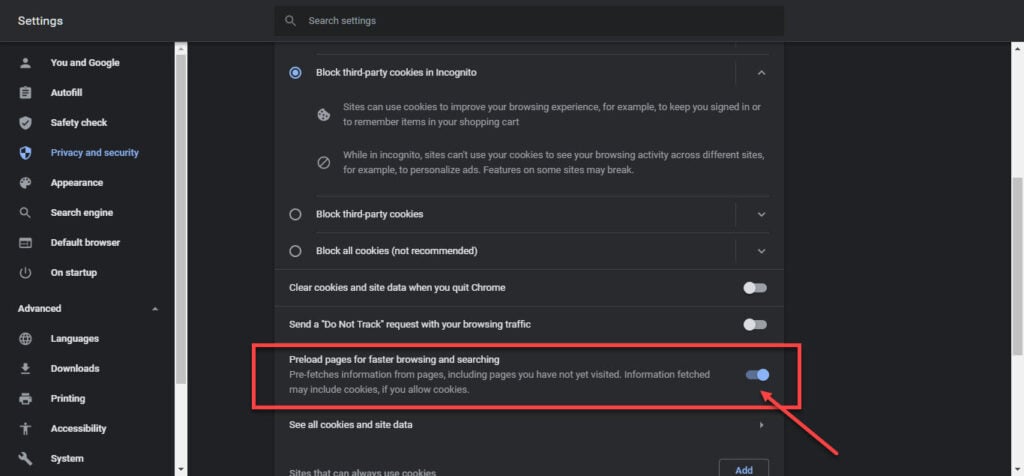
Step 1: Fire up Chrome and head over to your Privacy and Security settings. You’ll find them at chrome://settings/privacy.
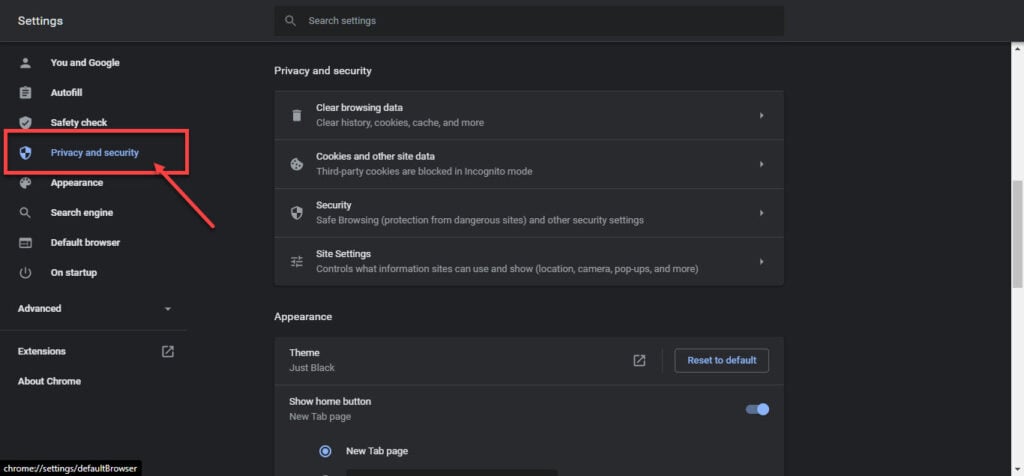
Step 2: Under the Cookies and other site data section, find the setting that says Preload pages for faster browsing and searching and toggle it off.
Also read: Apt-get command not found: 5 Fixes
Clear the DNS cache
Just like every other cache, any corrupted settings in your DNS cache can cause this issue. Here’s how you can clear it out.
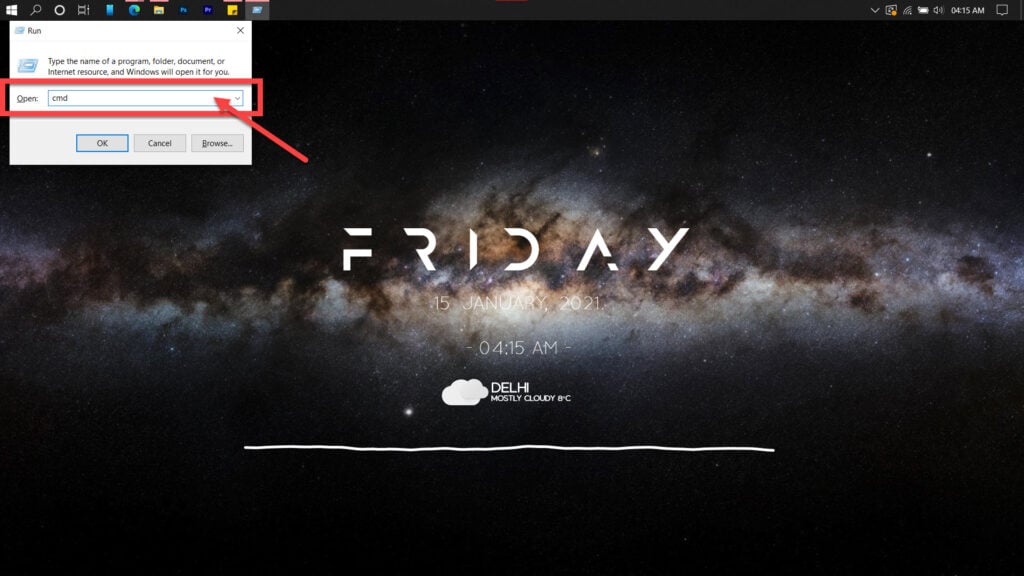
Step 1: Press Windows key + R, type cmd and hit the Enter key.
Step 2: Type in ipconfig /flushdns and hit enter. This will reset your DNS settings to their defaults.
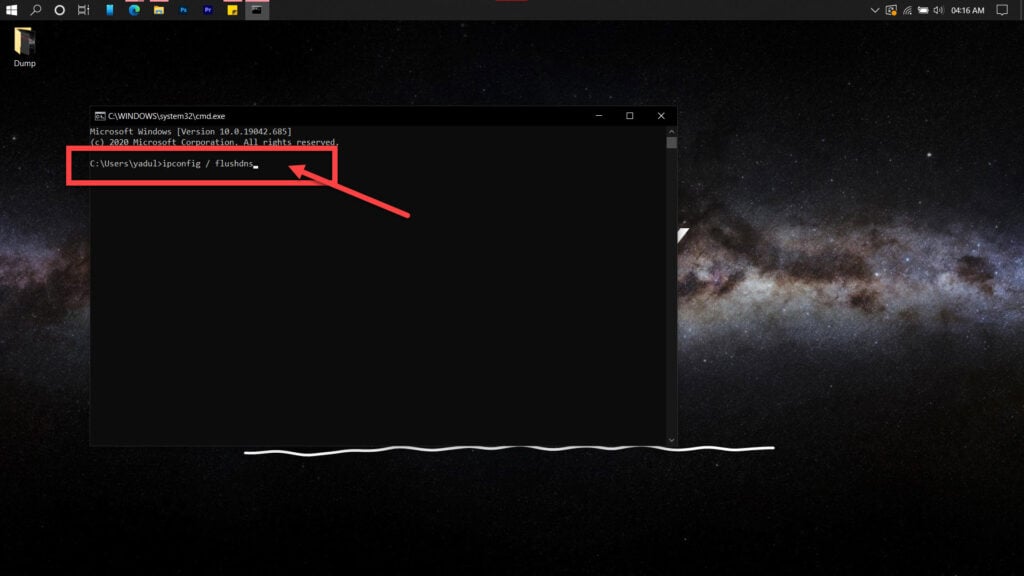
If this doesn’t work, you can go ahead and reset files used by Windows to access the internet by using these commands.
ipconfig /flushdns
ipconfig /registerdns
ipconfig /release
ipconfig /renew
Check your adaptor settings
Sometimes you need custom adaptor settings to connect to a network with certain specific rules, such as a school or a work network. But if these settings stay, you will not be able to connect to the internet anywhere else.
Here are the steps you need to follow.
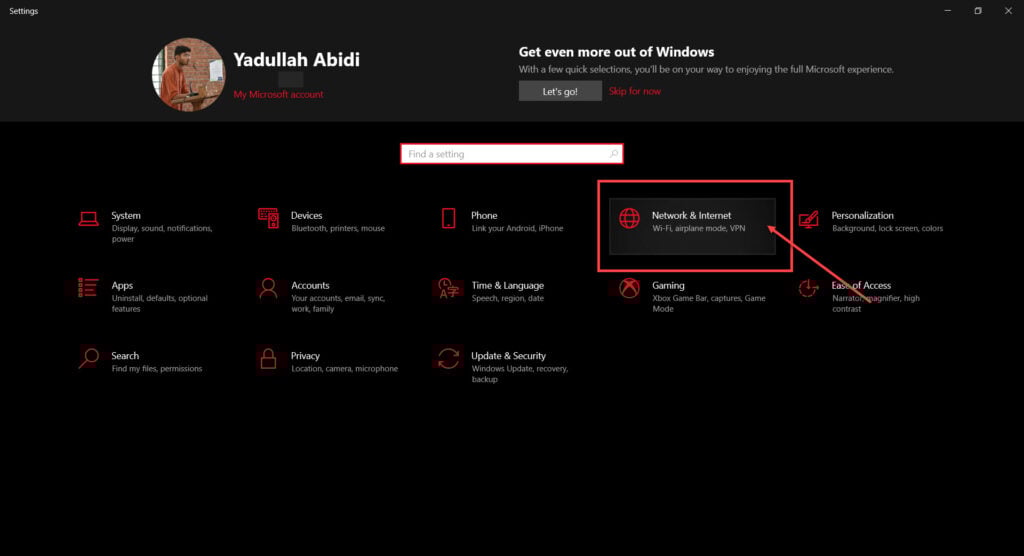
Step 1: Press Windows key + I to open the Windows settings.
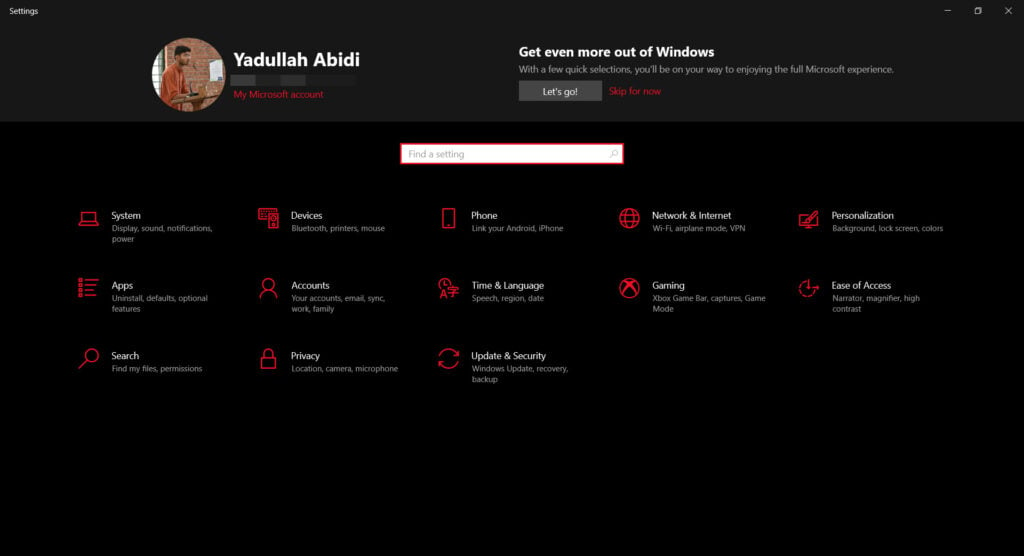
Step 2: Click on Network & Internet.
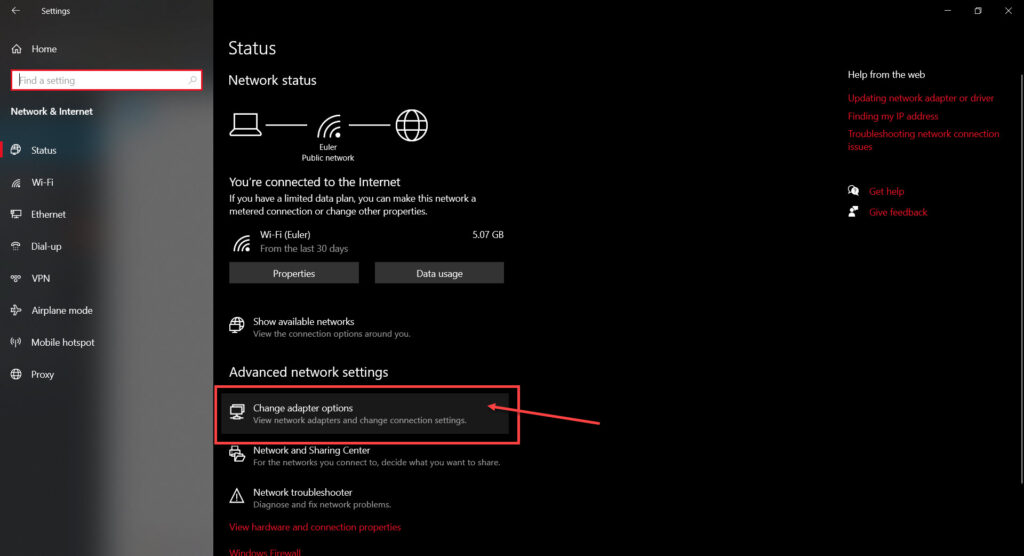
Step 3: Click on Change adaptor options.
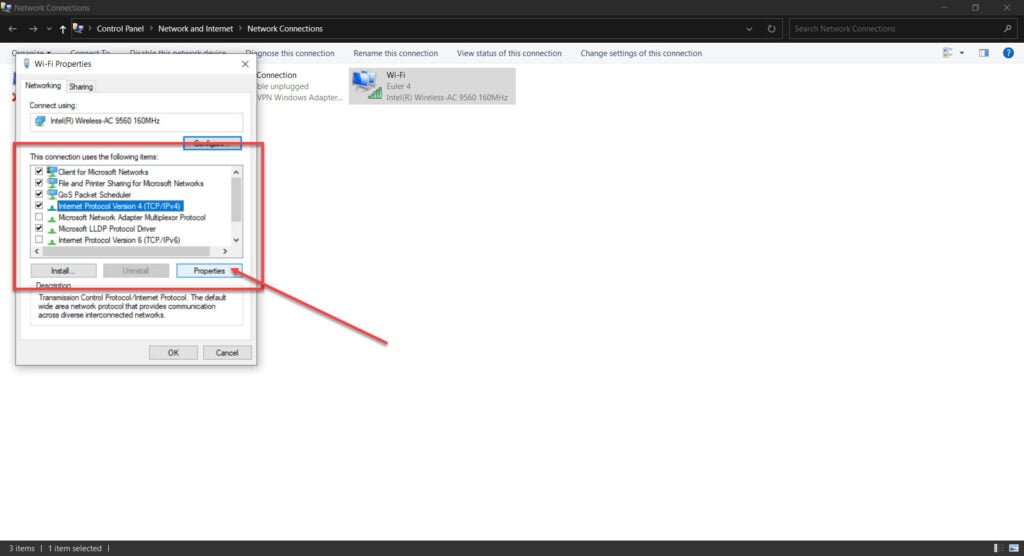
Step 4: Right-click on your Wi-Fi network and click Properties.

Step 5: Find Internet Protocol Version 4 in the list, click on it and then click Properties.
Step 6: Make sure that all settings are set to automatic.

Step 7: Now repeat steps 5 and 6 with Internet Protocol Version 6.
If this doesn’t fix the ‘this site can’t be reached’ issue, you can try moving to a public DNS using the guide below.
Also read: Why is Jio Sim not working? 7 Fixes
Try a public DNS
If automatic DNS settings aren’t working out for you, try moving to a public DNS. Follow these steps.
The first five screenshots are the same as Check your adaptor settings. Also, remove the last line from that very section after adding this)
Step 1: Press Windows key + I to open the Windows settings.

Step 2: Click on Network & Internet.

Step 3: Click on Change adaptor options.

Step 4: Right-click on your Wi-Fi network and click Properties.

Step 5: Find Internet Protocol Version 4 in the list, click on it and then click Properties.

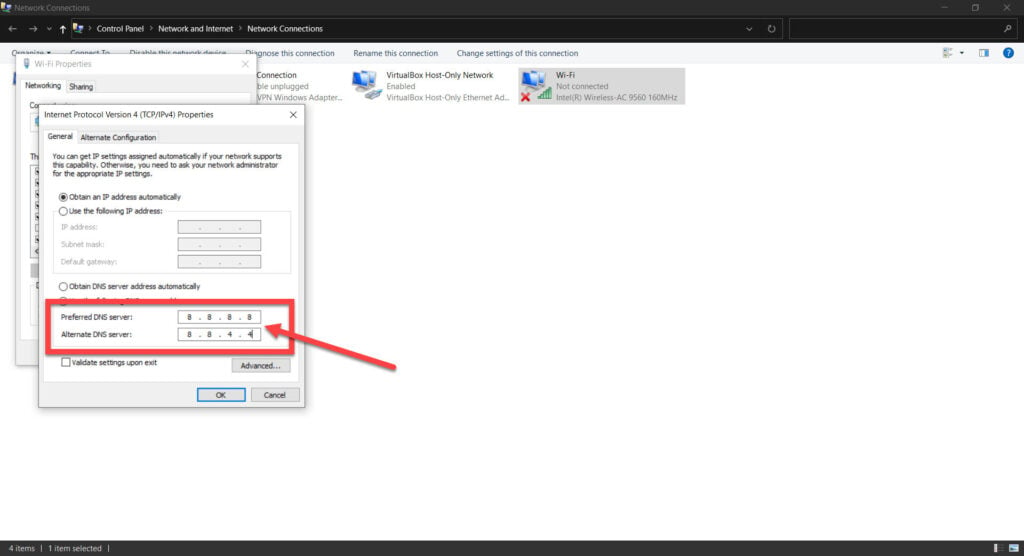
Step 6: Click on Use the following DNS server addresses.

Step 7: Type in 8.8.8.8 in the Primary DNS field and 8.8.4.4 in the Alternate DNS field.
Clear your browser’s data
Corrupt files in your cache or otherwise can cause this error as well. Clear them out to see if you can get Chrome to work.
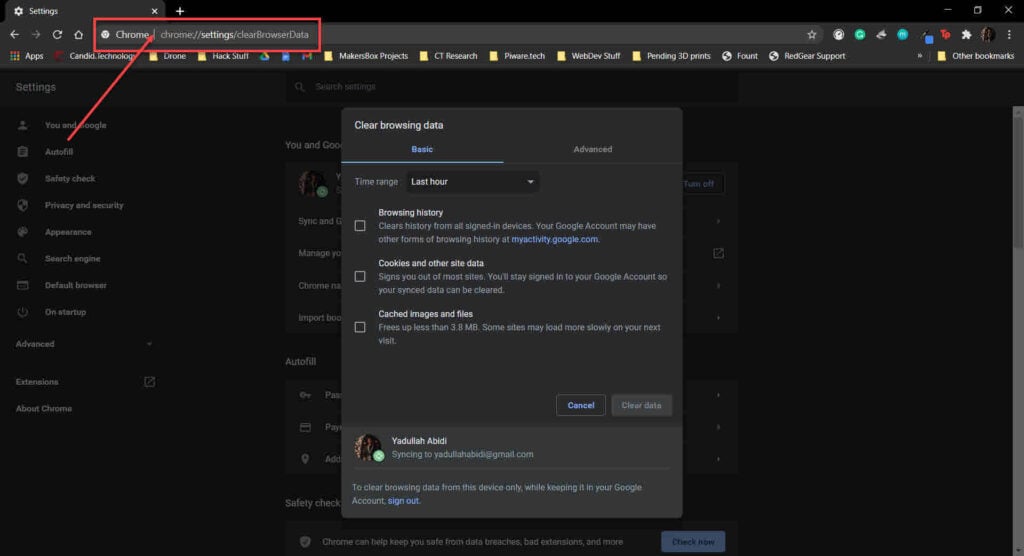
Step 1: Type in chrome://settings/clearBrowserData in your browser’s address bar and hit Enter.
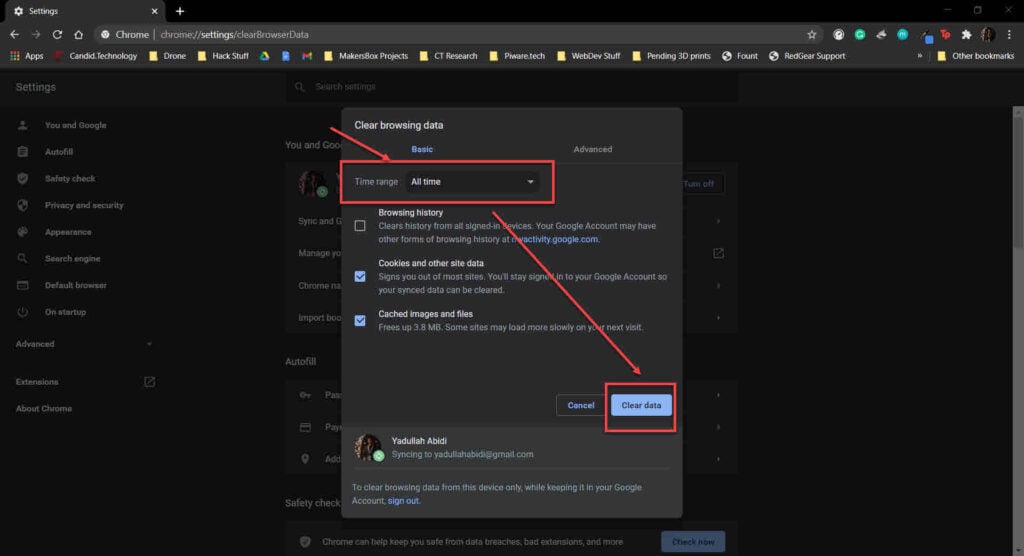
Step 2: Select the cache and cookies options and make sure the Time range is set to All time. Click on the Clear now button to clear out all the data.
Reset your browser
Resetting Chrome can fix all sorts of random bugs and glitches with the browser.
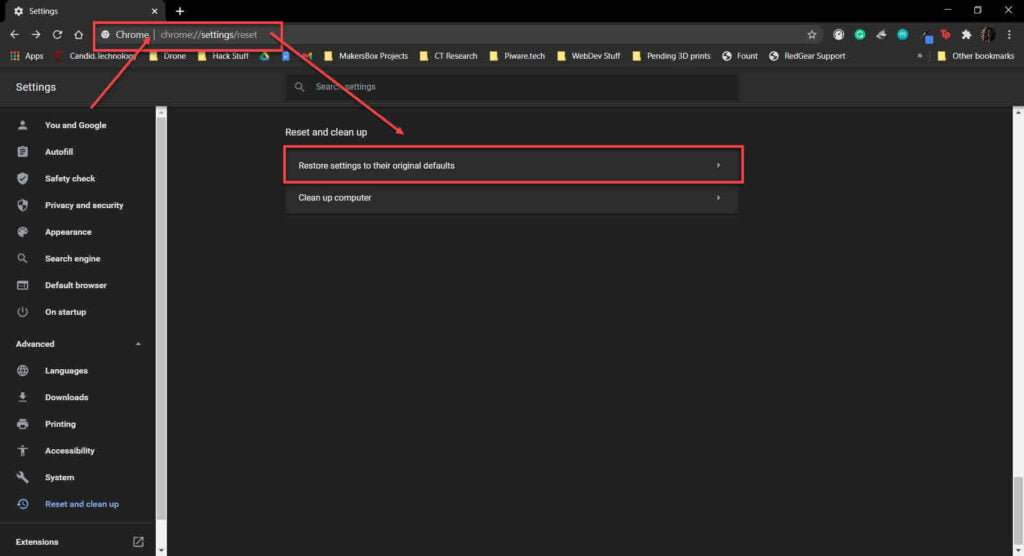
Step 1: Head over to chrome://settings/reset. Click on Restore settings to their original defaults.
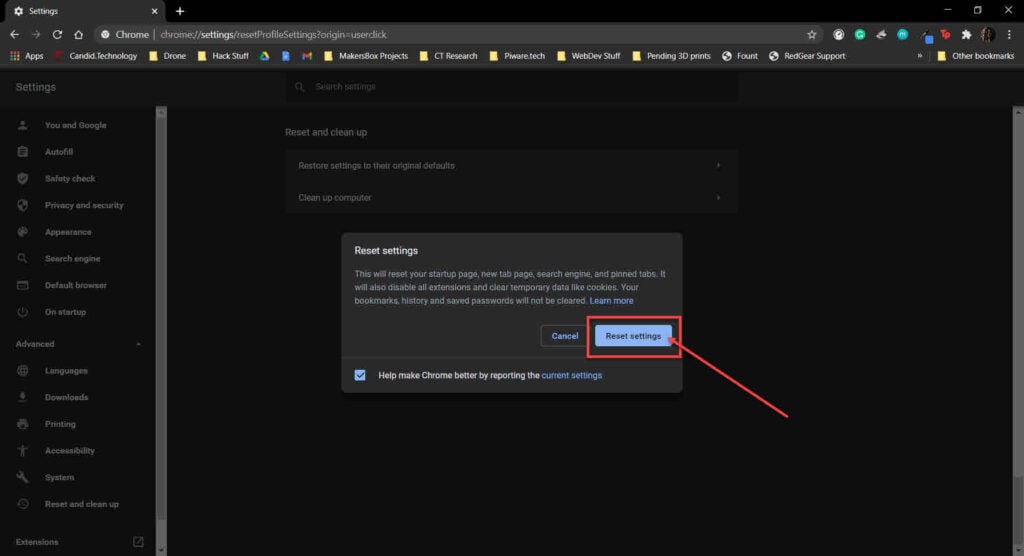
Step 2: Chrome will show you a warning prompt. Click on Reset Settings, and your browser will reset to default settings.
Also read: Spotify Search not working: 3 Fixes
Restart the DNS client service
Restarting the DNS client service can also help fix this issue. Here’s how.
Step 1: Press Windows key + R to open the Run prompt. Type services.msc and hit enter.

Step 2: Find the DNS Client service and restart it by clicking the Restart link at the top left.

Try reaccessing the site. This should fix the ‘this site can’t be reached’ error.
Reinstall Chrome
Another possible cause for Chrome not starting might be some corrupt program files. Reinstalling the browser should fix the issue.
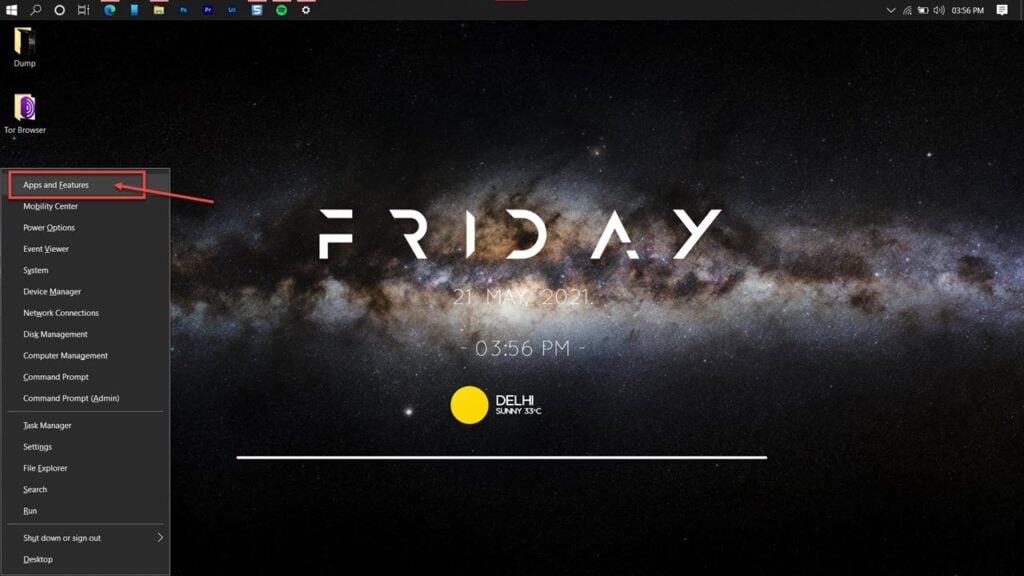
Step 1: Press Windows Key + X to open the Quick Access menu and click on Apps & Features.
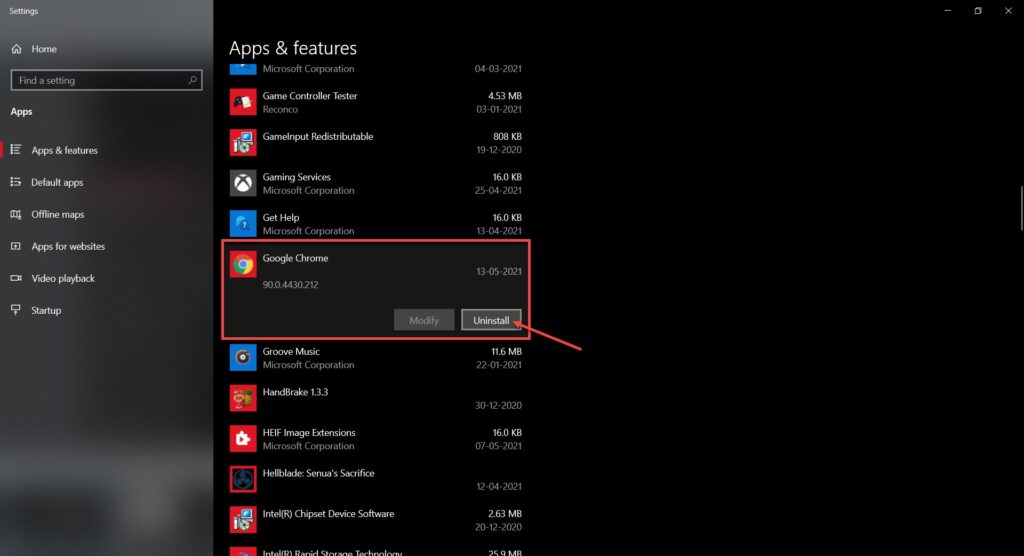
Step 2: Find Chrome in the list of apps and use the Uninstall button to remove the browser.
Now you can redownload Chrome and try installing it again to check if that resolves the ‘this site can’t be reached’ issue.
Also read: Fix: AirPods connected but no sound


