Windows 11 has brought about many changes over its predecessor, one of them being more and easier customisation. You can change anything from your sound scheme to your pointer colour in a few clicks.
In this article, we’re looking at how to change your mouse colour in Windows 11.
Also read: Windows 11 folders not showing preview: 11 Fixes
Changing mouse colour
There are two ways you can use to change the mouse colour.
- Using the Windows Settings.
- Using third-party cursors.
Using Windows Settings
Windows provides a quick and easy way of changing your pointer’s colour. Here’s how.
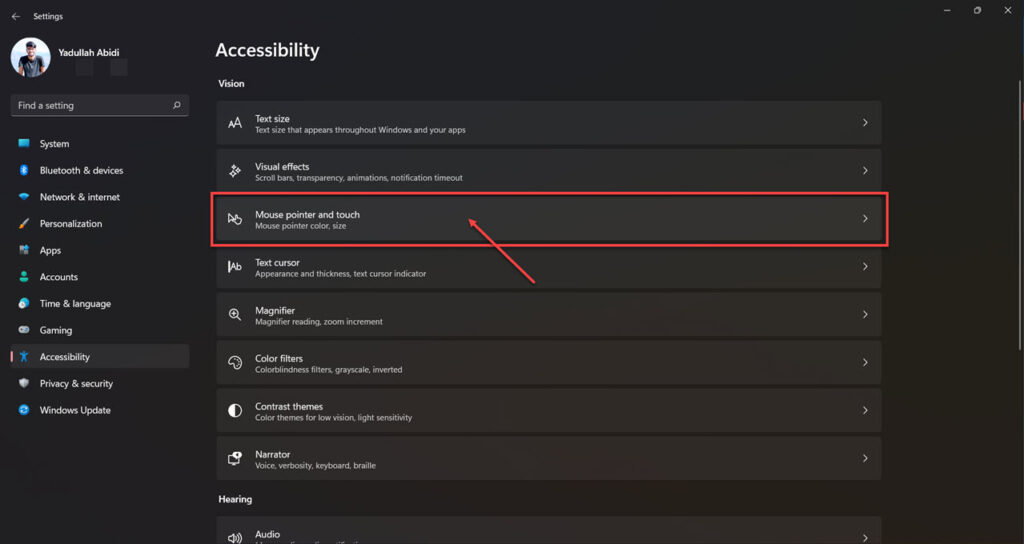
Step 1: Press the Windows key + I to open Windows Settings. Head over to Accessibility.

Step 2: Click on Mouse pointer and touch.
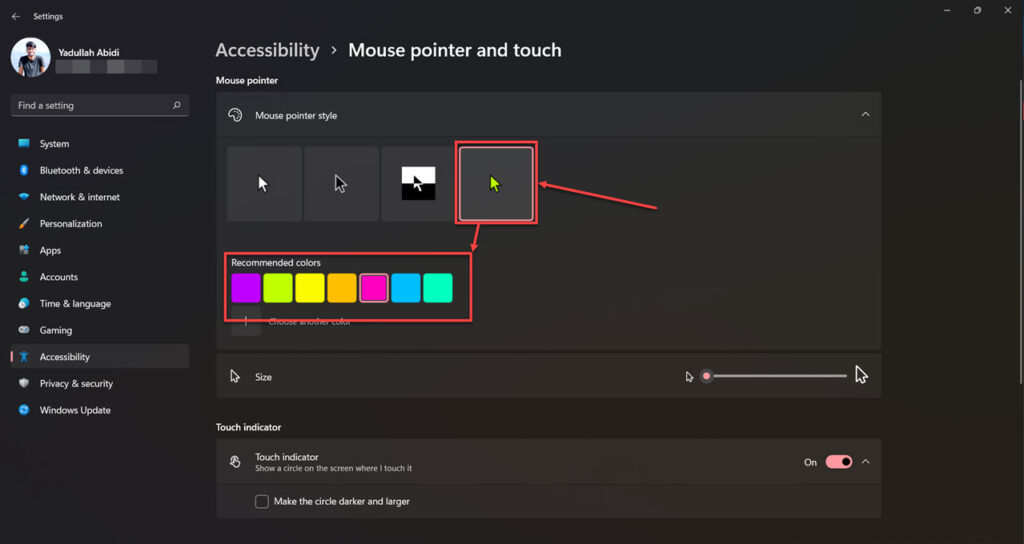
Step 3: Click on the Custom cursor and select the colour you want.
Using third-party cursors
If the default Windows cursors aren’t good enough for you, you can download third-party cursor files and use them instead.
Step 1: The first step is finding a cursor pack or file. We’re using Windows 11 Cursors Concept v2 from Deviant Art for this article.

Step 2: Extract the downloaded file to a location you can access.

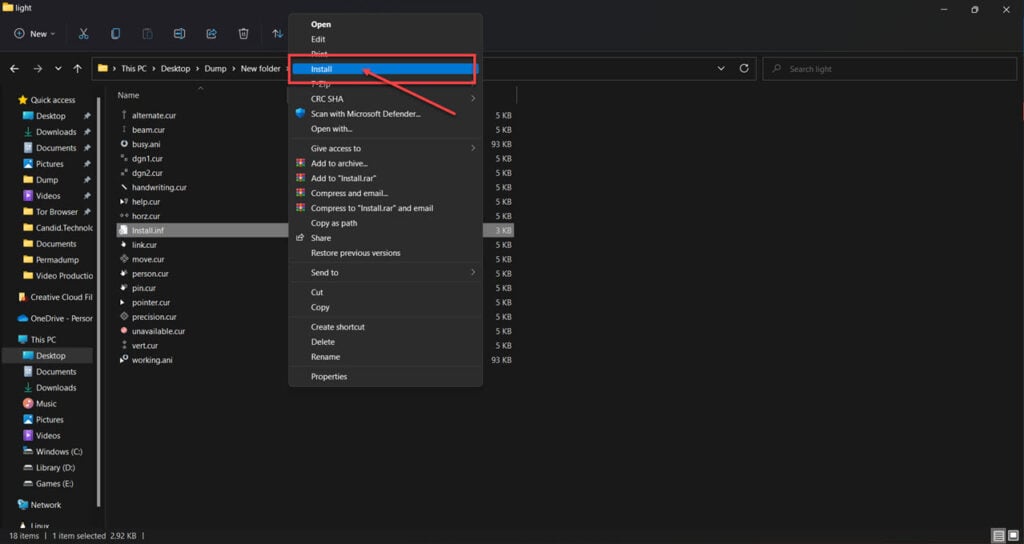
Step 3: Inside the archive, there are two folders, one for the dark theme and one for the light theme. Open whichever theme you want to install, and right-click the install.inf file and click Show More Options.

Step 4: Click the Install button, and your cursor pack will be installed.
In case you don’t want to install the entire pack and want to use only a few files, here’s how.
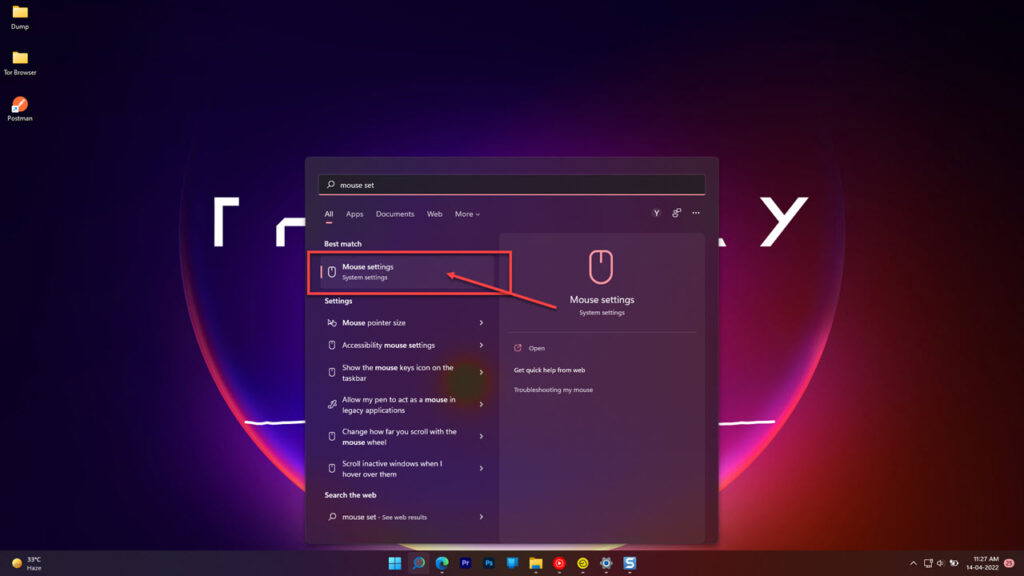
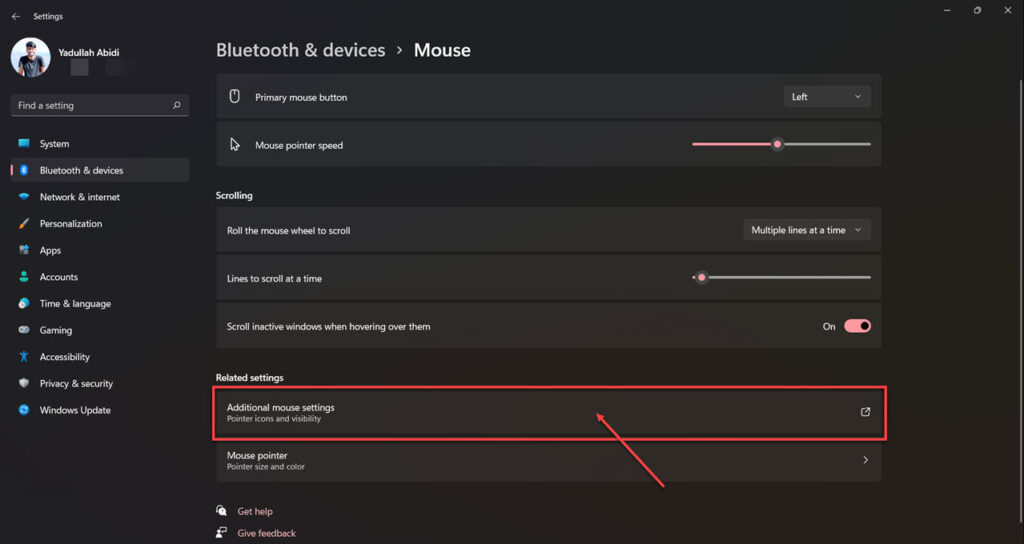
Step 1: Press the Windows key and search for Mouse settings. Click the corresponding search result.
Step 2: Click Additional mouse settings.
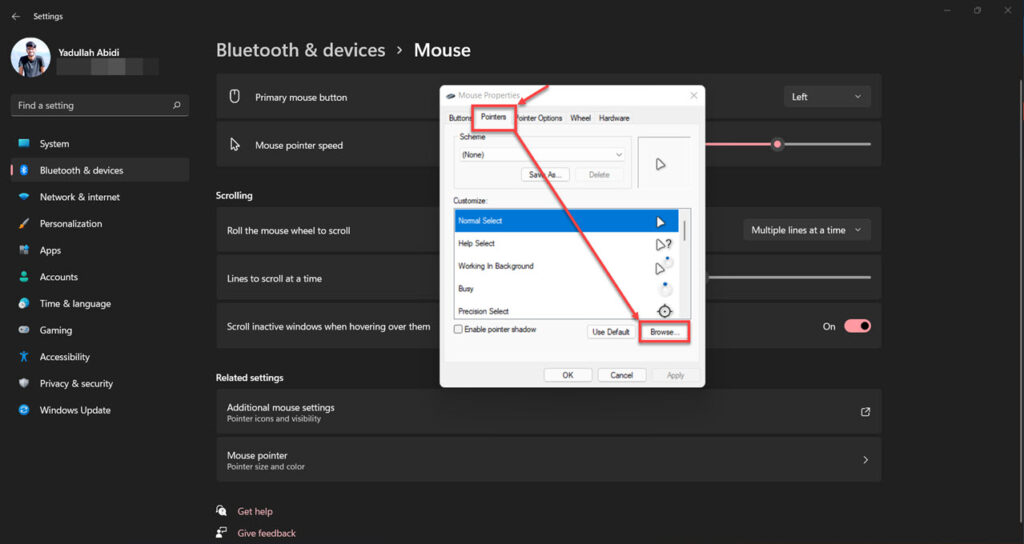
Step 3: Head over to the Pointers tab and click the Browse… button.
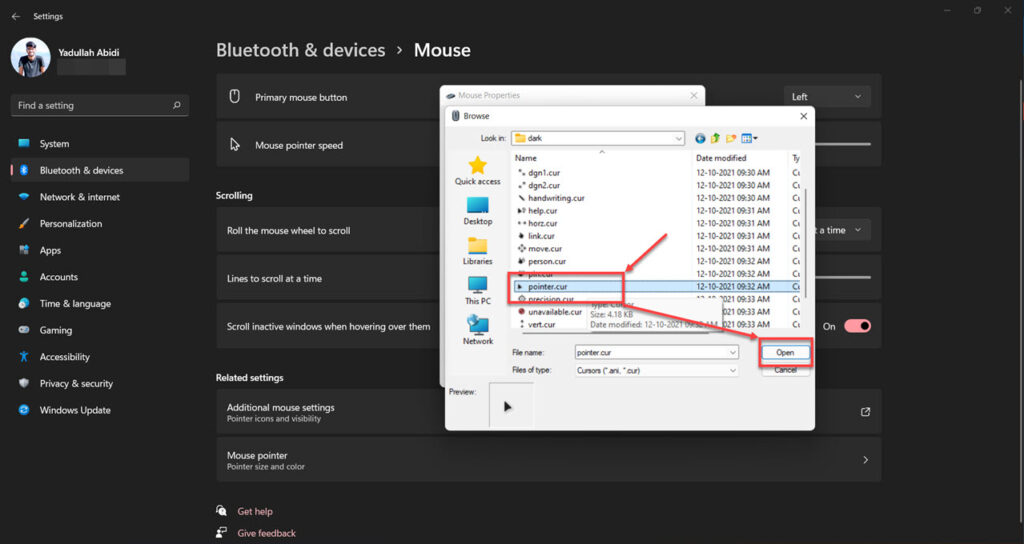
Step 4: Browse to where you’ve exacted your cursor pack and select the cursor you want to use.
Also read: How to check CPU, GPU and RAM usage in Windows 11?


