Windows is a rather stable OS that Microsoft has now spent over a decade trying to perfect. However, it still suffers from the occasional bug or glitch.
In this article, we’re talking about CRC errors, their causes and how you can fix them.
Also read: How to fix Red Screen of Death in Windows 10?
What causes CRC errors?
CRC or Cyclic Redundancy Check error appears when your computer tries to read data from a corrupted hard drive. It could be a local drive, network drive or a CD/DVD. If the drive’s got bad sectors on it, you’re most likely going to see this error.
Other causes include corrupt files, incorrect drive configuration or faulty app installations.
How to fix CRC errors?
Here are a few solutions you can try out to solve this problem.
Restart your PC
The first thing you should do in such situations is to try and restart your PC. Restarting your PC can fix a bunch of seemingly random issues that occur without any explanation whatsoever.
Run the Check Disk utility
The error can very well be a sign of your boot drive failing to perform as it should. Try running the check disk utility to check whether or not your storage drives are, in fact, functional.
You can refer to our detailed guide here on how to run the check disk utility.
Remove all new hardware
You should first turn your computer off and remove any new hardware or peripherals you may have added to your machine. Then, check to see if your PC boots fine or not.
If you’re removing multiple devices, remove them one at a time while rebooting your PC every time to isolate the faulty hardware.
Remove all new software
Like incompatible hardware can trigger this error, so can incorrect software. If you’ve installed any new programs recently, try removing them to see if that solves your problem.
Once again, if you’re removing multiple programs, remove them one at a time and reboot your PC each time to isolate the software at fault.
Redownload the file
If you’re getting a CRC error while trying to access a file you’ve downloaded from the internet or a local network, try downloading the file again. There’s a good chance that the file may not be fully downloaded and hence, corrupt.
Also read: Getting Windows Ready stuck: 5 Fixes
Run the Windows hardware troubleshooter
Windows 10 comes with a few handy troubleshooters that can resolve a bunch of issues. However, for some reason, Microsoft has removed the hardware troubleshooter from the troubleshooter’s menu. So here’s an alternative way to run the hardware troubleshooter.
Step 1: Press Windows key + R to open the Run prompt. Type cmd and hit enter.

Step 2: Type msdt.exe -id DeviceDiagnostic and press enter. This will launch the hardware troubleshooter.
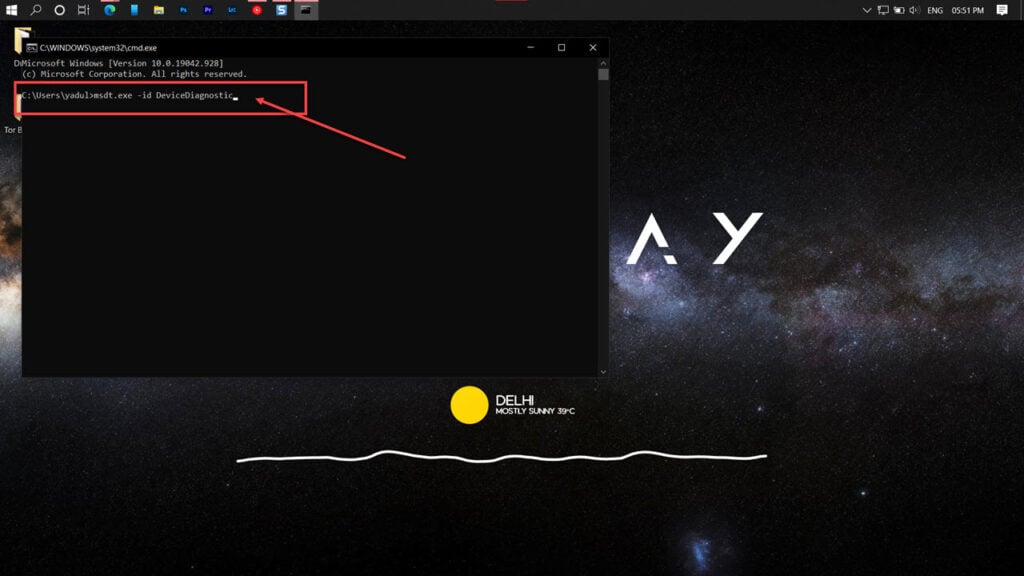
Proceed along as instructed by the troubleshooter.
Perform a clean boot
To isolate the problem, perform a clean boot and then start the missing processes one at a time to find your culprit.
Step 1: Press the Windows key and search for System Configuration.
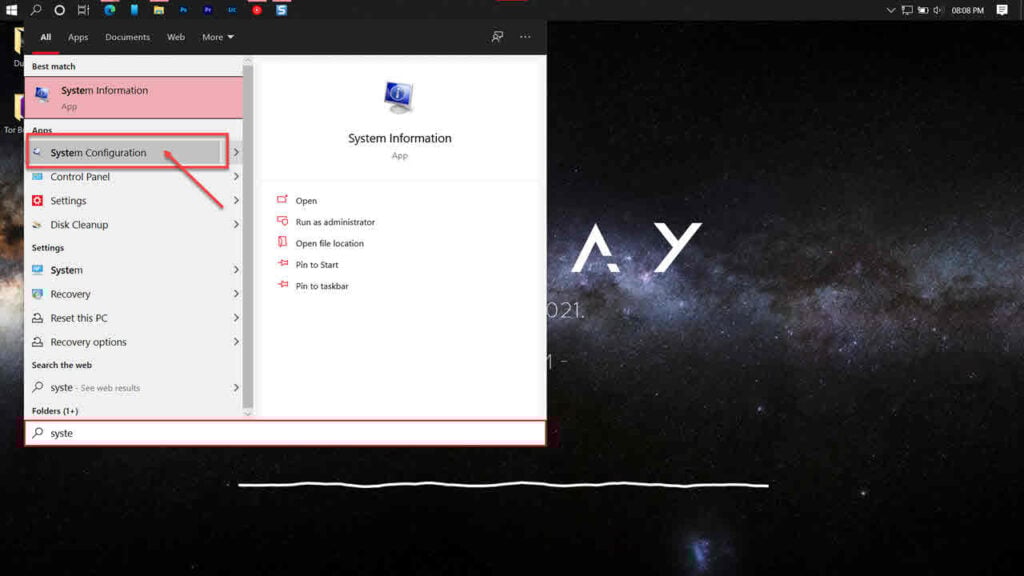
Step 2: Head over to the Services tab.
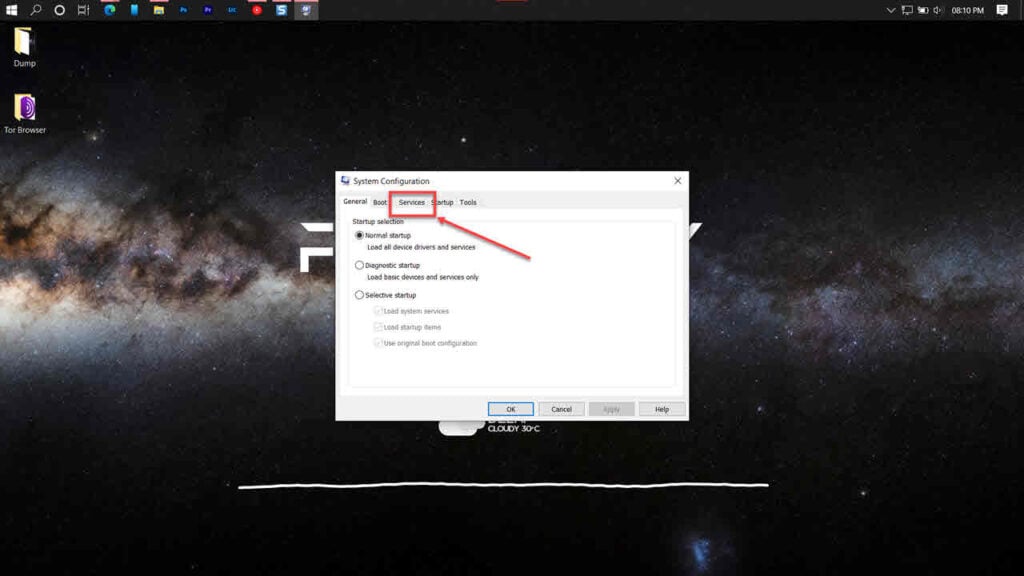
Step 3: Uncheck the Hide all Microsoft Services checkbox. Now click the Disable All button.
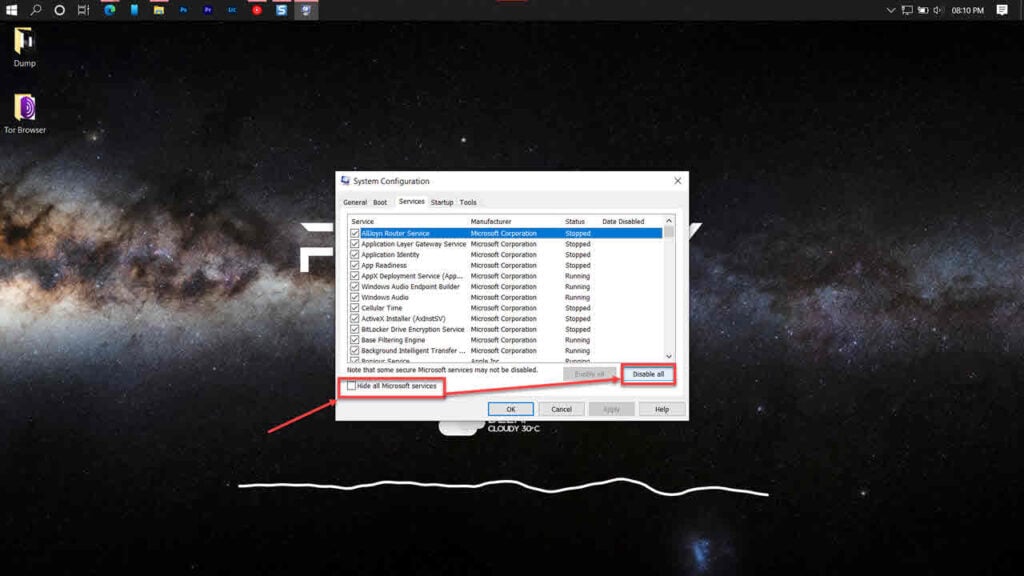
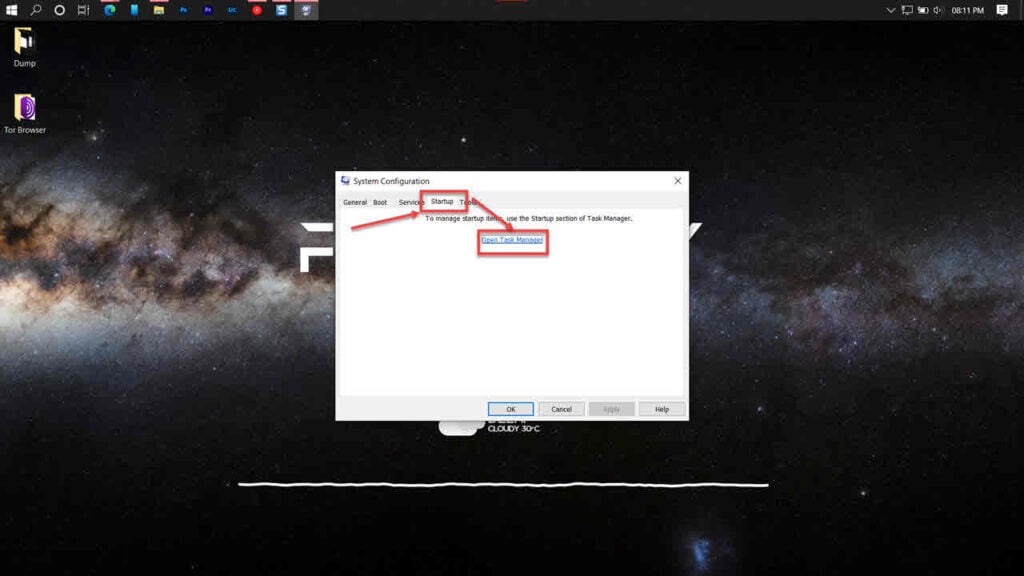
Step 4: Now head over to the Startup tab and click on Open Task Manager.
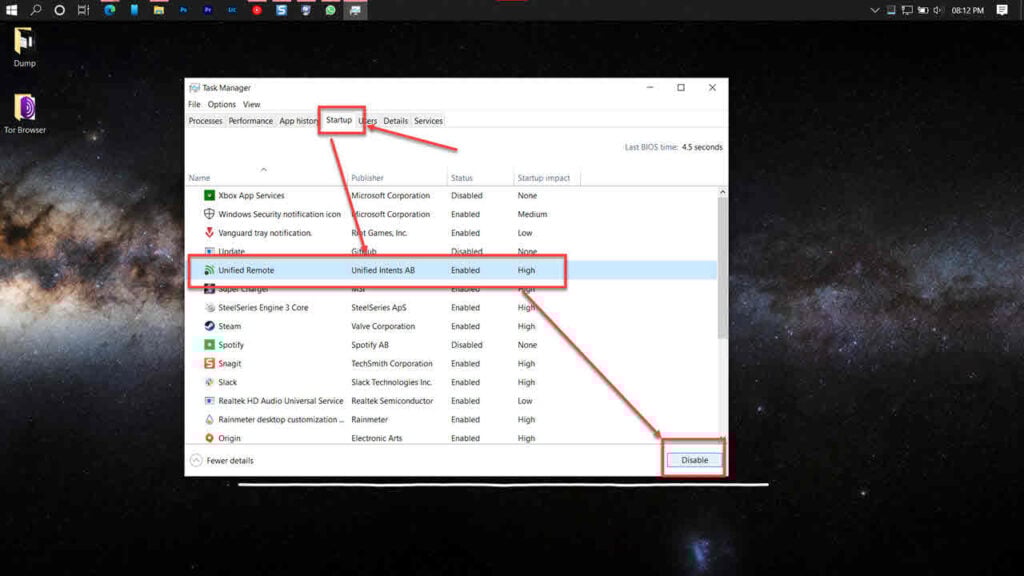
Step 5: Click the Startup tab again, select all the services and click the Disable button.
Now try running the SFC scan again. The Windows Resource Protection could not perform the requested operation issue should be fixed.
Repair your system
If nothing else works, the best way to get rid of the error is by simply reinstalling or repairing your OS.
The Windows Media Creation tool is a great way to install Windows and repair the OS. Using this, you can perform a clean installation or repair your OS without affecting your data.
You can download the Media Creation Tool here
Also read: Windows Resource Protection could not perform the requested operation: 5 Fixes


