Most of us have faced a ‘DNS probe finished no internet’ issue while browsing the Internet on any browser. And once received, you cannot use the Internet on your system, no matter how and whatever site you try. In such scenarios, it becomes necessary to get rid of this issue as soon as possible.
Before diving in, first, let’s understand what a DNS is? DNS stands for Domain Name System. Every website that you visit has a name, like Google or Amazon, or Candid.Technology and you use this name to access the website.
However, IP addresses are used by the browser to access the internet. These IP addresses are hard to remember for a human, and hence, DNS takes over. It takes care of mapping the website name that you give to its IP address.
In this article, we’ve covered how you can get rid of this issue and get access to your internet back.
Also read: Fix for ‘This site can’t be reached’ error on Chrome.
What causes the DNS probe finished no internet issue?
‘DNS probe finished no internet’ issues come when there is a problem in your DNS server. Since there is a problem with your DNS server, it cannot map the domain name to the equivalent IP address. Hence, leaving you with no internet error message.
Fixes for ‘DNS probe finished no internet’ issue
To access the internet, you need to remove the ‘DNS probe finished’ issue. Coming up next, we will discuss few ways to get rid of the error.
Reboot your router
First, try unplugging and plugging back your router after waiting for 5 mins. Once your router is up and running, then try to load some websites.
Then, use the URL given to you for your router and log in to your account. Go inside the System settings and choose Reboot.
Clear DNS Cache of your browser
At times, a buggy DNS cache can redirect your browser to the wrong site and hence cause this error. You can try clearing Chrome’s DNS cache to see if the issue gets resolved.
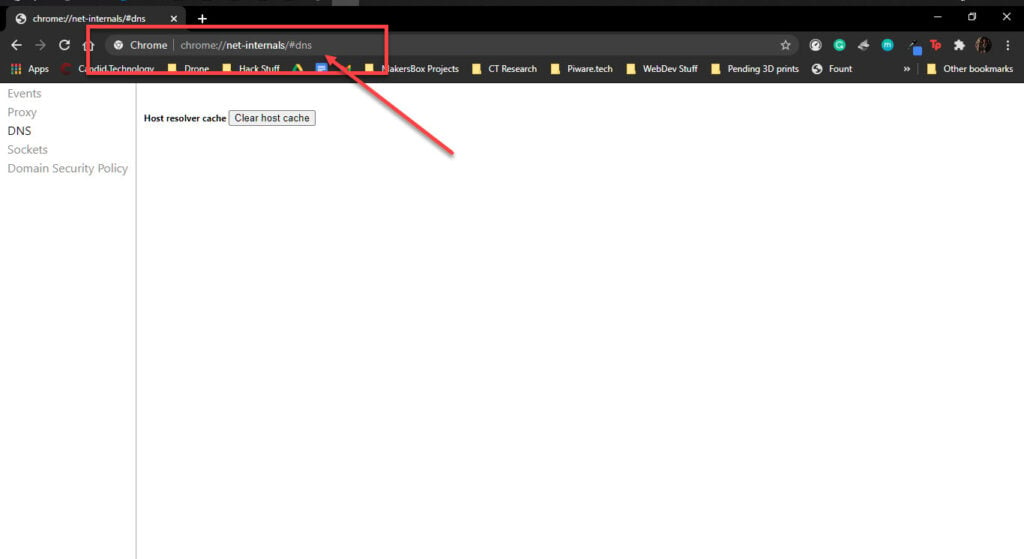
Step 1: Fire up Chrome and head over to chrome://net-internals/#dns.
Step 2: Click on the Clear host cache button to clear out your DNS cache.
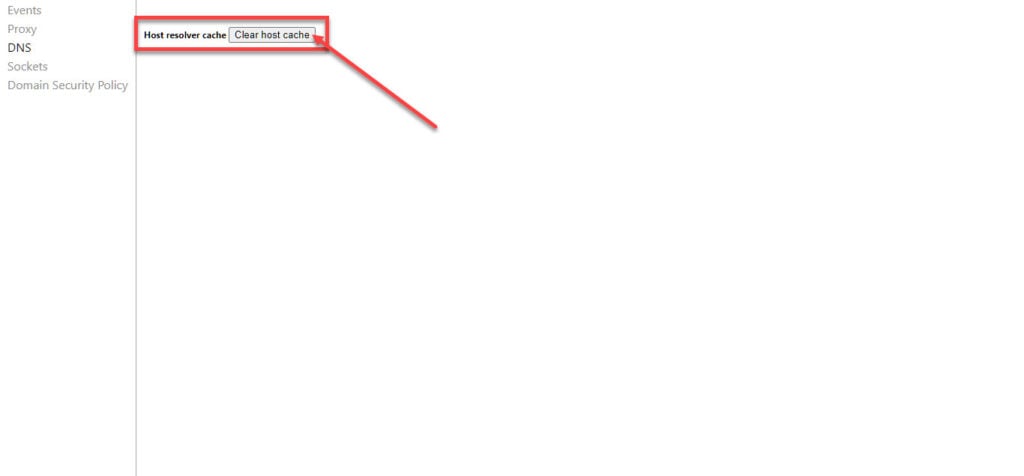
Restart the browser and try to access the site you were having issues with again.
Also read: Fix for ‘DNS probe finished NXdomain in chrome’.
Use command prompt to flush DNS
You can flush your existing outdated DNS using the command prompt.
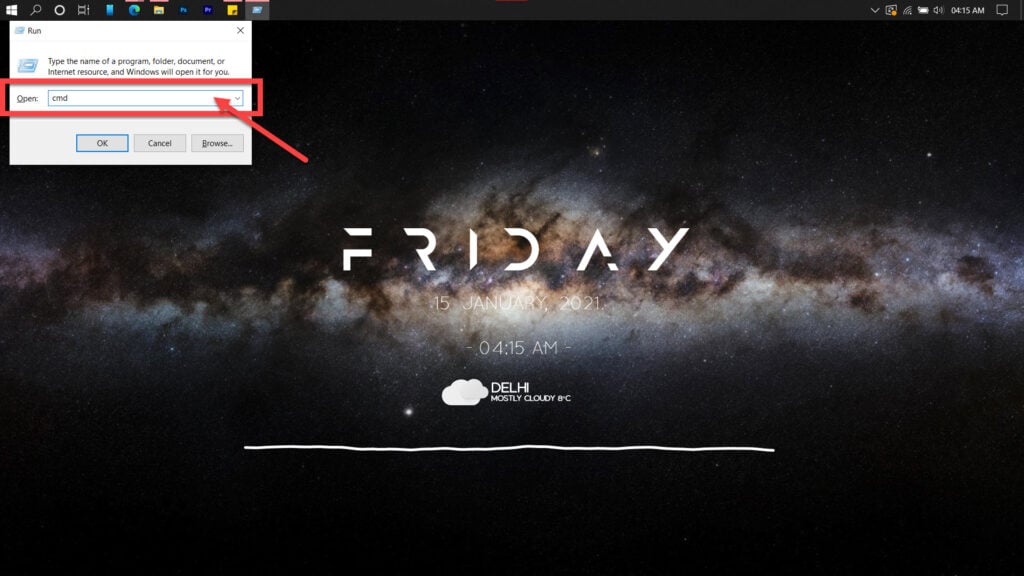
Step 1: Press Windows key + R and type in cmd, and hit enter.
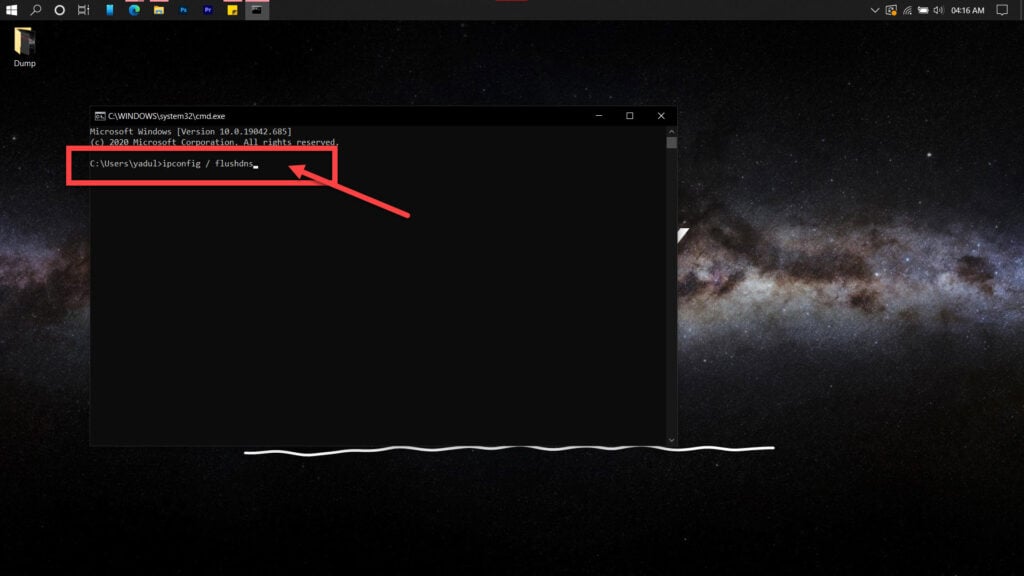
Step 2: Type in ipconfig /flushdns to reset DNS settings to default.
Update your browser
Update your browser once, and see if the issue or gone or is still persistent. You can also try reinstalling your browser again.
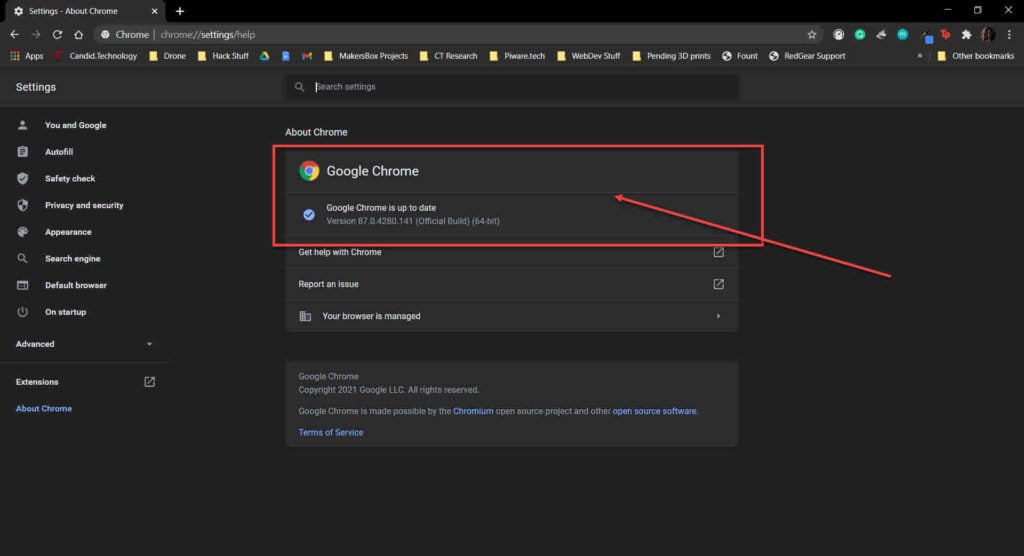
Sometimes, the firewall and antivirus application present in your system can also block some websites. You can also check if the issue is because of the application or not. However, it is recommended to not turn off the firewall and antivirus system, as doing so can expose your system to malicious software.
Try another DNS
There are multiple free DNS providers using whom you can fix this issue. In this example, we’re going to use Google’s DNS.
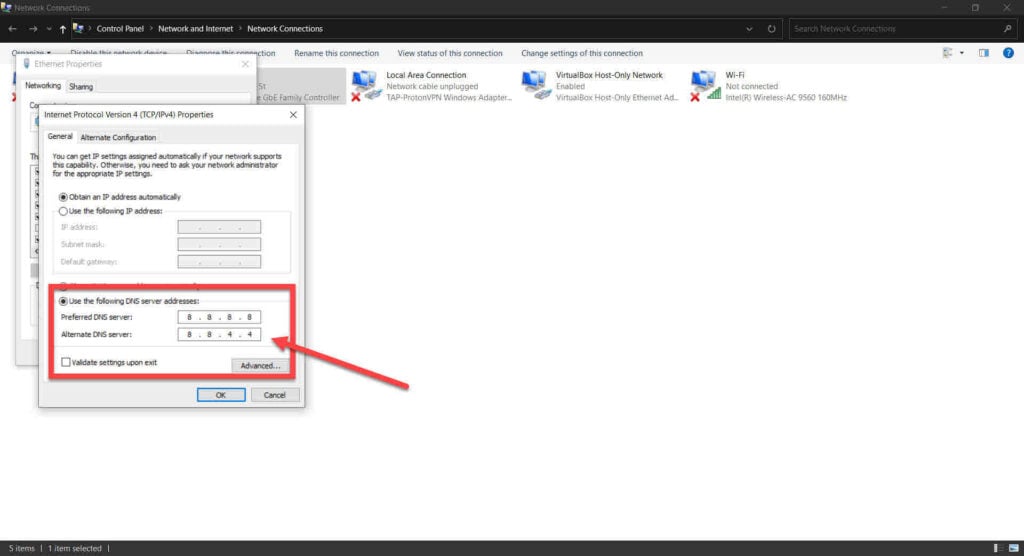
Step 1: Press Windows key + I to open the Windows settings and click on Network & Internet.
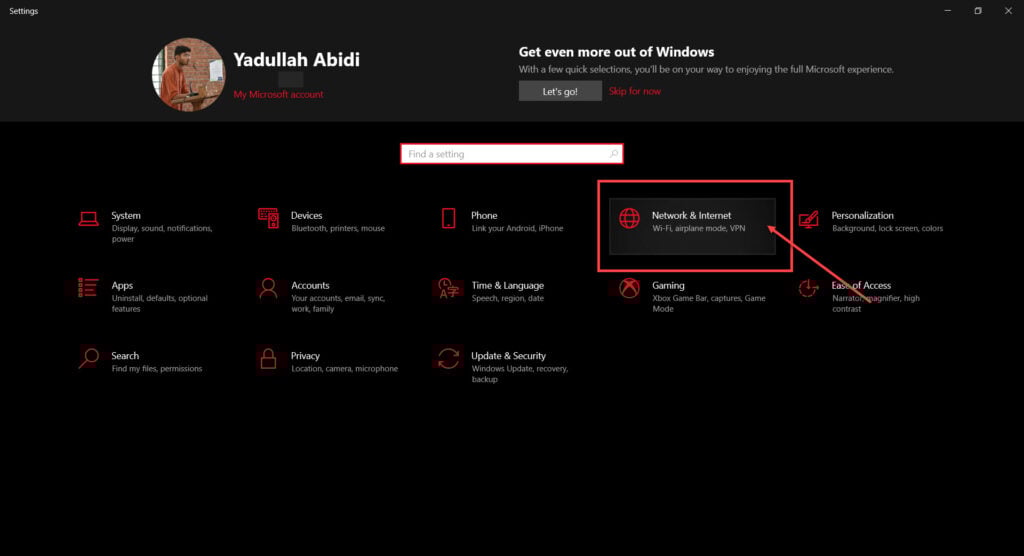
Step 2: Click on Change adaptor options.
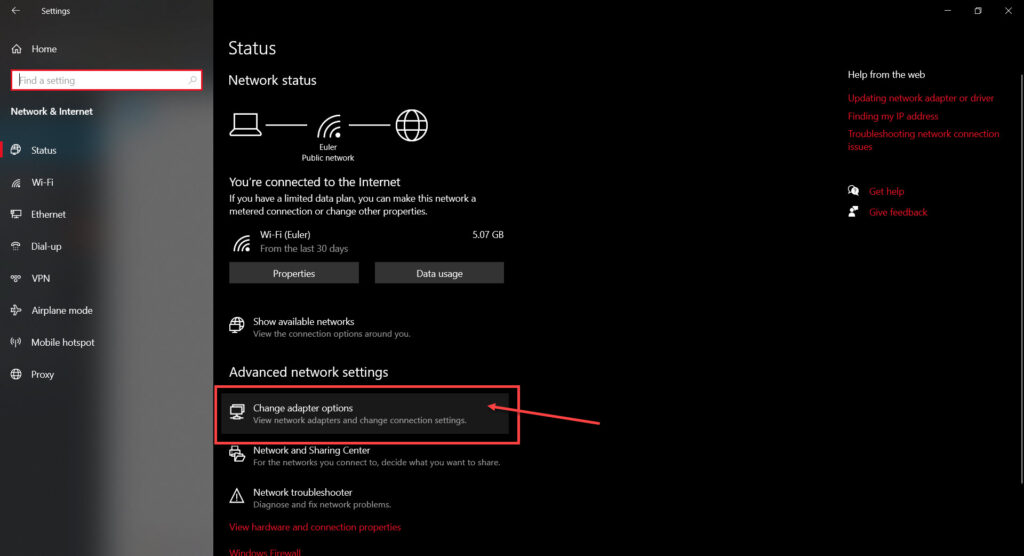
Step 3: Right-click on your active network (WiFi or LAN) and click Properties.

Step 4: Find Internet Protocol Version 4 in the list, click on it and then click Properties.
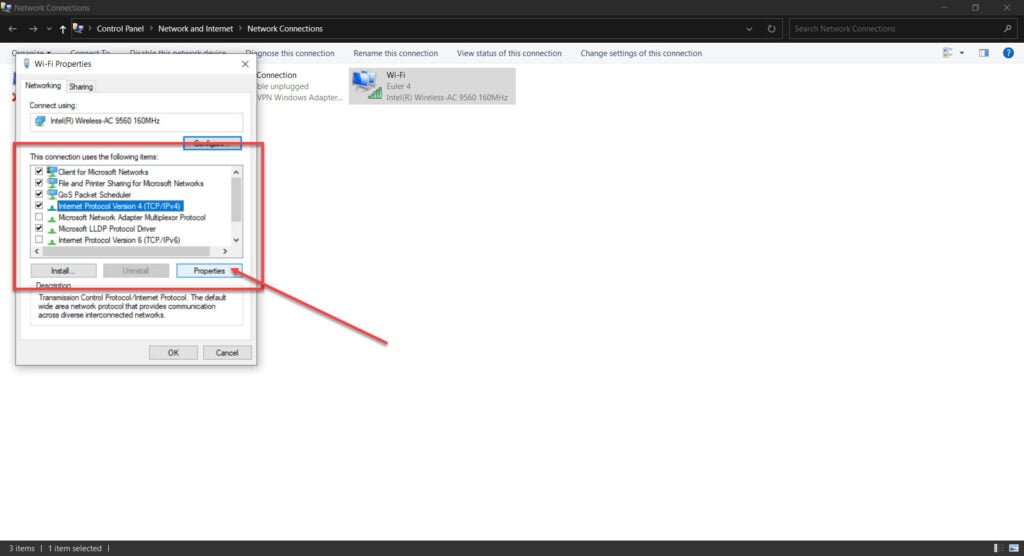
Step 5: Check the Use the following DNS server addresses radio button and type in 8.8.8.8 and 8.8.4.4 in the preferred and alternative DNS addresses, respectively.
Also read: How to hide tabs in Chrome?
Clear your browser’s data
Corrupt files in your cache or otherwise can cause this error as well. Clear them out to see if you can get Chrome to work.
Step 1: Type in chrome://settings/clearBrowserData in your browser’s address bar and hit Enter.
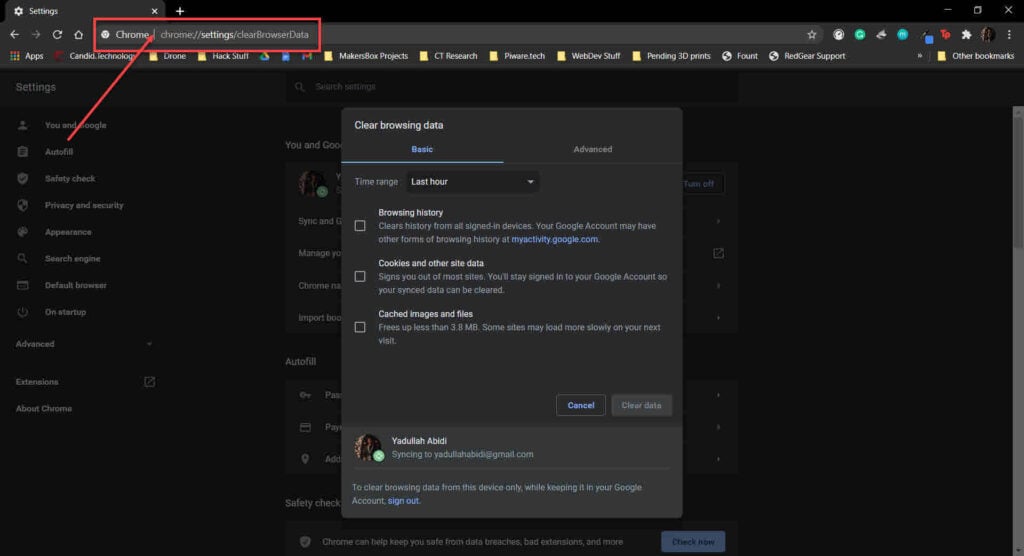
Step 2: Select the cache and cookies options and ensure the Time range is set to All time. Click on the Clear now button to clear out all the data.
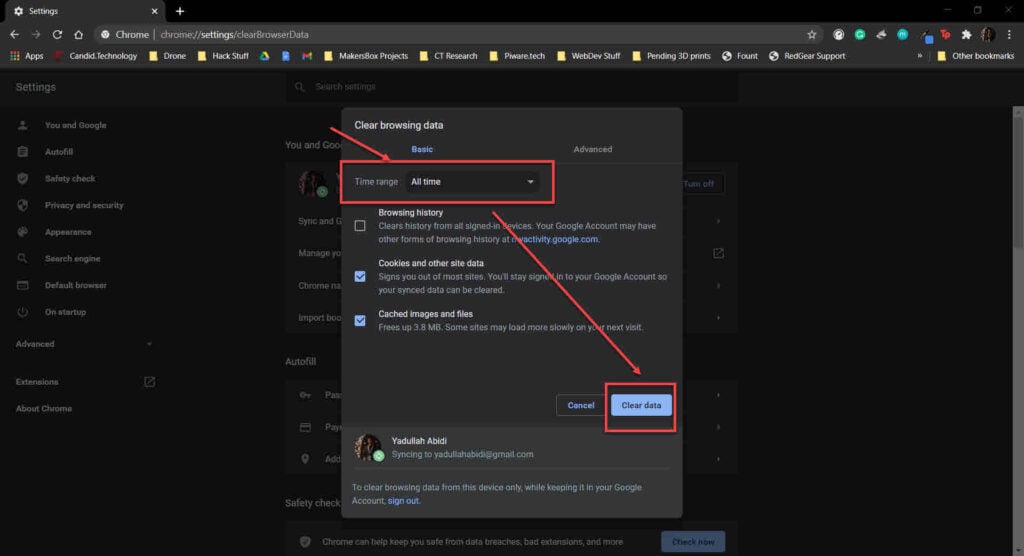
Now restart the browser and try again.
Reset your browser
Resetting Chrome can fix all sorts of random bugs and glitches with the browser.
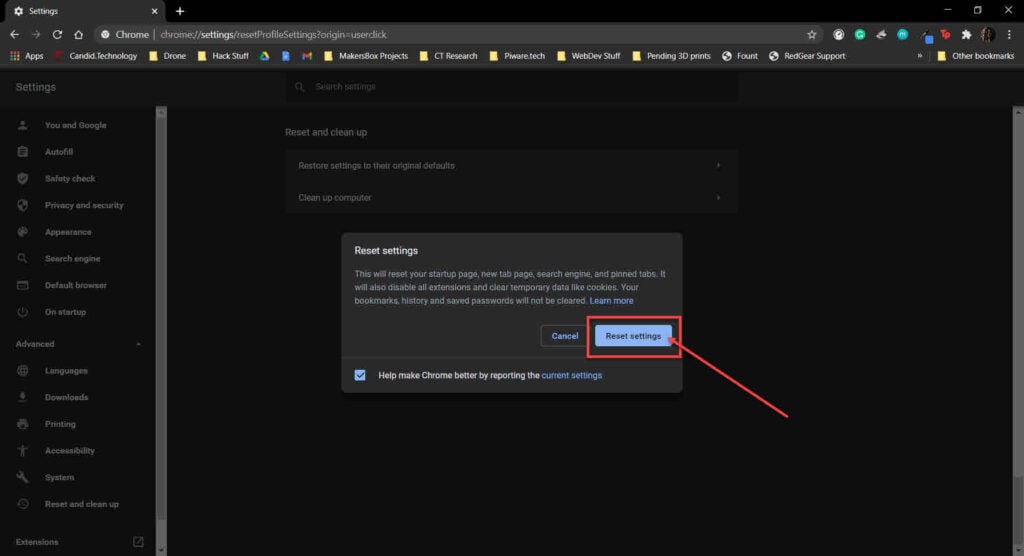
Step 1: Head over to chrome://settings/reset. Click on Restore settings to their original defaults.
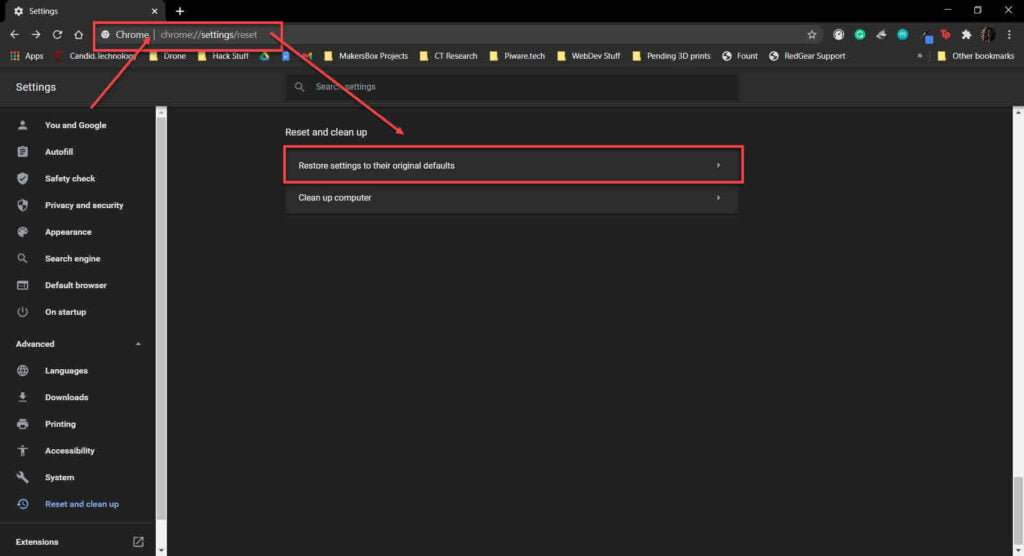
Step 2: Chrome will show you a warning prompt. Click on Reset Settings, and your browser will reset to default settings.
Also read: 25 Best DNS servers for PS4


