Apple and Windows products have never gotten along well, and while the tech bigwigs seem to be making progress in this direction, it shouldn’t be news to you if an error shows up on iTunes for your Windows PC while trying to connect your iPhone, iPad or iPod.
One of the most common errors while connecting iPhone to Windows 10 PC is iTunes error 0xE800000A. If you also see the message: “iTunes could not connect to this iPhone, an unknown error occurred (0xE800000A)”, here we’ve listed eight ways to fix the issue.
Disconnect your iPhone from the Windows PC and start going over the methods listed below until the iTunes error is fixed.
Restart your PC and iPhone
Restarting your device can go a long way in fixing a lot of issues you might be having. A simple restart can help clear any cache files or background processes that might be hindering iTunes from running smoothly.
Moreover, since it’s one of the most elementary ways to fix the iTunes error 0xE800000A, we recommend that you try restarting your iPhone and Windows PC before moving on to the relatively more complex fixes.
Also read: How to fix the ‘Screen Recording Not Working’ issue on iPhone and iPad?
Update Windows, iOS and iTunes
If a restart doesn’t fix the issue, you should consider updating your Windows PC, iOS, and iTunes. Updates could address specific bugs that could be causing software or hardware incompatibility issues and potentially fix the iTunes error 0xE800000A.
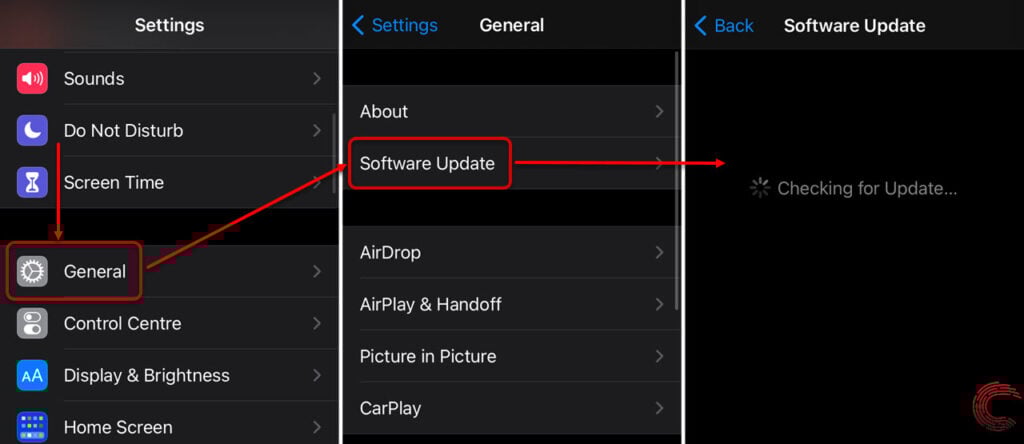
You can find our guide to update Windows 10 here. Follow the steps mentioned below if you want to update your iPhone.

- Tap on General.
- Then tap on Software Update.
- If an update is available, you’ll see that on the next page.
- Tap on Download and Install to proceed.
You’ll need the Apple Software updater to download and install an update for iTunes.
Updating the iTunes, iPhone and Windows can mostly fix the “iTunes could not connect to this iPhone” issue for you too, as it has for many online.
You can also check out our guide here to update your iPhone or iPad using iTunes.
Reset location and privacy settings
If the iTunes error 0xE800000A pertains, you can also try resetting the location and privacy settings on your iPhone, which keeps of track of your app permissions.
Go to your iPhone or iPad’s settings and follow the steps mentioned below to do so.

- Tap on General.
- Scroll down on the next page and tap on Reset.
- Then tap on Reset Location & Privacy
Once you reset the location and privacy settings, apps will request location permission again.
If you want to know what happens when you reset your iPhone or iPad and what the different reset options mean, check out our guide here.
Also read: How to fix ‘Safari Can’t Find Server’ issue?
Reset the lockdown folder
The Lockdown folder contains all the security and trust certificates required for iTunes and your iPhone to establish a secure connection on Windows 10. Resetting the Lockdown folder can also fix iTunes error 0xE800000A.
Follow the steps below to rename the existing Lockdown folder and then connect our iPhone to the PC and iTunes will create a fresh copy of the Lockdown folder.
Step 1: You can either launch the Run prompt (Windows + R keys), type %ProgramData% and hit Ok to open the folder, or go to C:/ drive and unhide folders to find and select the ProgramData folder.
Step 2: In the ProgramData folder, click on Apple.

Step 3: On the next page, right-click on Lockdown folder and select Rename from the list of options.

Step 4: Then rename the Lockdown folder to Lockdown.fix or anything else that pleases you.

We’re renaming the folder instead of deleting it to ensure that you’ve got a backup copy of the older security and trust certificates, in case a new Lockdown folder isn’t created.
When you reconnect your iPhone to the PC, a prompt will appear; click on the Trust button there, and a new Lockdown folder will be created.
Disable antivirus
Antivirus apps can often hinder the connection between iTunes and iPhone. To see if your antivirus software is causing the “iTunes could not connect to this iPhone” error or not, pause it temporarily from the taskbar and see if it fixes the iTunes error 0xE800000A.

If it does, go to the antivirus’ firewall settings and add iTunes to the list of exceptions.
Also read: 10 ways to fix the ‘Snapchat Camera Not Working’ error
Reinstall iTunes
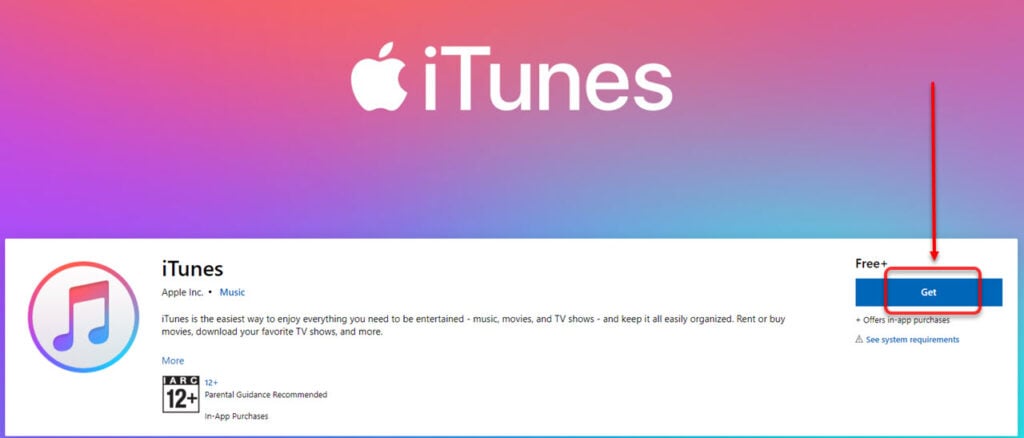
Follow the steps mentioned below to uninstall iTunes. If you need a setup to reinstall the app, you’ll find it here.
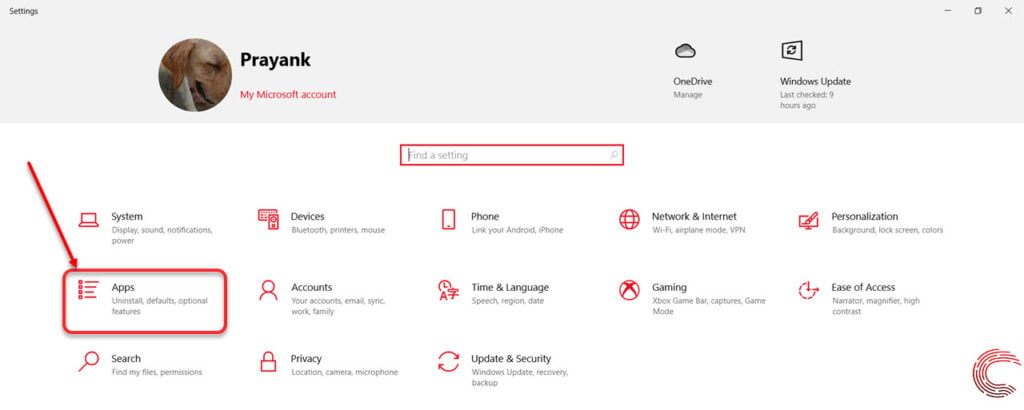
Step 1: Click on the Start icon (at the bottom-left) or press the Windows icon on your keyboard. Then select Settings.

Step 2: On the settings page, click on Apps.

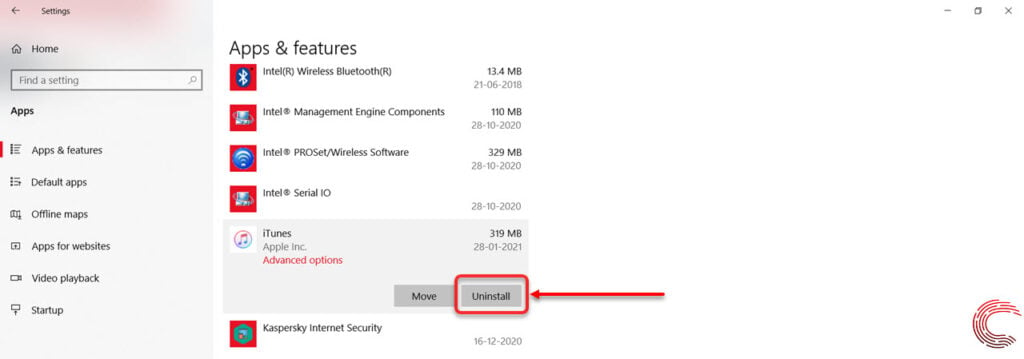
Step 3: Then on the next page, scroll down to find iTunes; select it and then click on the Uninstall button.

In addition to iTunes, you’ll also need to remove the following apps: Apple Software Update, Apple Mobile Device Support, Bonjour, and Apple Application Support (32-bit, 64-bit).
Reinstall iTunes here
Use Windows Store version of iTunes
If the iTunes error 0xE800000A still doesn’t get resolved, it could be due to the iTunes version you’re using. Try installing iTunes from the Windows Store to see if that fixes the issue.

While the Windows Store version is the same as the regular iTunes download, it reportedly has better overall compatibility with Windows 10 builds.
Restart Apple Mobile Device services
If nothing else works, you can also try restarting the Apple Mobile Device services by setting it to automatic by following the steps mentioned below.
Step 1: Open the Run prompt (Windows + R keys) and type services.msc Then click on the Ok button.

Step 2: Now on the Services page, find AppleChargerSrv, right-click and click on Properties. Then switch the service to automatic and click on Start. Click on Ok to save the settings.

Also read: 11 ways to fix Netflix error code NW-2-5


