Macs are known for their user-friendly interfaces and powerful features, including the ability to hide files. Whether you’re looking to protect sensitive information or keep your desktop clutter-free, learning how to hide files on your Mac can be valuable.
Want to hide files on Mac? Here we’ve discussed four methods to help you hide your files on your Mac.
Hide files using Keyboard shortcuts
If you like working with keyboard shortcuts to get your work done quickly and efficiently, then follow the below steps to hide your files on Mac using the keyboard shortcuts:
Step 1: Select the files you want to hide on your Mac.
Step 2: Press the Shift + CMD +Period (.) keys simultaneously to hide the files.
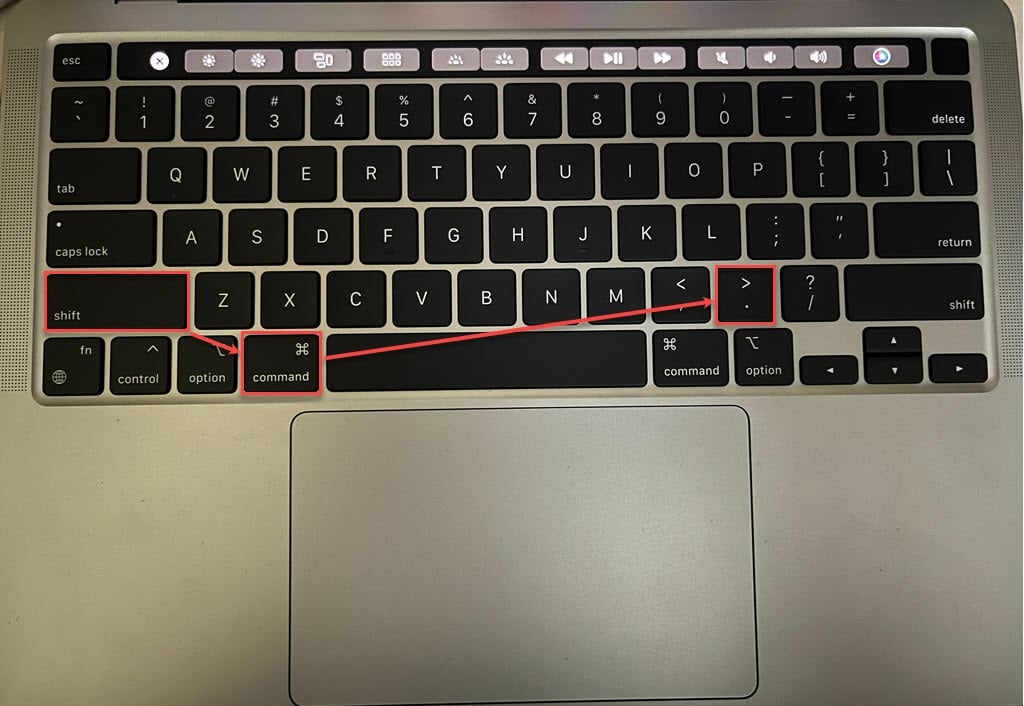
This method doesn’t just make your files disappear; it also comes in handy when you need to see those hidden files again. Follow the same steps by pressing the three keys to reveal hidden files.
Also read: How to add widgets to Mac?
Use FileVault
On your Mac, you have a built-in feature called FileVault, which encrypts files with a password and only the users who know the password can access those files. To use the FileVault to hide the files on your Mac, follow the steps below:
Step 1: Click on the Apple icon at the top left corner of the screen, and then in the dropdown menu, click on the System Settings option.
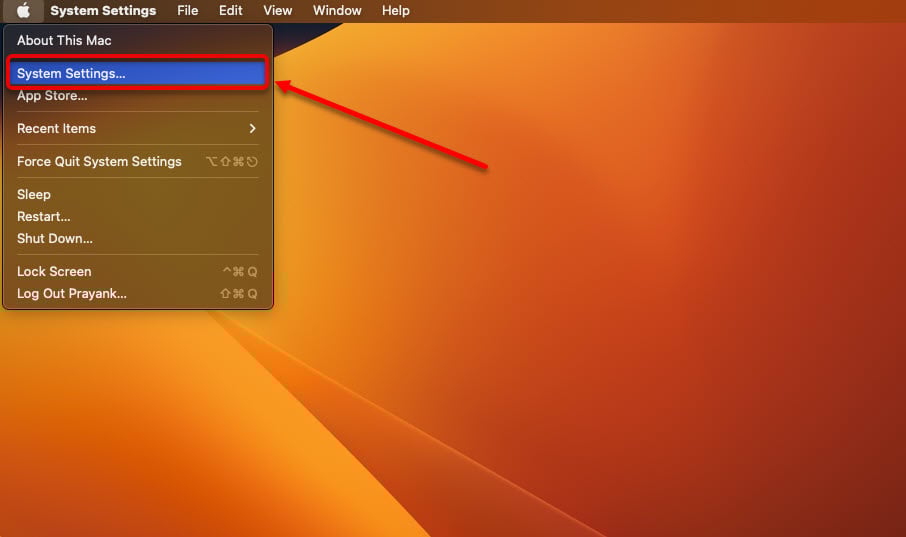
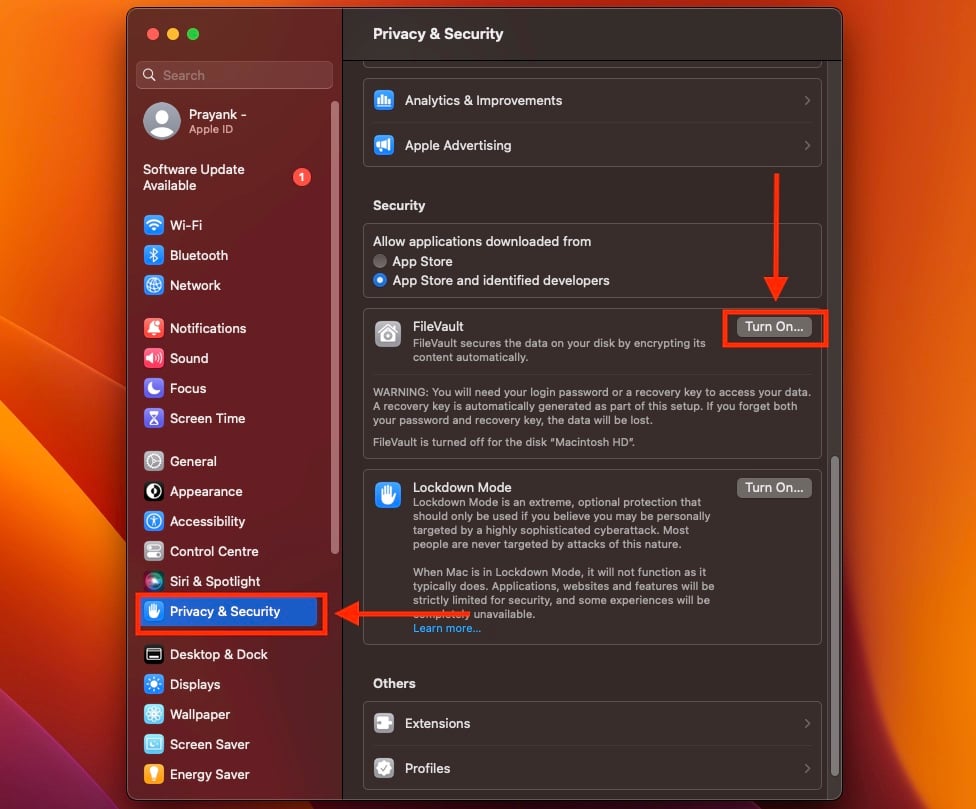
Step 2: Click on the Privacy & Security option in the sidebar, and then on the right side of the screen, scroll down and click on the Turn on button beside FileVault.
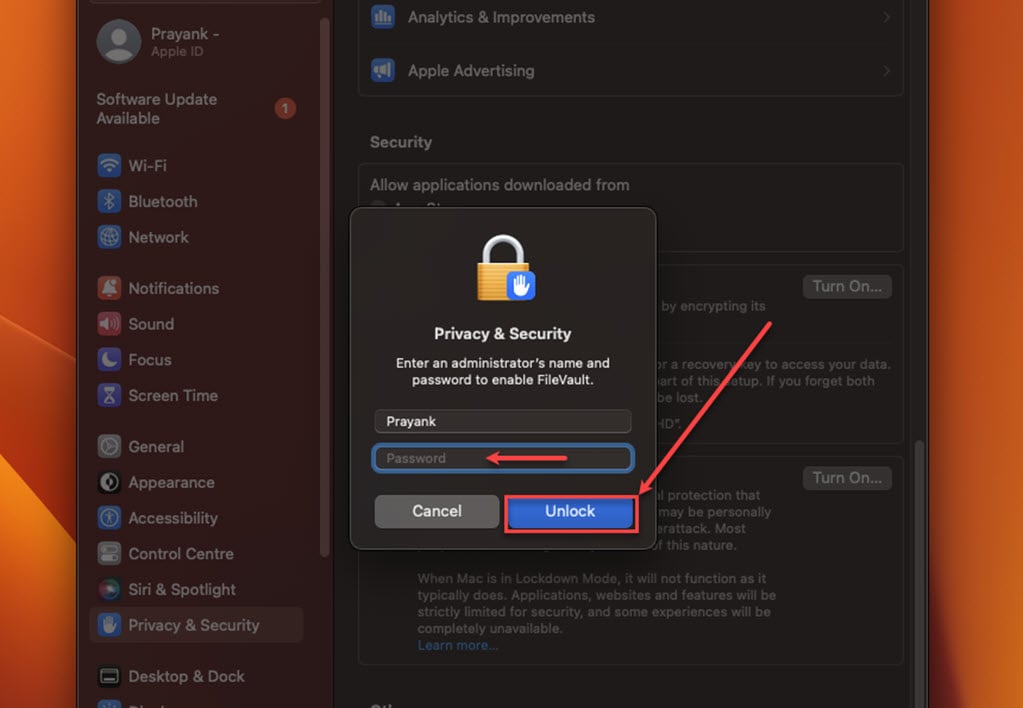
Step 3: Enter your password and click on the Unlock button.
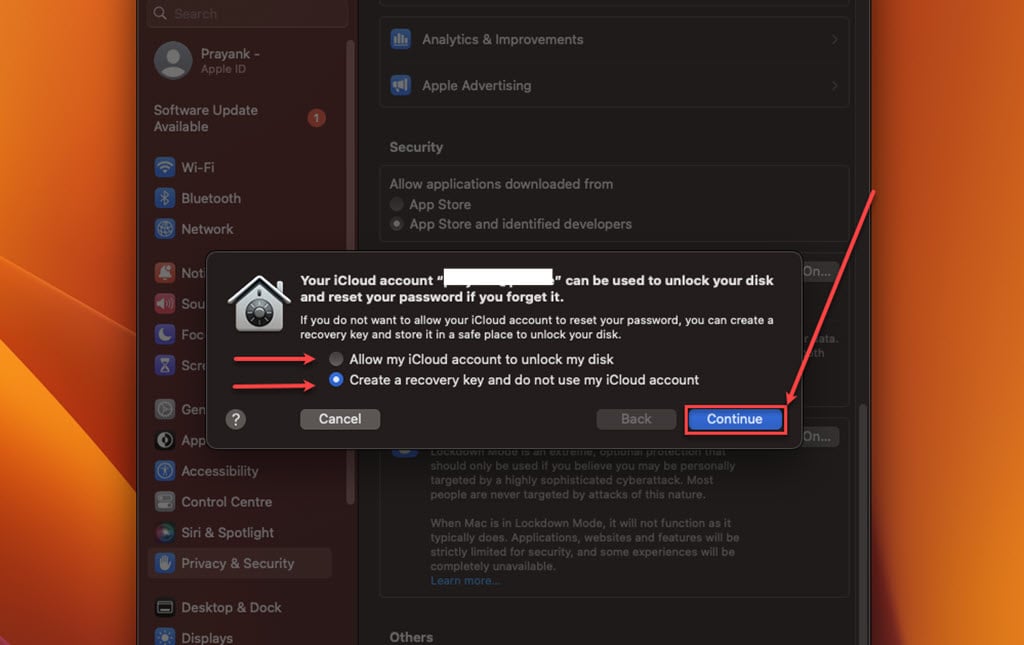
Step 4: Now, choose the recovery method and click the Continue button.
- Choosing the Allow my iCloud account to unlock my disk option will start the encryption process automatically.
- Choosing the Create a recovery key and do not use my iCloud account option will generate a recovery key. You must save the recovery as you cannot access the files without this recovery key and the password.
Also read: How to play Windows games on a Mac?
Use Terminal to hide files
You can also use the terminal to hide files on your Mac. To do that, follow the steps below:
Step 1: Open Finder, click the Applications option in the sidebar, and then click on the Utilities folder.

Step 2: Double-click on the Terminal.

Step 3: In the Terminal, type the command chflags hidden, add a space after the command, drag and drop the files, and then hit Enter.
Unhide files through the Terminal
To unhide files, follow the steps below:
- Step 1: Launch the terminal and type the command defaults write com.apple.finder AppleShowAllFiles -boolean true; killall Finder and hit Enter.
- Step 2: The icons of the hidden will appear, but they will appear faded.
- Step 3: To unhide them, launch the terminal again and type the command chflags nohidden, add a space and then drag and drop the hidden files and hit Enter.
Use third-party apps
Many third-party apps are available that can hide your files on Mac. The above-explained steps can do the work, but for some users, they can be a bit of a hassle. If you hide your important files often, third-party apps like Parallels Toolbox can help you save time and simplify the hiding process.
The Parallels discount code above only applies until November 5 on the full-license or first year of subscription.
Also read: How to turn keyboard light on Mac?


