Cropping an image on a Mac is a simple and powerful technique that allows you to trim and enhance your visuals. Whether you want to highlight a special moment in a photo or resize an image for a project or to, focus on a specific part of an image, or remove unwanted areas, Mac’s built-in tools make the process easy and simple.
In this article, we discussed the steps of cropping an image on a Mac through the Preview and Photos apps.
Also read: How to print from a Macbook?
Cropping an image using the Preview app
The Preview app on Mac is incredibly versatile. It can open and crop various image and document formats like JPG, GIF, PNG, and TIFF. It can even crop Photoshop PSD files without needing Photoshop itself. To crop an image through the preview app, follow the steps below.
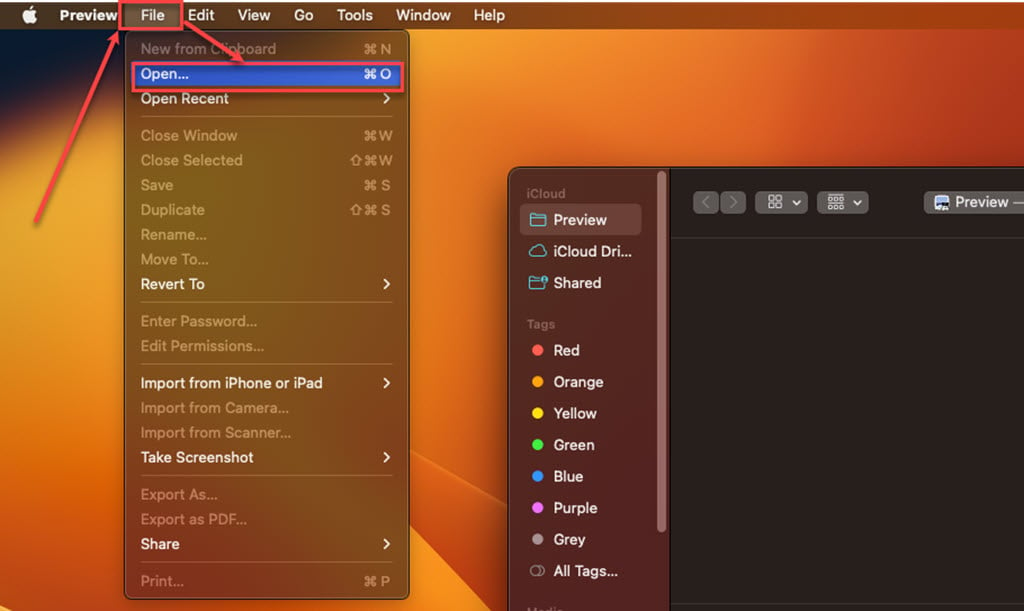
Step 1: Open the Preview app on your Mac and click on the File tab to open the file menu; then, click on Open in the dropdown menu.

Step 2: Browse through the files and choose the image that you want to crop, and click on the Open button at the bottom right corner of the screen.

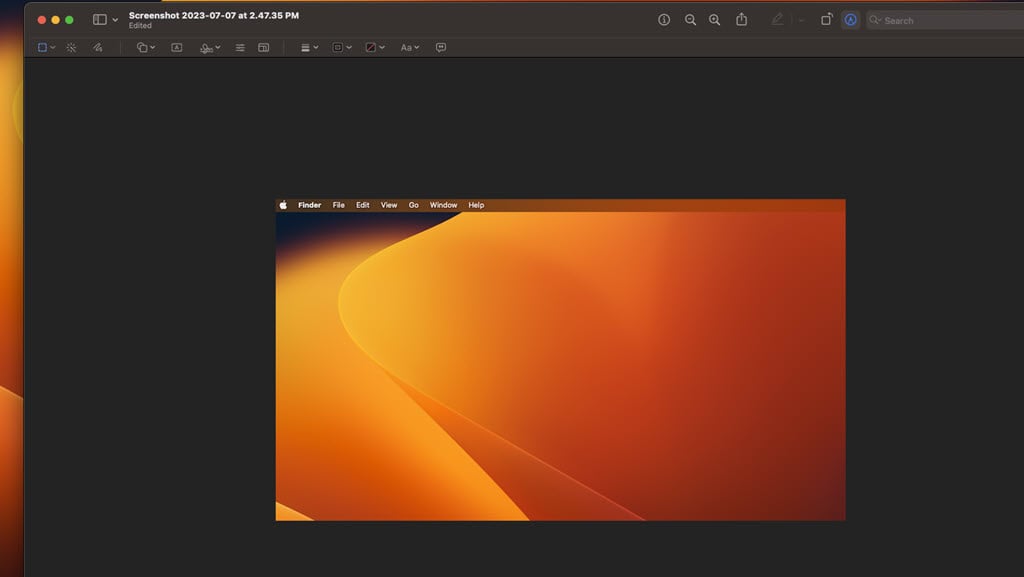
Step 3: Select the Markup tool at the top of the Preview window beside the Search bar.

Step 4: Select the area on the image you want to crop by clicking and dragging your mouse or trackpad pointer.

Step 5: After the selection, a Crop button will appear; click on it to apply it.

Also read: How to delete bookmarks from Mac?
Cropping an image from the Photos app
To crop an image on Mac using the Photos app, follow the steps below.
Step 1: Open the Photos app on your Mac, locate the image you want to crop and double-click on it to open it.

Step 2: Click the Edit button at the window’s top right corner.

Step 3: Click on Crop at the top of the window and drag the corners of the frame as per your need. Once cropping the image, click the Done button at the window’s top right corner.

Also read: How to get the upside-down question mark on Macbook?


