SSDs are almost a must these days. The faster data transfer speeds are necessary to keep up with the latest PC hardware. Not to mention if you have an HDD as your boot drive, it will take ages to get your computer started.
Installing an SSD in your PC is as simple as ever; all you have to do is access the slot, slide the SSD in and secure it in place with a screw. That said, sometimes, your motherboard might not detect the SSD even after you’ve properly inserted it in the slot.
In this article, we’re looking at what to do when your M.2 drive isn’t showing up in the BIOS or your OS.
Also read: SSD unable to initialise: 4 Fixes
Check the drive
The first thing you should do is check to see if the drive is properly attached. A lot of times, the drive wouldn’t be inserted all the way inside the slot, causing an improper connection which can lead to this error. Also, check if you’ve properly secured it with the M.2 drive screw.
Set up your BIOS
If your BIOS is set up incorrectly, chances are your SSD drive won’t be detected. Ensure your SATA configuration is set to IDE instead of RAID or AHCI. Additionally, if you have the option for adjusting the PCI Express X4_3 slot bandwidth, make sure it’s set to M.2.
Initialise the SSD
Another thing you can do to get the SSD to show up in Windows is to initialise the drive. The easiest way is to open the Run prompt by pressing the Windows key + R and typing compmgmt.msc.
Once the tool is running, it’ll ask you to initialise the SSD before the Logical Disk Manager can access the drive. Once the initialisation is complete, your SSD should start working as expected.
Update your drivers
Out-of-date or corrupt drivers can also cause numerous hardware problems leading to such errors. If you haven’t updated your drivers in a while, now’s the time to do so.
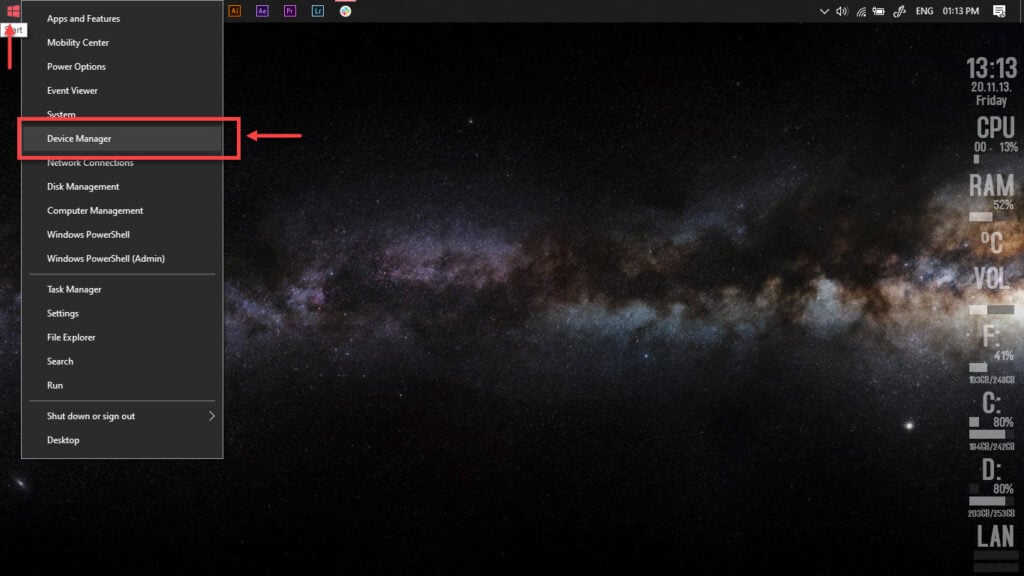
Step 1: Right-click Start and select Device Manager from the menu.
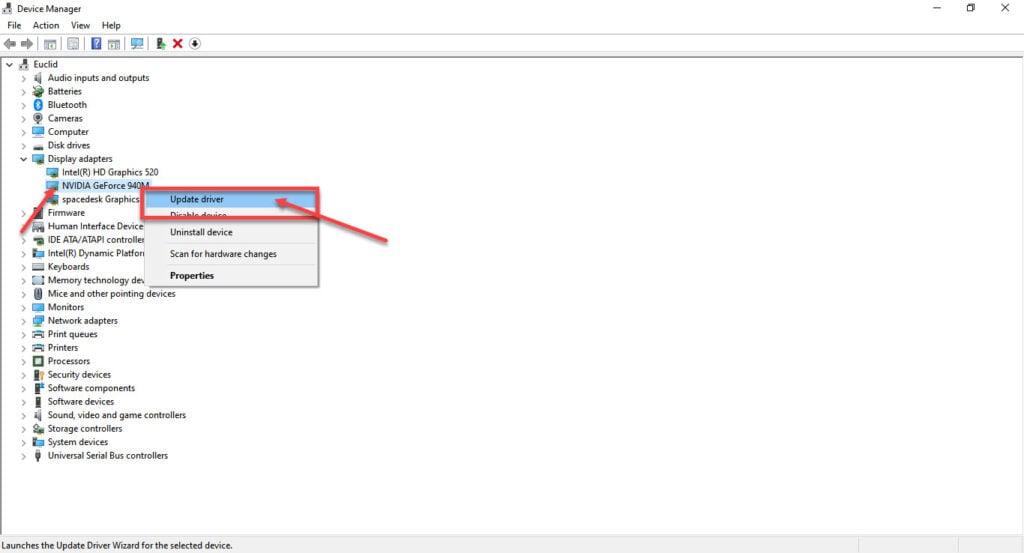
Step 2: Under Disk Drives, find your storage drive, right-click it followed by Update driver.
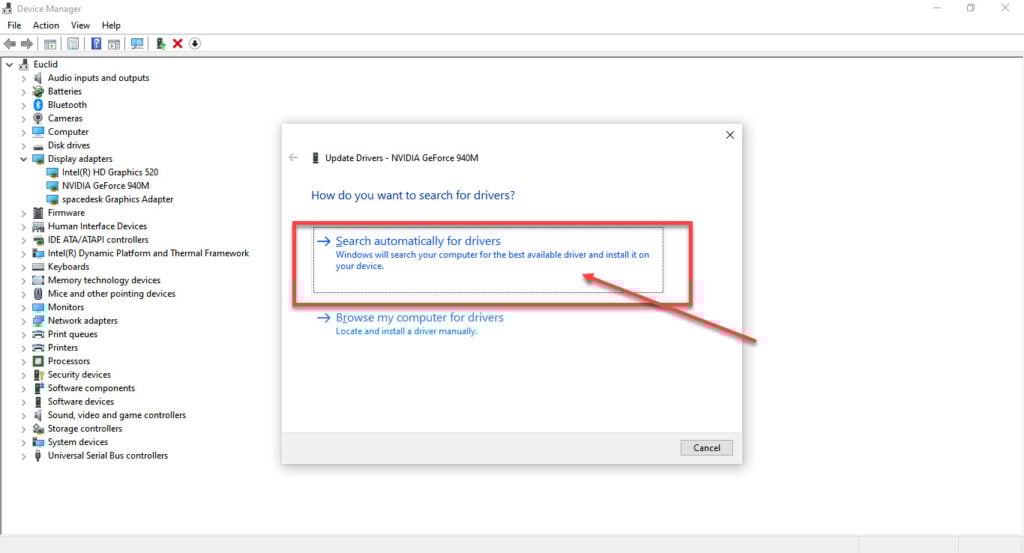
Step 3: Click on Search automatically for drivers. Windows will then automatically look for and download the latest drivers.
While this should help resolve the error, in case it doesn’t, click Uninstall device and restart your PC to force Windows to install the required drivers. You can then update them later.
Run the Windows hardware troubleshooter
Windows comes with a few handy troubleshooters that can resolve a bunch of issues. However, for some reason, Microsoft has removed the hardware troubleshooter from the troubleshooter’s menu. So here’s an alternative way to run the hardware troubleshooter.
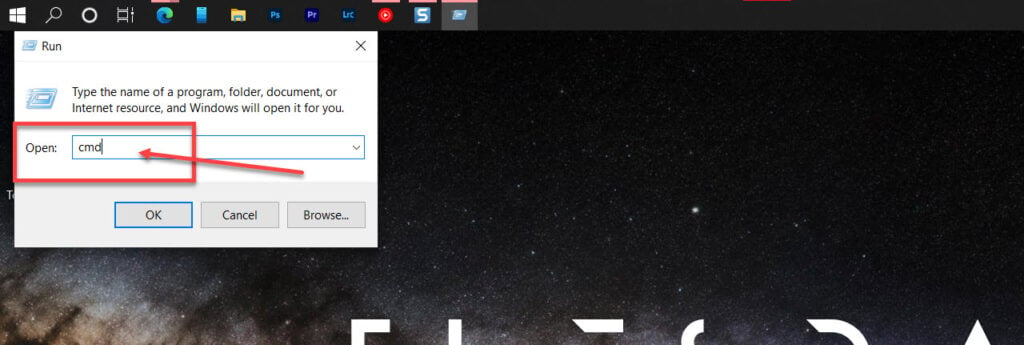
Step 1: Press the Windows key + R to open the Run prompt. Type cmd and hit enter.
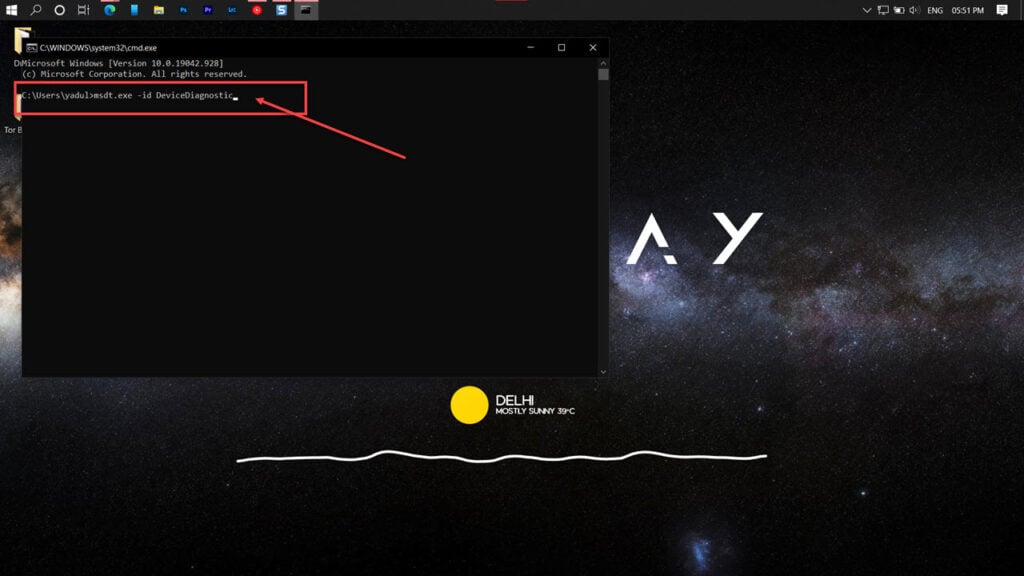
Step 2: Type msdt.exe -id DeviceDiagnostic and press enter. This will launch the hardware troubleshooter.
Proceed along as instructed by the troubleshooter.
Change the drive letter
Each drive connected to your PC is assigned a drive letter by default. If your card didn’t get one for some reason, it wouldn’t show up in Windows Explorer.
Step 1: Press Windows Key + R to open the Run prompt. Type diskmgmt.msc and hit enter.

Step 2: Find your SD card reader, right-click it followed by Change Drive Letter and Path.

Step 3: Click on Add, and you’re good to go.

Also read: Scanning and repairing drive stuck at 100: 7 Fixes


