PhonePe is an Indian digital payments platform that acts as a Unified Payments Interface (UPI). It lets users easily connect their bank accounts and transfer money, pay bills, and shop online, from their smartphones. Due to its easy-to-use interface and strong security features, PhonePe has become a popular choice for millions of people in India.
In this article, we have discussed the steps to create an account on PhonePe and how to add your basic info on PhonePe.
Also read: How to use the money in PhonePe’s wallet?
How to create a PhonePe account?
Creating a PhonePe account is simple and easy. To create an account on PhonePe, you need a phone number. Follow the steps below to create an account on PhonePe.

- Install the app from the app store on your phone and then open it.
- Ensure to enter the mobile number registered with your bank account and present the mobile through which you created the account. Otherwise, you won’t be able to use the UPI on PhonePe. After entering the phone number, click on Proceed button.
- PhonePe will auto-read the SMS; if it can’t, enter the OTP and click the Verify button.
Add your name and address to complete the basic information of your profile
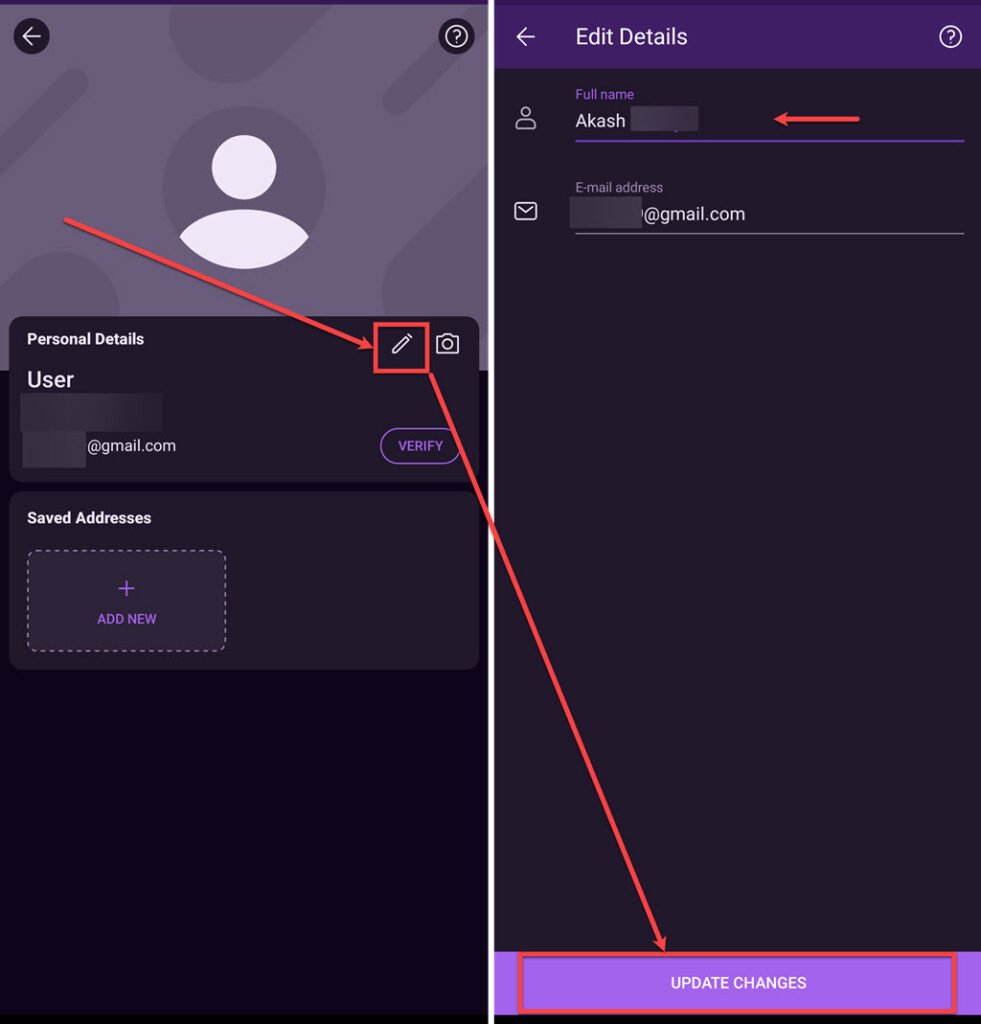
Add your name on PhonePe
To add your name on PhonePe, follow the steps below.

- Tap on the Profile icon at the screen’s top left corner.
- Tap on User, which is your username.
- Tap on the Edit (Pencil) icon.
- Change your name in the Full name field, then tap the Update Changes button.

Also read: How to add another bank account in PhonePe?
Add your address
To add an address on PhonePe, follow the step below.

- Tap the Add Address option beside the Profile icon and then follow the on-screen instructions.
Also read: Google Opinion Rewards explained


Good Article…