Switching from Gmail to Protonmail is smart for those prioritising privacy and security. Protonmail, based in Switzerland, offers end-to-end encryption, ensuring your emails are protected from prying eyes.
If you’re ready to make the transition, here’s a step-by-step guide to help you transfer your data from Gmail to Protonmail seamlessly. You can watch the video below or continue reading the article.
Also read: How to change your Gmail name?
Why switch to ProtonMail?
Before diving into the transfer process, it’s essential to understand why many users opt for Protonmail:
- Privacy and Security: Protonmail offers end-to-end encryption, ensuring that only you and your intended recipient can read your emails.
- Open source: Protonmail’s code is open source and publicly available for inspection, providing transparency.
- Data sovereignty: Protonmail is based in Switzerland, a country known for its strong privacy laws.
Steps to transfer your data from Gmail to ProtonMail
Protonmail offers a built-in tool called Easy Switch that simplifies the transfer process. Here’s how to use it:
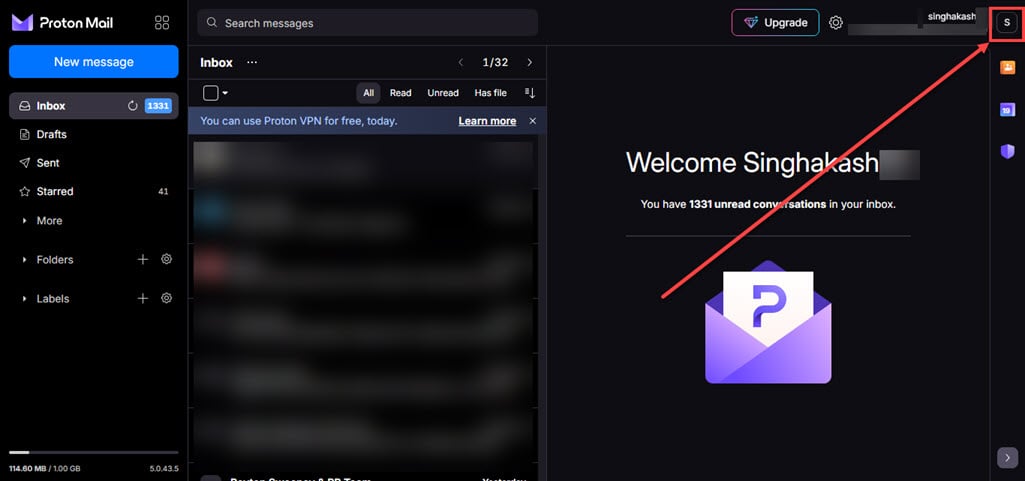
Step 1: Open the Protonmail and click on the Profile icon at the top right corner of the screen.
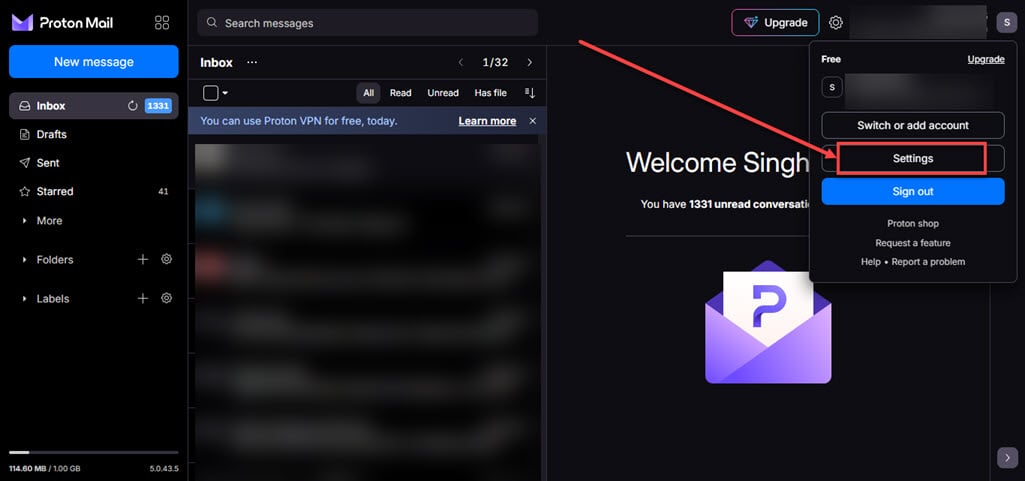
Step 2: Click on the Settings option.
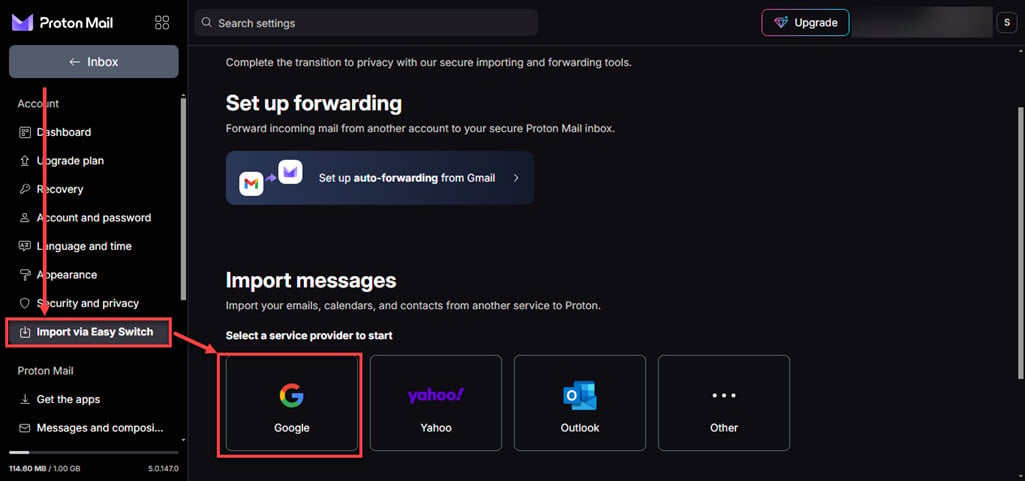
Step 3: Click on the Import via Easy Switch option available in the sidebar and then on the right side click on the Google tab available under the Import messages section.
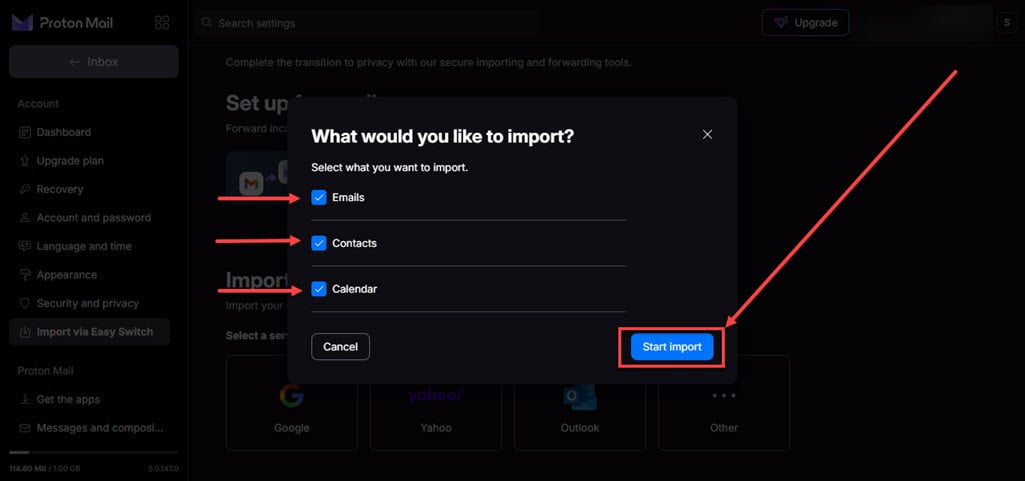
Step 4: Now, choose what you want to import, all the options are selected by default. If you don’t want to import something, uncheck the box beside the option. After you are done click on the Start Import button.
Step 5: It will show you a message that you need to sign in and grant access to your data, click on the Continue button.

Step 6: It will take you to the log-in page, choose the email from which you want to import data to protonmail.
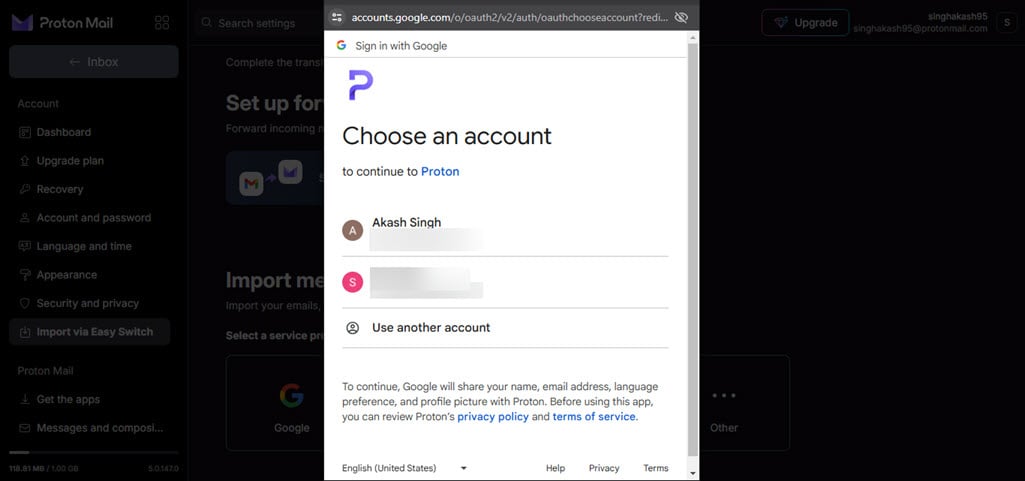
Step 7: Click on the Continue button.

Step 8: It will ask you to grant permissions to protonmail, check mark the permissions and click on the OK button.

Step 9: You can customise various things related to your data, change the settings if you want to and then click on the Start import button.

Step 10: Your data will start importing from your Gmail account to your Protonmail account. Once the importing is complete they will mail you so, you can close this tab or even the browser itself.

Additional Considerations
- Using Easy Switch with mobile app: While Easy Switch is convenient, avoid using the Protonmail mobile app during the transfer process. This can lead to sluggish performance.
- Transferring larger amounts of data: If you have a massive inbox, the transfer might take longer. Be patient and avoid interrupting the process.
- Moving forward: After a successful transfer, consider keeping your Gmail account open for services that require it. You can also set up email forwarding from Gmail to Protonmail to ensure you don’t miss any new messages during the transition.
Protonmail offers a secure and private email experience. By transferring your data, you can enjoy the benefits of Protonmail’s encryption features while keeping your communication safe. With Easy Switch, the process is smooth and straightforward. So, move your emails with confidence and embrace a more private online world.
Also read: Protonmail login temporarily not permitted: Quick Fix


