With how capable smartphones have become, these devices have replaced digital cameras for many and have also become the go-to video creation tool for some professionals.
If you have started as a creator on the iPhone or have just shifted to using one after years on another platform. In this article, we will go through two methods you can apply to transfer photos from your iPhone to your Windows PC.
Also read: How to set up Dual SIM on iPhone?
Method 1: Via Windows Photos Application
While this method works for all image files, in our experience, when it comes to videos, clips longer than ten minutes tend to not appear in the import menu and need to be transferred via alternate steps listed under Method 2.
According to Apple’s website, users will need iTunes 12.5.1 or later to import photos. You can download the latest version of iTunes by clicking here.
Connect your iPhone to your Windows PC via its Lightning cable and follow the steps listed below.
Step 1: Tap on Allow on the prompt on your iPhone — this allows your Windows PC to access files on the device.

Step 2: Open Photos on your Windows PC.
Note: Alternatively, you can also File Explorer to transfer files after performing Step 1.

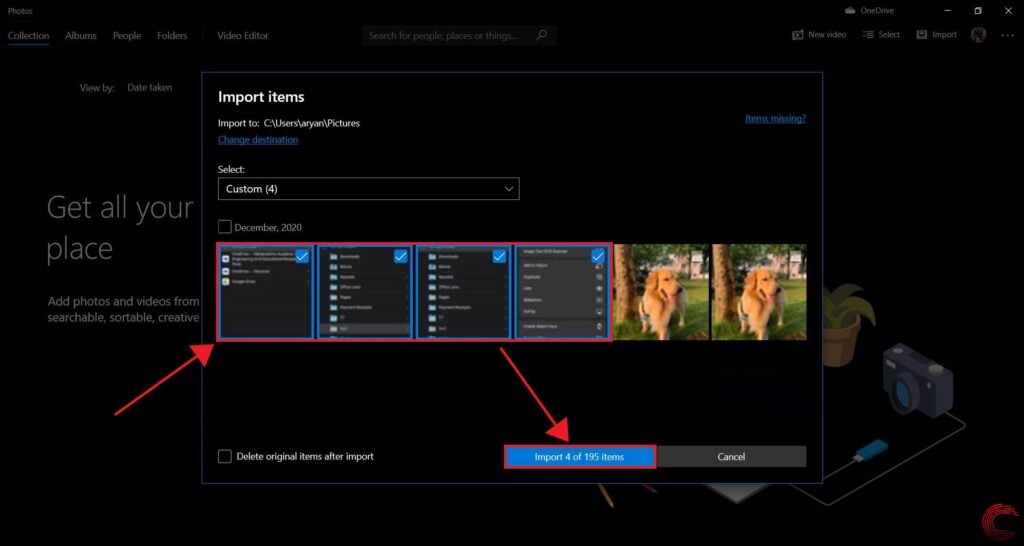
Step 3: In the top-right corner of your screen, locate Import — click on it — and select From a connected device.

Step 4: Select the required files from the grid and click on Import.

Also read: How to mute your iPad Pro?
Method 2: Via iTunes
Step 1: Download VLC on your iPhone and save the required files to the VLC folder in the Files app.
The steps to save files to VLC’s folder have been listed below.

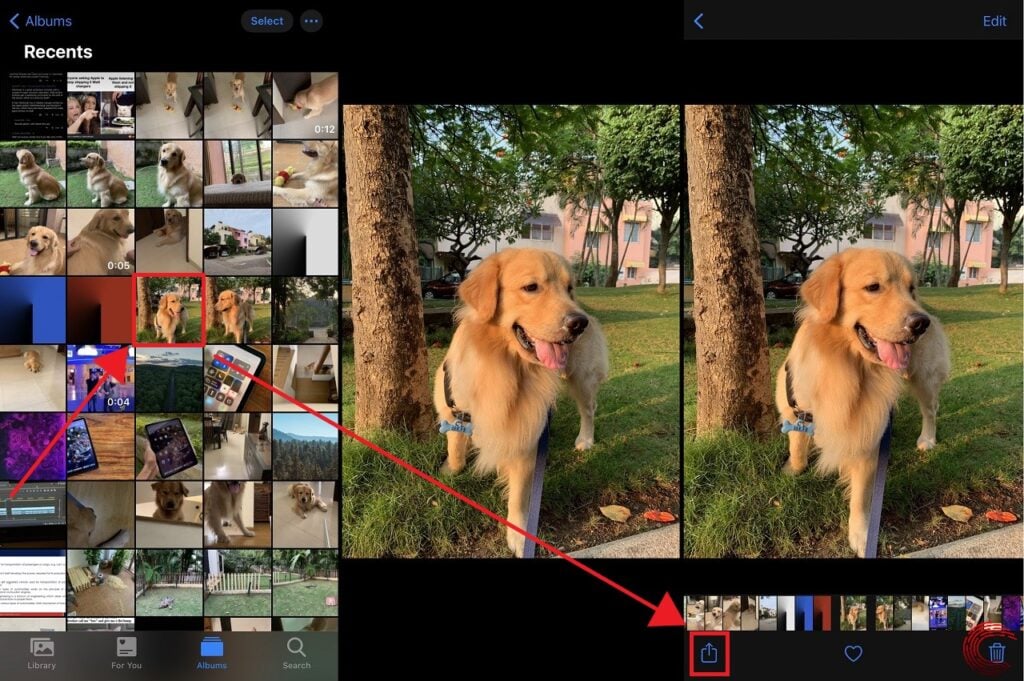
- Open Photos application on your iPhone.
- Select the photo or video file.
- Tap on the Share button in the bottom-left of your screen.

- Scroll down and look for Save to Files and then tap on this option.
- Under On My iPhone, locate VLC.
- Tap on it and click Save.
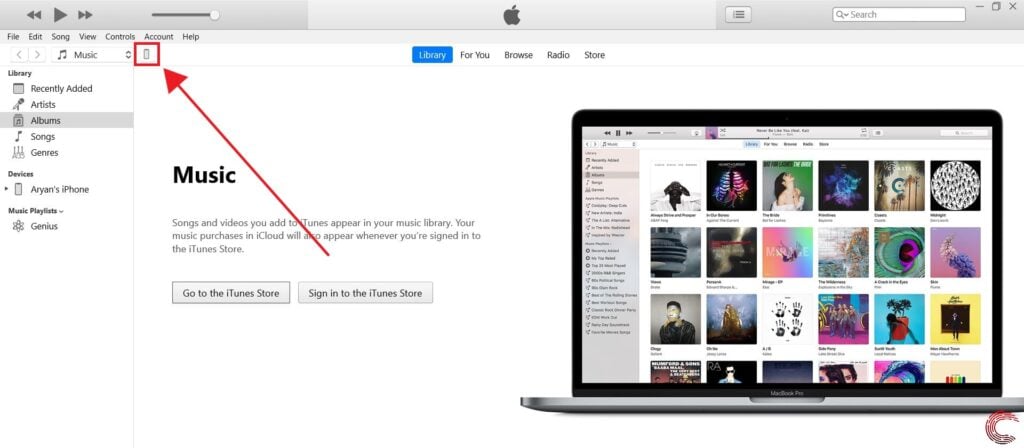
Step 2: Open iTunes on your Windows PC, connect your iPhone accept the Trust this device prompt and open the device page in iTunes.

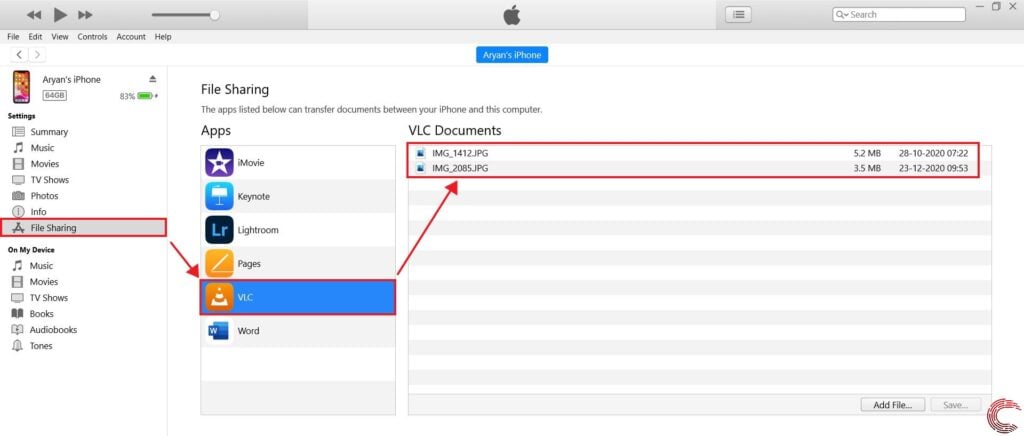
Step 3: Locate File Sharing along the left-hand side of your display and select that option.

Step 4: Click on VLC among the visible applications, select the files from under VLC Documents and drag and drop them into your desired folder.
We recommend you keep the iTunes and File Explorer windows open in split view for ease of transfer.

Note: This method has no progress bar to indicate how far your transfer has progressed, but the destination’s File Explorer window and iTunes remain unresponsive until the transfer is complete. Nevertheless, you can continue performing other activities on your computer and iPhone.
Also read: How to block YouTube screen time on iPhone and iPad?


