If you’re into portraits or any type of photography that generally involves human subjects, you know that the smile is often the most important aspect.
However, often a good smile is ruined by a yellowish tint on the subject’s teeth. This could be because of a number of reasons, most common being camera flashes, white balance or just the naturally occurring slight yellow colour.
In this article, we take you through a step by step process of how you can remove those pesky little yellow stains and end up with a perfect white smile every time.
Also read: Photoshop 101: Five tips and tricks for beginners
How to whiten teeth
Load up your image in Photoshop and head over to the toolbar.
Step 1: Select the Lasso tool and start drawing a selection around the teeth. You can also use the Magnetic lasso tool if you find the regular one a bit hard.

If your photo has more than one person in it, you might be tempted to just go ahead and select everyone’s teeth at once. However, everyone’s teeth are different and using the same settings for everyone can result in crooked images.
Step 2: Create a new Fill/Adjustment layer and select Hue/Saturation from the list.

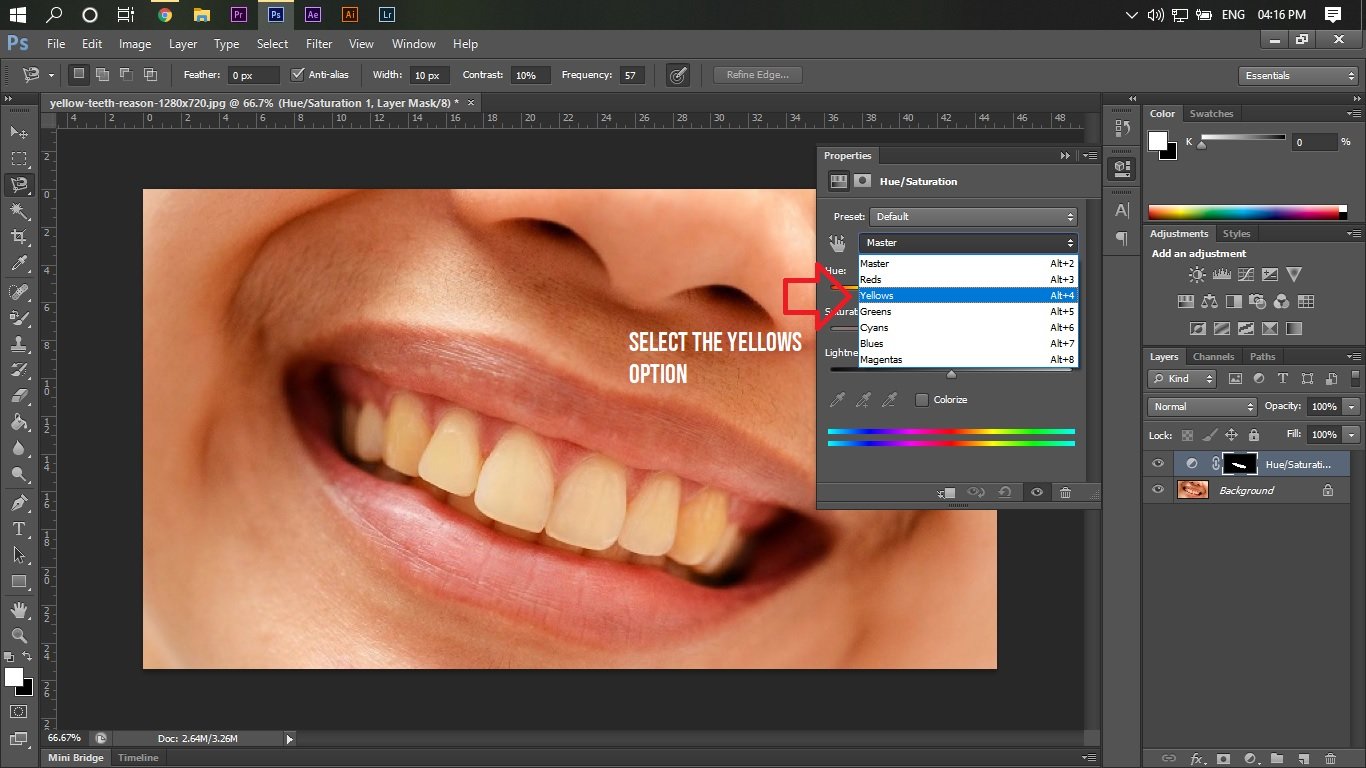
Step 3: Change the edit option from Master to Yellow

Step 4: Lower the Yellow Saturation. As you drag the slider along, you’ll notice that the teeth start becoming more and more white. However, don’t drag the slider all the way down. I’ve found that the value of -80 usually works best.

By this step, you’d already have teeth are pretty much what you want them to look like, however, there’s still a little bit of cleaning up to do.
Step 5: Set the edit mode back to master
Step 6: Adjust the Lightness slider to brighten the teeth. Again, don’t drag the slider all the way to 100. Rather adjust it minorly to make sure you don’t overdo anything. Personally I set the slider maximum to +20.

And that’s how you get perfect shiny teeth in Photoshop.
Also read: Photoshop 101: Changing colours in an image


