When you link your hard drive to the system, it appears in File Explorer alongside other partitions of the system drives. Nonetheless, on certain occasions, the hard drive might show an error stating A device which does to exist was specified when the users attempt to access it.
In this article, we have discussed the causes of A device which does not exist was specified issue and a few ways to fix the error.
Also read: Can’t remove read-only from folder in Windows 11: Quick Fix
What are the causes of the A device which does not exist was specified issue?
Below we have discussed a few possible causes of the A device which does not exist was specified issue.
- Insufficient permissions.
- Mismatching drive letters.
- Defective USB port.
- Issues with the Hard disk.
- Outdated Motherboard drivers.
- Faulty Motherboard header.
How to fix the issue?
If you are encountering the A device which does not exist was specified issue then we have explained a few ways to help you fix it.
Give permission to access the drive
Insufficient permissions to the drive are typically the cause of this error. Access to the drive is denied if you lack the appropriate permissions. To give the permissions to access the drive follow the steps below.
Step 1: Open the File Explorer and right-click on the hard drive which is showing the error. In the drop-down menu click on the Properties option.
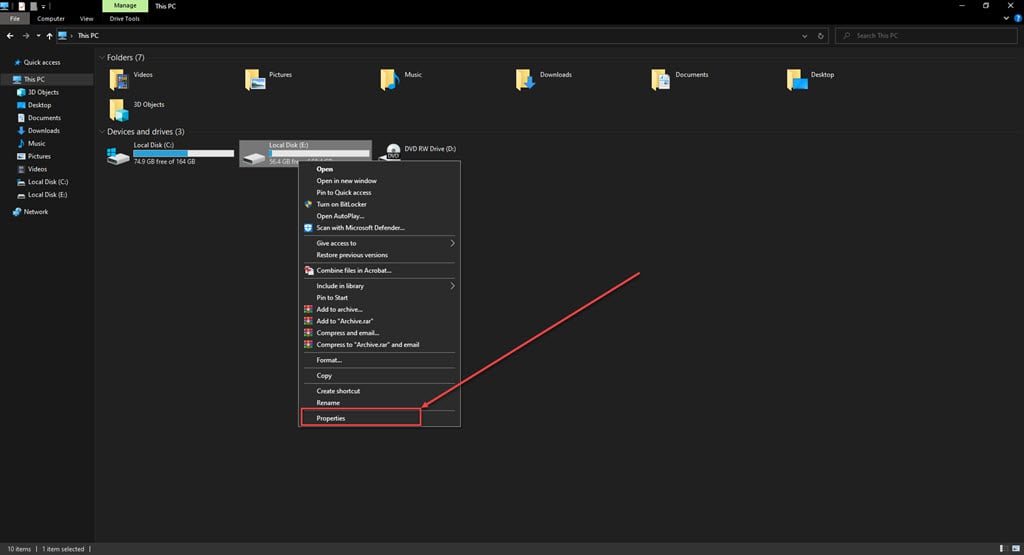
Step 2: In the properties, click on the Security tab and then click on the Edit button to change the permissions.

Step 3: In the next pop-up window, checkmark the Full control and then click on the Apply button and then the OK button.

Change the Drive letter
When you connect a hard drive to a Windows system, it is automatically assigned a letter. However, if the drive letter displayed in the error message does not match the drive letter in File Explorer or Disk Management, you are likely to encounter the error. To resolve this issue, you will need to manually change the drive letter. To do that follow the steps below.
Step 1: Press the Windows+X keys and the in the drop-down menu click on the Disk Management option.
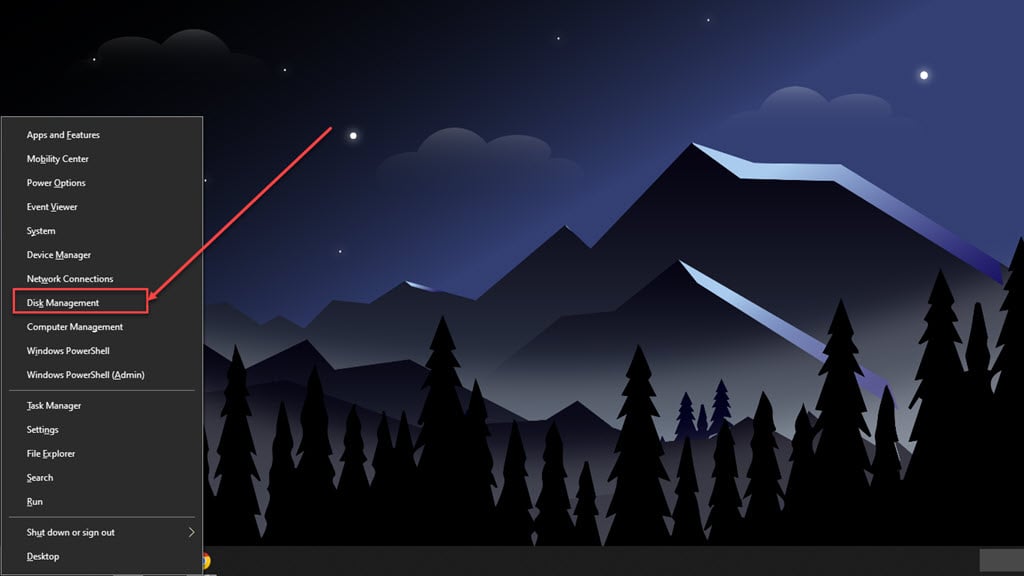
Step 2: In disk management, right-click on the drive with the error and then in the drop-down menu click on the Change Drive Letter and Paths…

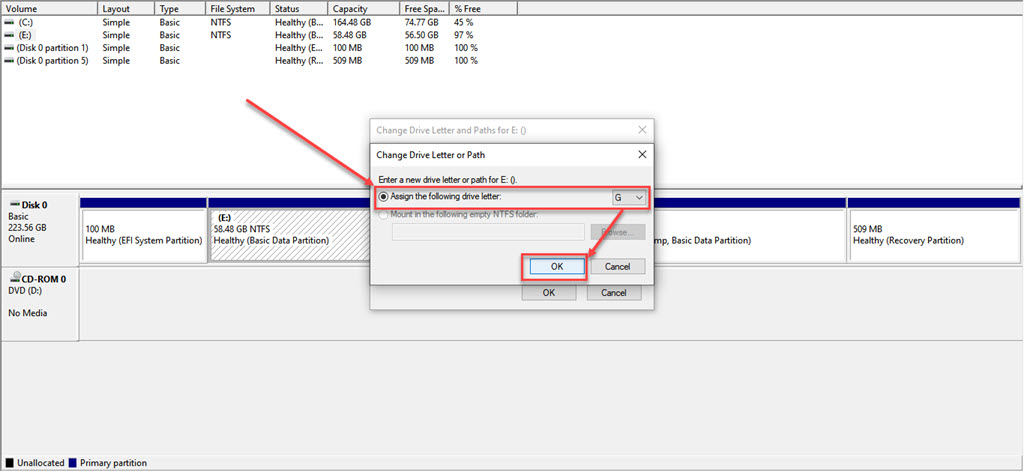
Step 3: In the pop-up window click on the Change button.

Step 4: On the next pop-up window, click on Assign the following drive letter and then from the drop-down list select a letter for the drive and then click on the OK button.
Uninstall and Reconnect Drive
Uninstalling the drive drivers and then reconnecting the drive have solved the issue for many users. To do that follow the steps below.
Step 1: Press the Windows+X keys and the in the drop-down menu click on the Device Manager option.
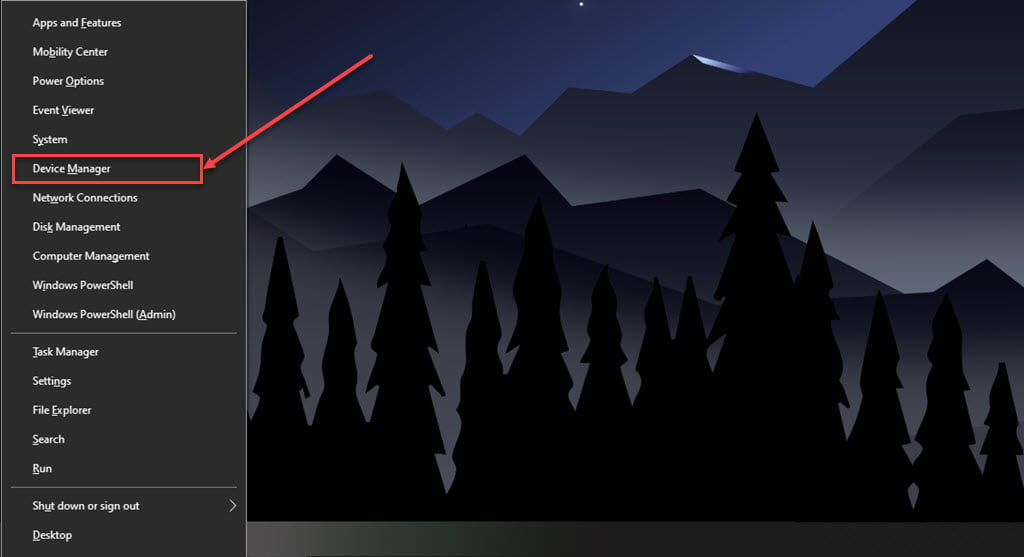
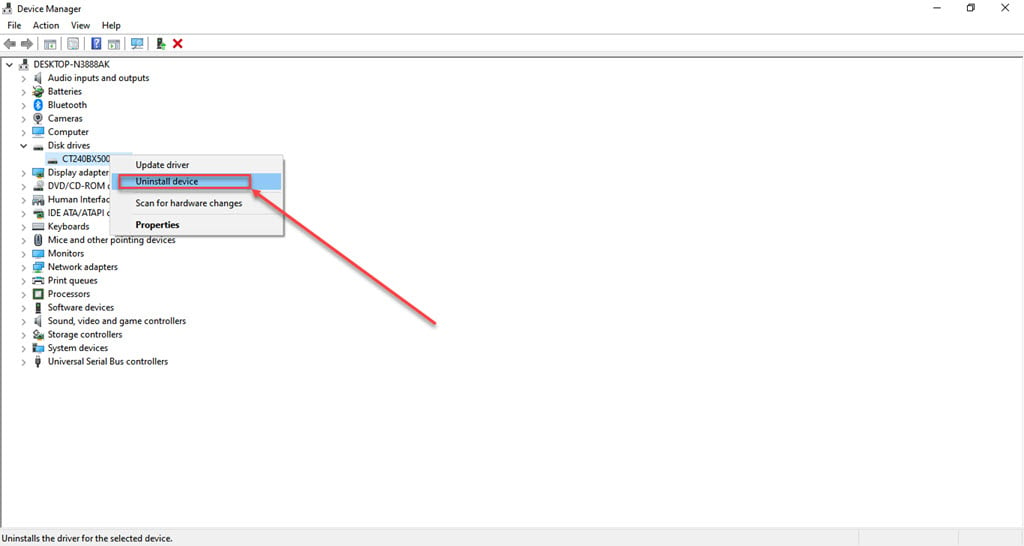
Step 2: In the device manager, expand the Disk drives and then right-click on the drive with the error.

Step 3: In the drop-down menu, click on the Uninstall device option.
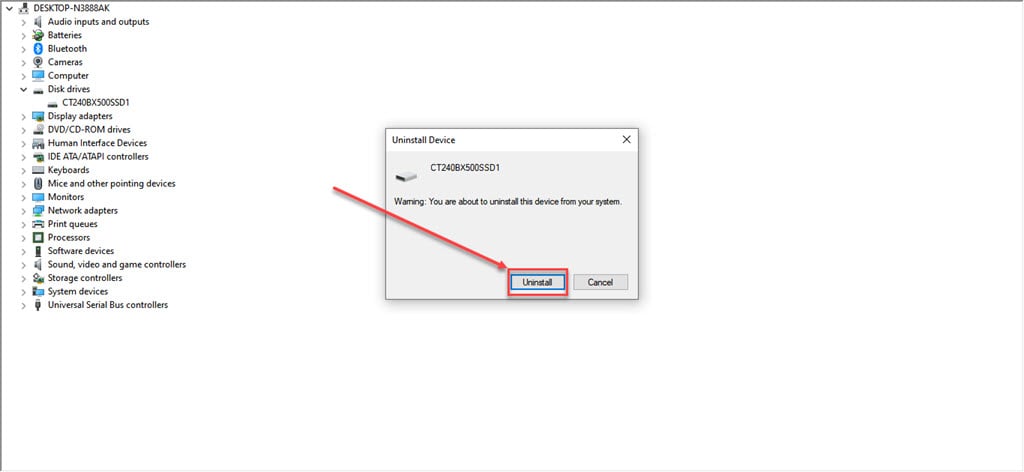
Step 4: In the pop-up window, click on the Uninstall button to confirm.
Re-create Disk Partition
It is possible that you are unable to access the device because the partition is corrupted. o resolve the A device which does not exist was specified error, you can attempt to recreate the device partition using the DiskPart utility. To do that follow the steps below.
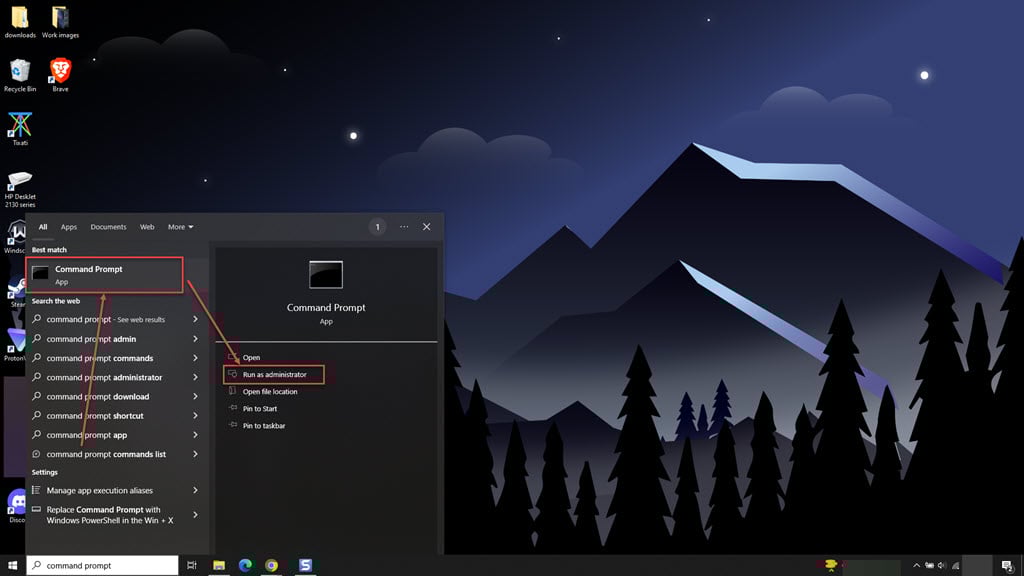
Step 1: Type cmd in search and then click on the Run as administrator option in the menu on the right side.
Step 2: Type the following commands in the same order.
- Type diskpart and hit Enter.
- Type list disk and hit Enter.
- If you can the disk with the error, type select disk and the number of the disk shown. For example, select disk 0.
- Type clean and hit Enter.
- Type list disk and hit Enter.
- Type create partition primary and hit Enter.
- Type select partition 1 and hit Enter.
- Type assign letter=G and hit Enter.
- Type format fs=ntfs quick and hit Enter.
Update Motherboard’s Driver
To ensure effective communication between the system and its components, such as system memory and hard drives, it is crucial to keep the motherboard chipset drivers up to date. Outdated chipset drivers can impact system performance and may cause this error. To update the motherboard chipset drivers, it is necessary to visit the manufacturer’s website.
Change the Motherboard headers
If there are problems with the motherboard’s header, the USB ports may cease to function correctly, resulting in errors when connecting devices. In such cases, it is advisable to have your system examined by experts or manufacturers to identify and resolve the underlying problem.
Also read: Windows cannot connect to the printer: 8 Fixes


