Printers are really useful peripherals whether you’re at home or at work. That said, they’re also one of the biggest headaches when considering all the problems they keep running into.
In this article, we’re talking about the “Windows cannot connect to the printer” error, its causes and what you can do to fix the problem.
What causes this error?
More often than not, the error is a simple technical glitch that can be caused by several reasons, including the following.
- Outdated or corrupt printer drivers.
- Issues with the Print Spooler Service.
- Hardware defects with the printer.
Also read: How to fix ‘Another Computer is Using this Printer’ error?
How to fix this?
Here are eight fixes you can try out.
Update your PC
The first thing you should do is update your PC. Updating your PC will, in most cases, update your drivers and fix any issues in the process.
Check out this detailed guide to know how to update your PC here
Restart your printer
Power cycling your printer, PC and even router if you’re using a WiFi printer can help resolve random issues that might be causing printing conflicts. This should be the first item on your troubleshooting list.
Check the Printer
The error can also indicate a problem with your printer instead. Check to see if everything’s in place and that the printer has enough ink, and paper and is properly connected to your printing device. If you’re using a WiFi printer, check to make sure that the printer is connected to the network and that you have internet access.
Also read: How to find deleted Tweets?
Run the Windows troubleshooter
Windows comes with an excellent set of troubleshooters that can resolve a bunch of issues on your PC, including the ones with printers.
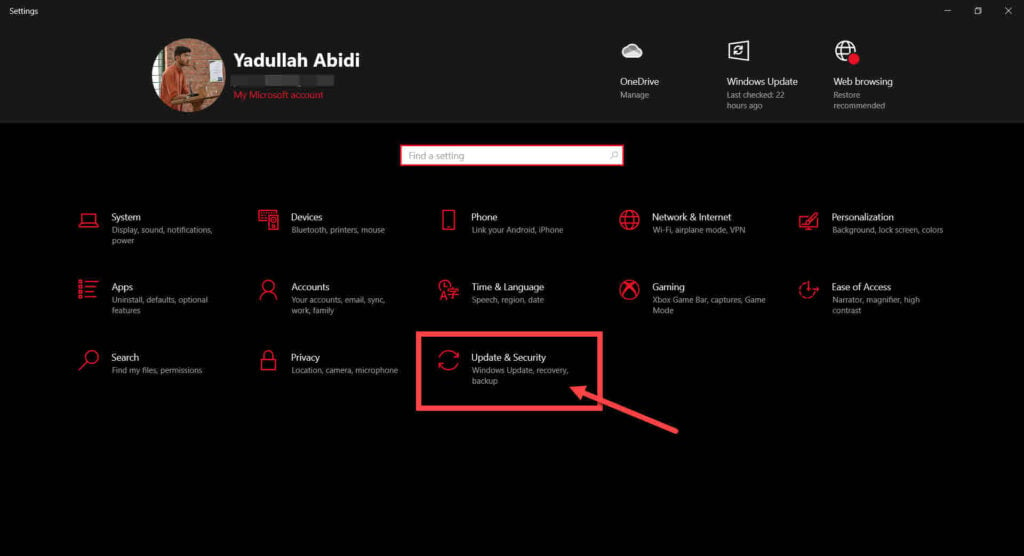
Step 1: Press Windows key + I to open Windows settings and click on Update & Security.
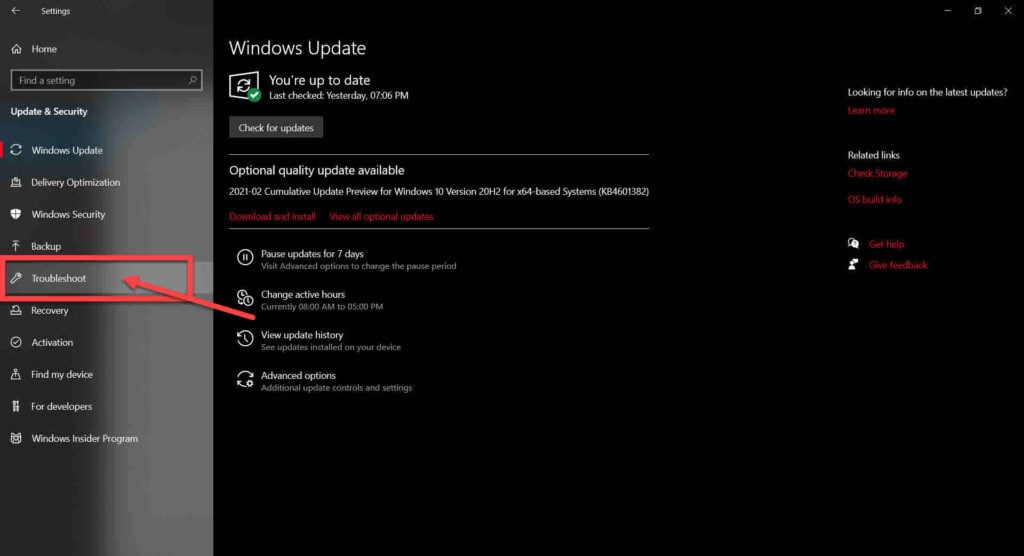
Step 2: Head over to the Troubleshoot tab.
Step 3: Click on Additional troubleshooters.

Step 4: Click on Printer and then Run the troubleshooter. Follow the on-screen instructions to run the troubleshooter.

Restart your computer and try again. This should fix the error.
Check your drivers
Making sure your drivers are properly installed and up to date can resolve a lot of printer issues.
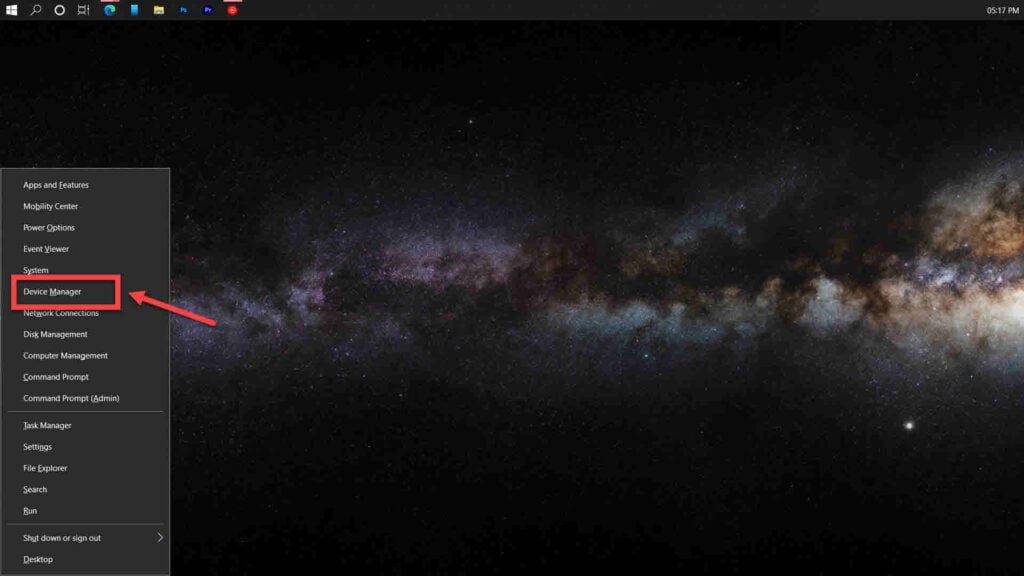
Step 1: Press Windows key + X to open the quick access menu and click on Device Manager.
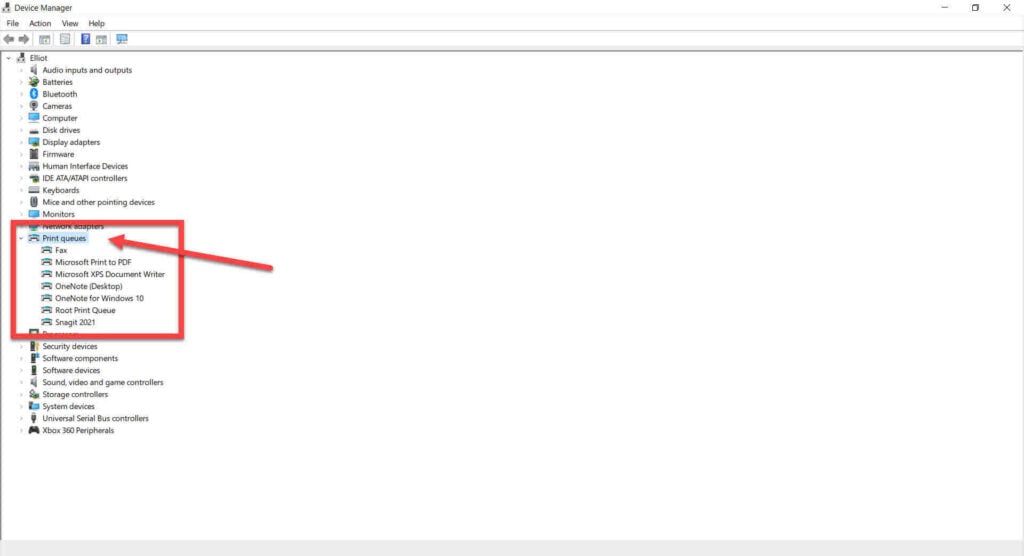
Step 2: Double click Print Queues to show all installed printers.
Step 3: Right-click on the problematic printer and click on Update drivers.
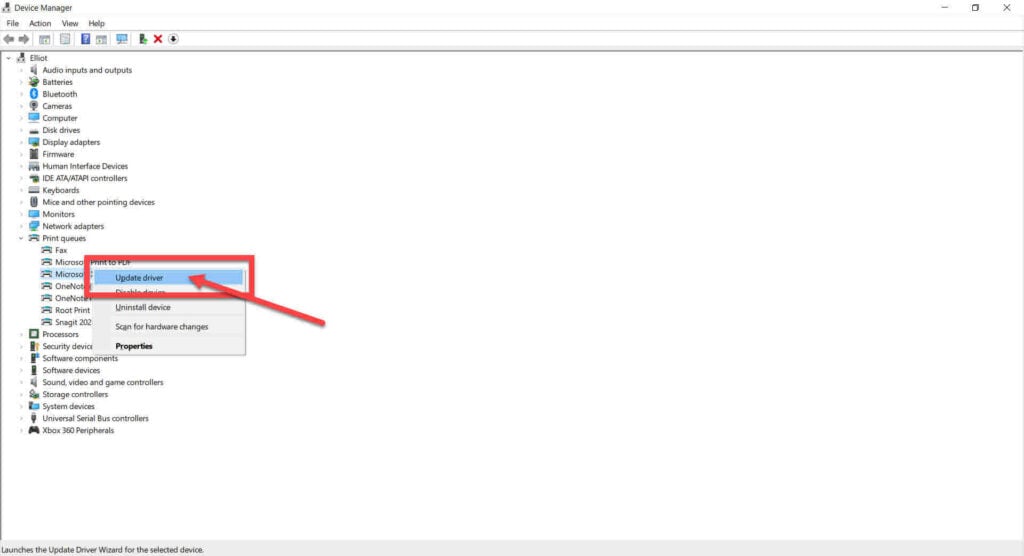
Step 4: Click on Search automatically for drivers. Windows will automatically look for driver updates and install them.
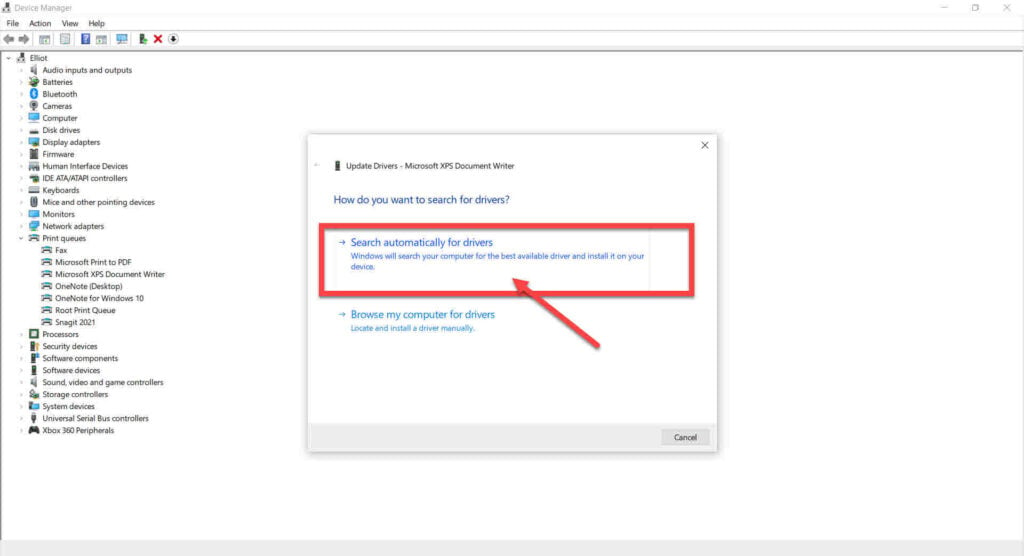
Now restart your PC and try again.
Also read: Facebook reels not showing: 6 Fixes
Resetting the print spooler service
The print spooler is a service on your computer that manages all printers, print queues and print jobs. Resetting this service can resolve any printer conflicts you’re facing.
Step 1: Press Windows key + R to launch the Run prompt. Type in services.msc and hit enter.

Step 2: Locate the Print Spooler service and double click it to open the properties.

Step 3: Click the Stop button to stop the service. Click OK after that.

Step 4: Now open Windows Explorer and head over to the following directory.
C:\Windows\System32\spool\PRINTERS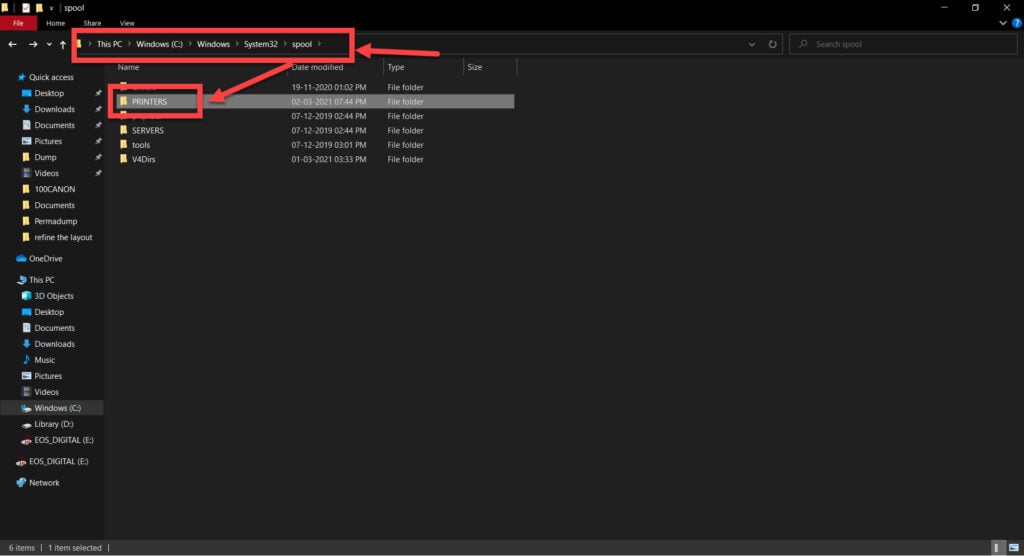
Once there, delete all the files in the PRINTERS folder. Restart your computer to check if the printer works properly now.
Check default printer
Another reason you might be getting this error could be because your default printer and active printer are different. While this shouldn’t cause an error, it’s worth checking your default printer once.
Step 1: Press Windows key + I to open Windows settings and click on Devices.

Step 2: Head over to the Printers & scanners tab.
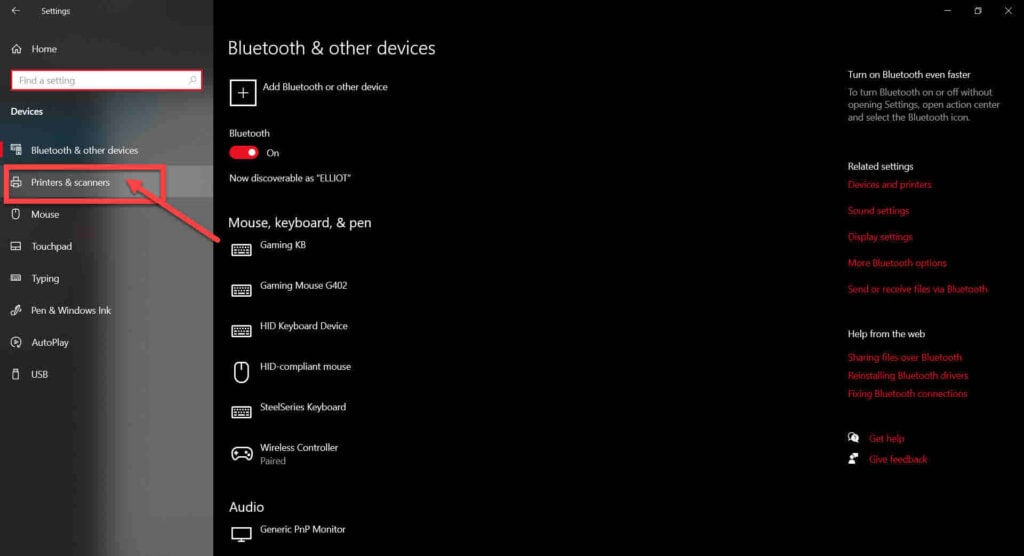
Step 3: Select the printer you want to use and make sure it’s set as the default printer.

Now try printing again.
Change a registry key
Sometimes the Printer Remote Procedure Call (RPC) binding that handles printer authentication might malfunction. Fixing this requires editing the registry.
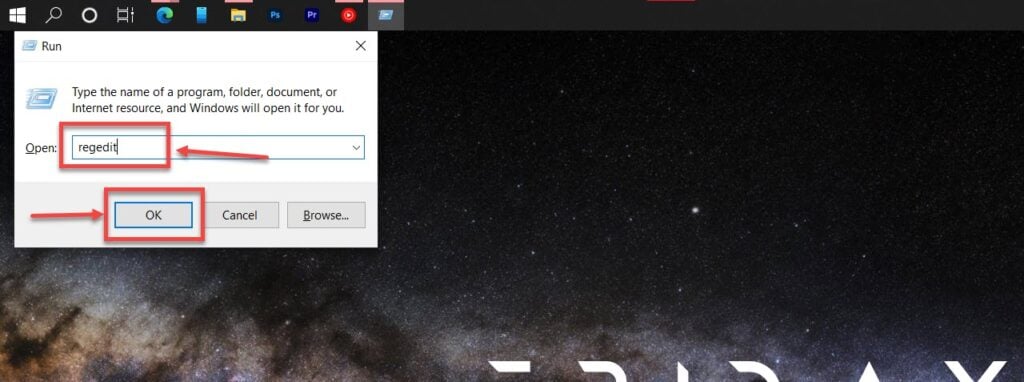
Step 1: Press Windows key + R to open the Run prompt. Type regedit and hit enter.
Step 2: Head over to the path given below.
Computer\HKEY_LOCAL_MACHINE\SYSTEM\CurrentControlSet\Control\Print
Step 3: In the right-pane, find the RpcAuthnLevelPrivacyEnabled key and set its value to 0. If the key doesn’t exist, you can make it by right-clicking the empty space on the right, selecting New and then DWORD (32-bit) Value.

Now restart your PC and the printer should work just fine.
Also read: How to fix HP printer error 59.f0?


