Minecraft is one of the most popular action-adventure sandbox games ever to exist. Part of the reason why the game is so popular is that it runs on almost any computer, including small ones like the Raspberry Pi. However, that’s not to say it always runs without hiccups.
The game is still prone to occasional bugs and glitches. In this article, we’re looking at the “a JNI error has occurred’ problem when running Minecraft and giving you a few fixes to solve the problem.
Why does this happen?
The problem mainly occurs on Minecraft version 21w19a and newer. Previous Minecraft versions were compatible with older versions of Java, but that’s not the case moving on with this update. Hence, the primary reason you see the ‘a JNI error has occurred in Minecraft issue’ is that your Java version is outdated. This problem might also happen when trying to run Minecraft server 1.17.
The two primary reasons for the issue are as follows;
- JDK 16 is missing: You haven’t installed the Java 16’s JDK on your PC, which is why Minecraft is running into compatibility issues and throwing this error.
- Invalid system path for Java: If Java is installed, but you’re still seeing the error, chances are your system path for Java is broken, which is why the game can’t locate it and launch.
Also read: How much RAM do you need to run a Minecraft server?
How to fix this?
Here are a few fixes you can try out to solve the ‘a JNI error has occurred in Minecraft’ issue.
Install the latest JDK version
Before proceeding, make sure all instances of Minecraft and the Minecraft launcher are closed. Then follow these steps.
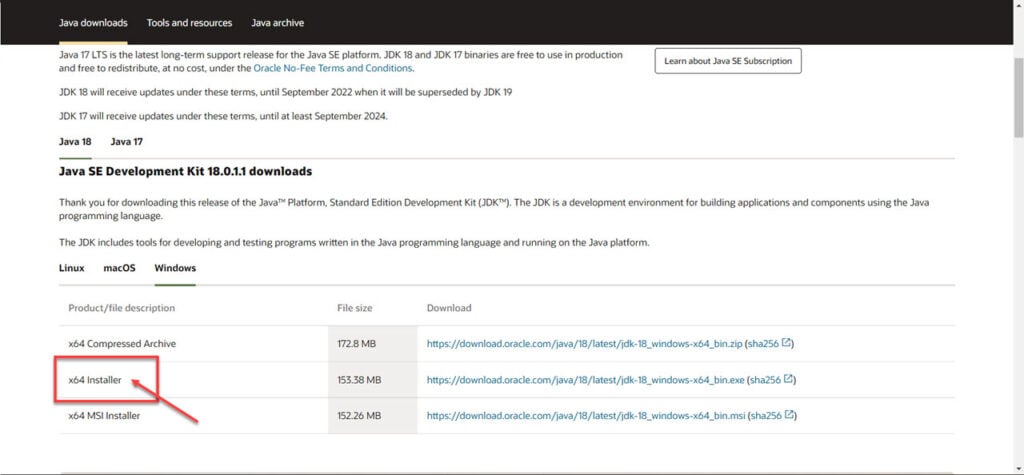
Step 1: Head over to Oracle’s JDK download page and download the x64 installer for the latest JDK version (18.0.1.1 at the time of writing). Install the downloaded installer once the download is complete.
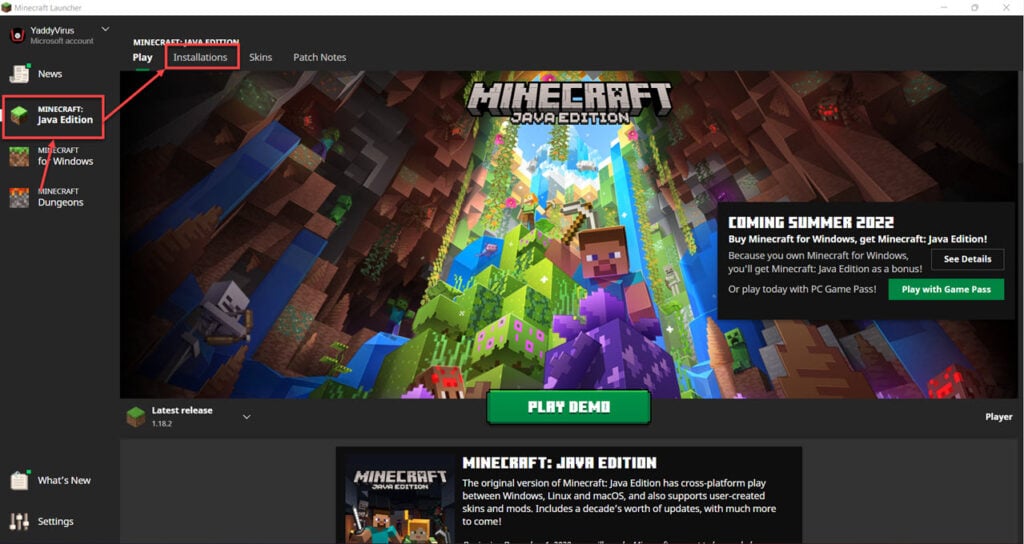
Step 2: Open the Minecraft launcher, head over to Minecraft: Java Edition and click the Installations tab.
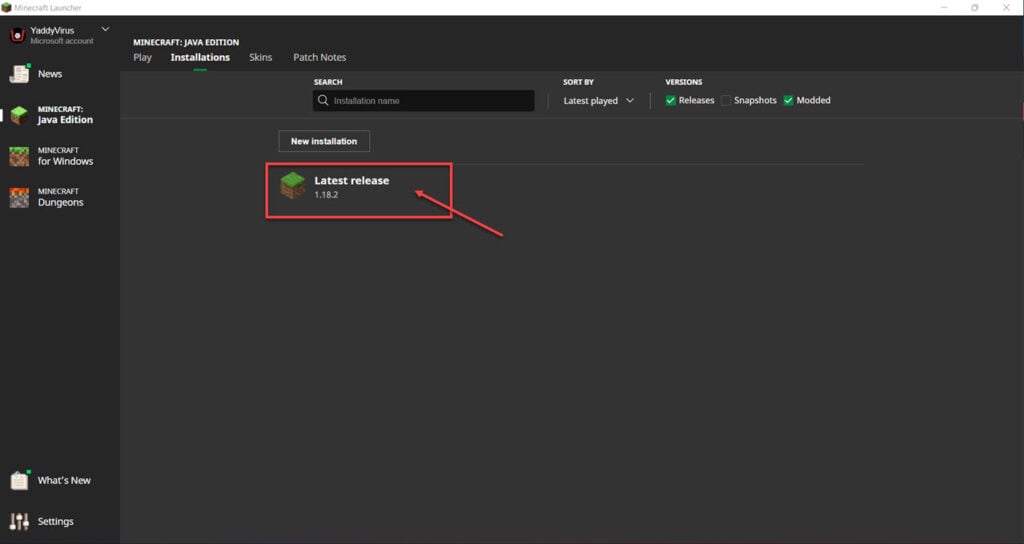
Step 3: Click the installation you want to fix.
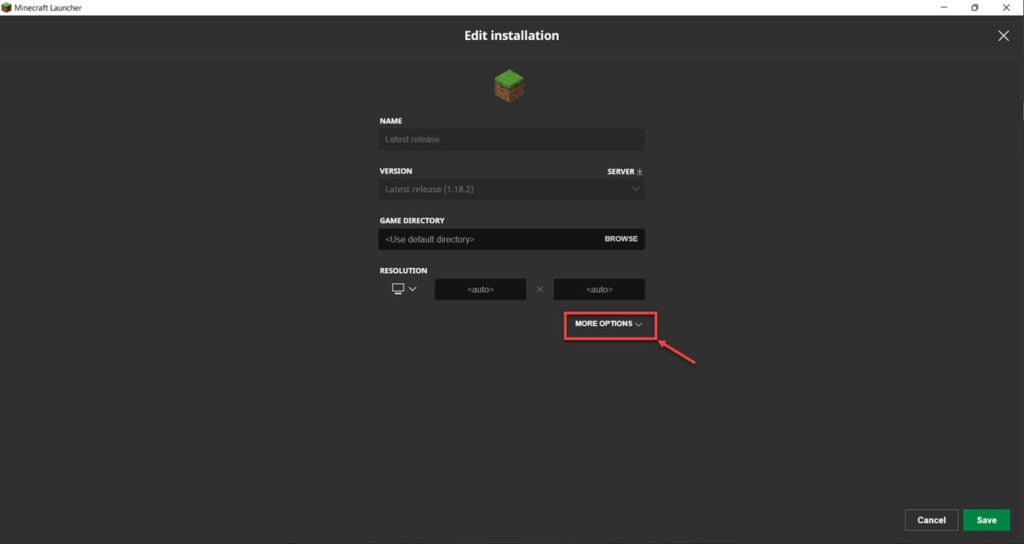
Step 4: Click More options.
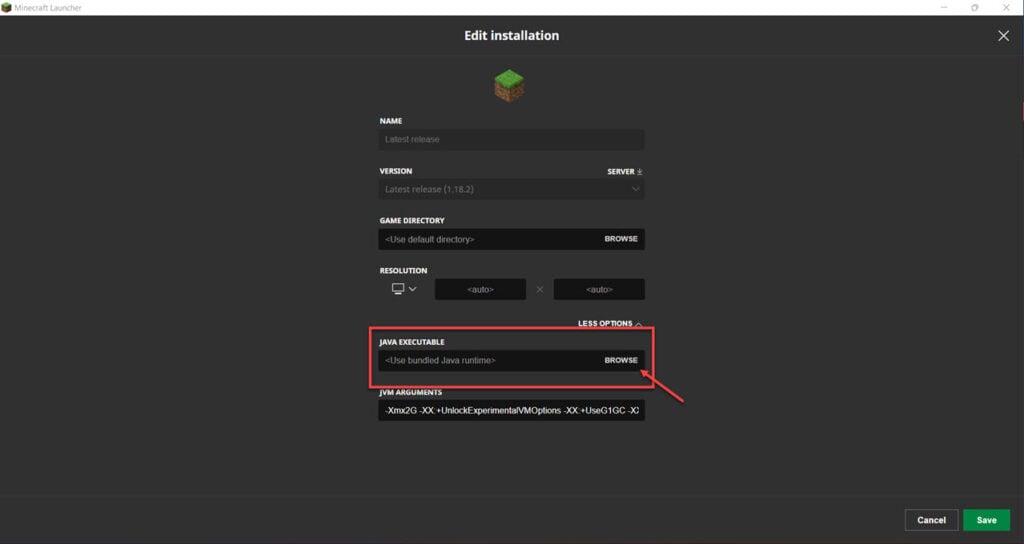
Step 5: Click Browse under Java executable and navigate to the folder where you installed Java in step 1.
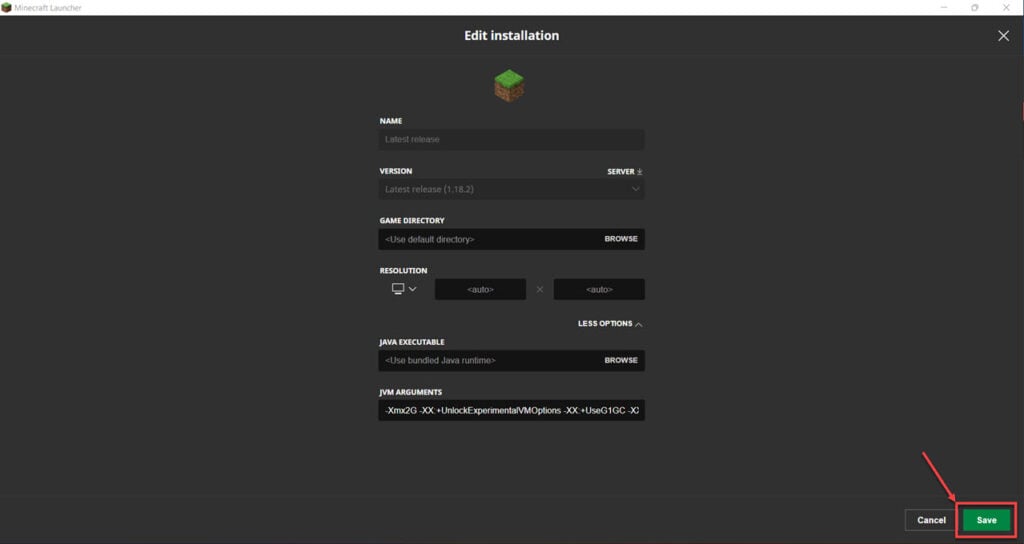
Step 6: Click Save to save the changes and run the game again.
Also read: Roblox audio not working: 6 Fixes
Repair the JDK path
If you have Java installed correctly, but the game can’t use it, chances are your Java path is broken. Follow these steps to fix the problem.
Step 1: Press the Windows key + R to open the Run prompt. Type sysdm.cpl and hit enter.

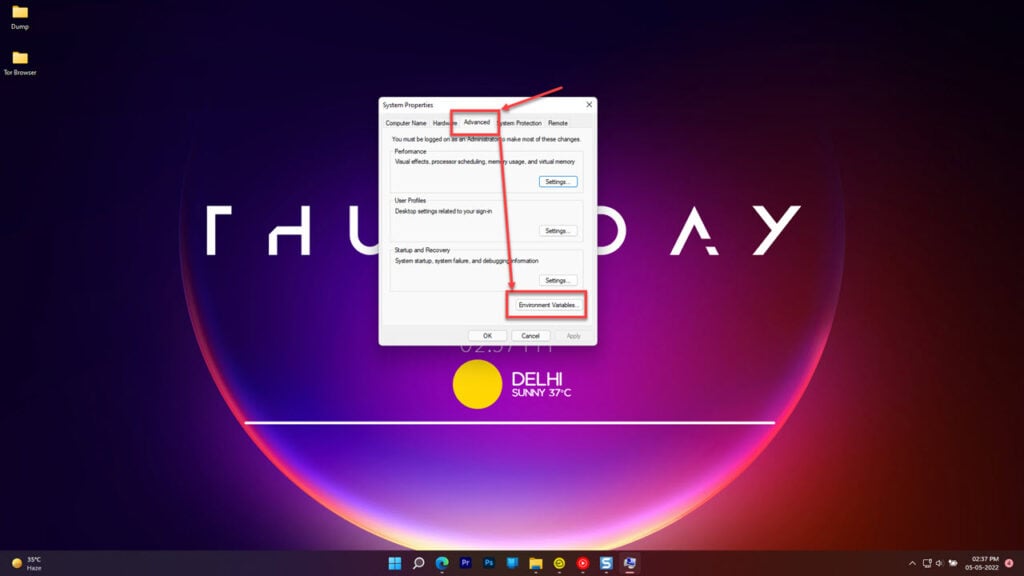
Step 2: Head over to the Advanced tab and click Environment Variables…
Step 3: Select Path under System Variables and click the Edit button.
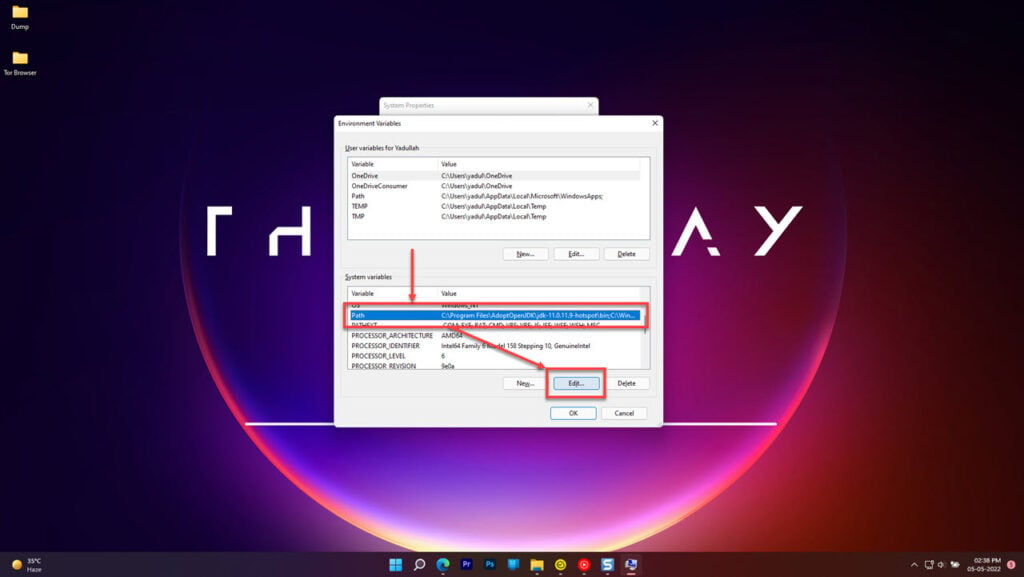
Step 4: Find and delete any paths that mention Java.
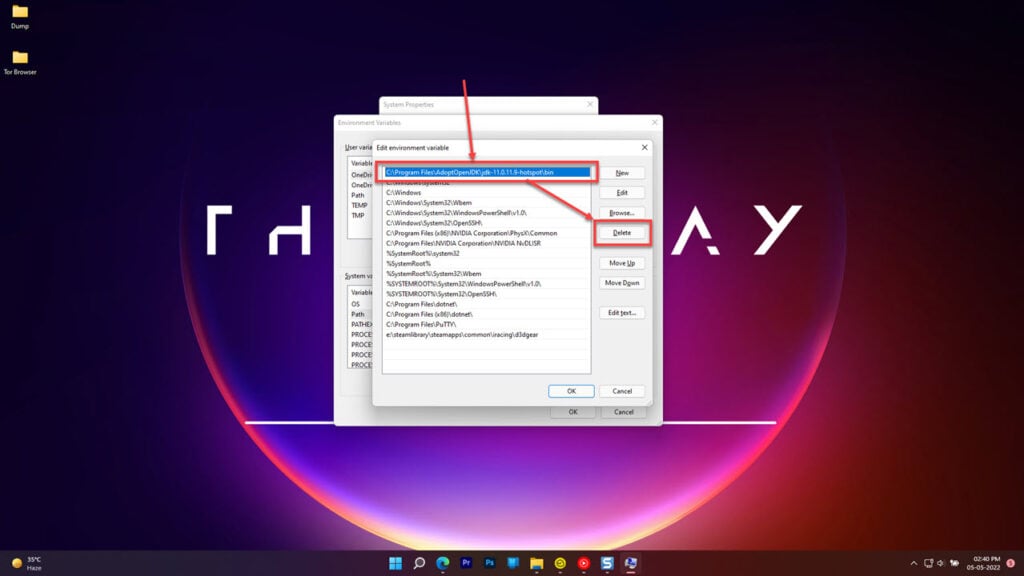
Restart your PC and launch the game again now. The ‘a JNI error has occurred in Minecraft’ problem should be resolved.
Installing Java on Linux
If you’re on Linux, enter the following commands one at a time in the terminal before launching the game again.
sudo apt-get update
sudo apt install openjdk-17-jdk
Also read: How long is a Minecraft day?


