How often have you downloaded an icon pack and realised it was the wrong colour? Or perhaps there’s an icon that you’d want in a specific colour and it’s not available. Now you could just suck up to it and use the icon anyway but let’s be honest, that would ruin the design you worked so hard to make.
Icons make all the difference and having the right coloured one is essential. In this article, we’re taking a look at how to change colours on PNG icons in photoshop.
Also read: 65 Photoshop keyboard shortcuts to make your workflow quicker
How to change PNG icon colours in Photoshop
First, let’s go ahead and grab an icon pack. I’m using this one from Pixabay.

Step 1: Load up your icon pack (or icon) in Photoshop and make sure you isolate the icon(s) you want to edit and include.

Step 2: To isolate the icon(s) you want to work with, select them with whatever selection tool you prefer and then Right-click > Layer by Copy. After this, you can also drag and drop the layer into a new photoshop document.

Step 3: Select the new layer. Then click on Image, then Mode and make sure that the RGB Colour option is selected.

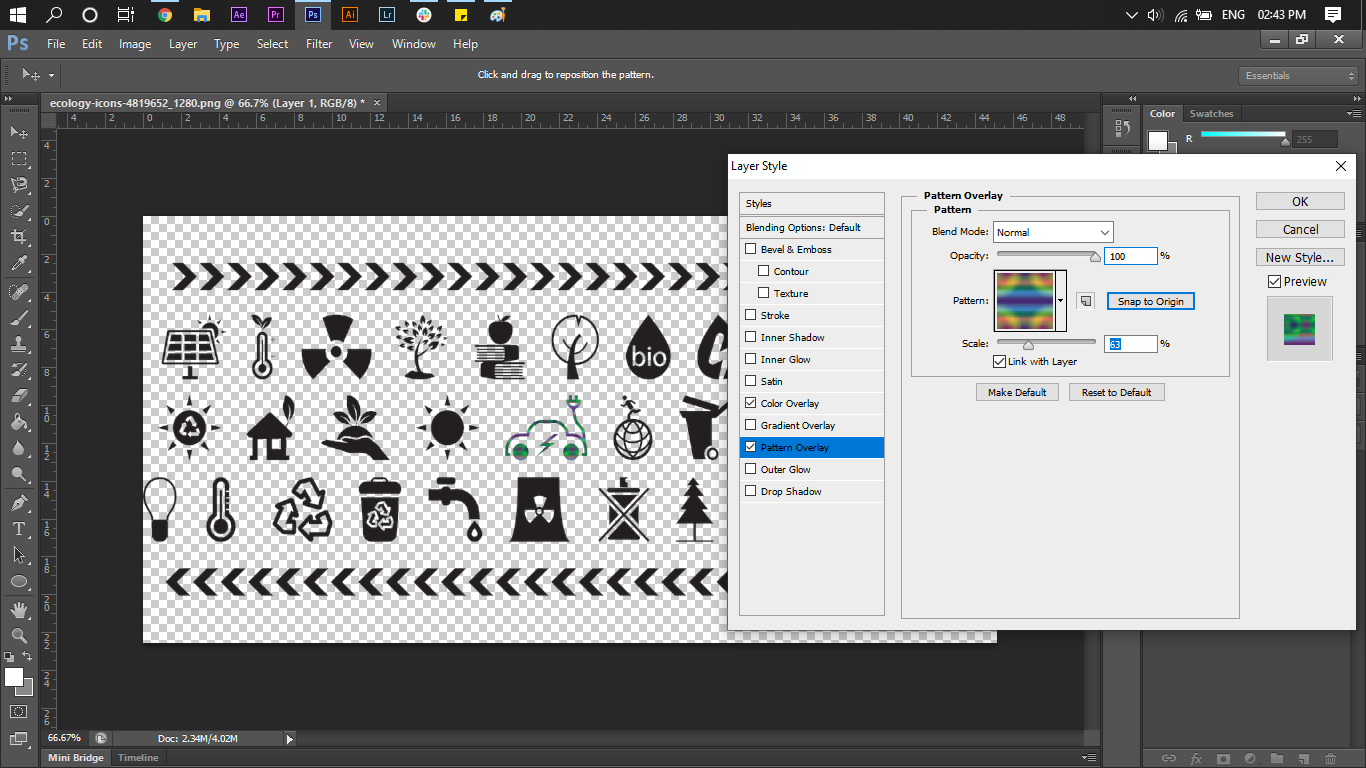
Step 4: Now right-click on the layer and select Blending Options.

Step 5: With the new layer selected. Right-click on it and choose Color overlay, You’ll see that your icon has already changed in colour. Now go ahead and pick whatever colour you want for your icon and you’re good to go.

You can also choose colour properties such as the blend mode, colour opacity, and whether or not to make these settings the default colour overlay.
If this doesn’t satisfy you, you can go one step ahead by adding a gradient or even a pattern overlay. As the names suggest, these overlays add specific designs the way you want them and sometimes can make for some exciting design choices.

Also read: Photoshop 101: Changing colours in an image


