Photoshop is a great and fun tool to play around with images and do anything you want. One of these features is the ability to change hair colour without losing any detail.
This can be helpful if you’re touching up photos after a shoot and want something different or even if you’re messing around to see which hair dye looks best on you.
Here’s a step-by-step guide on how to change hair colour in Photoshop
Also read: How to Whiten Teeth in Photoshop?
Changing hair colour in Photoshop
Go ahead and load up an image(preferably a portrait) in Photoshop. In this case, I’ve loaded up a portrait of myself with enough natural lighting for better demonstration purposes.
Step 1: Adding a Hue/Saturation Layer
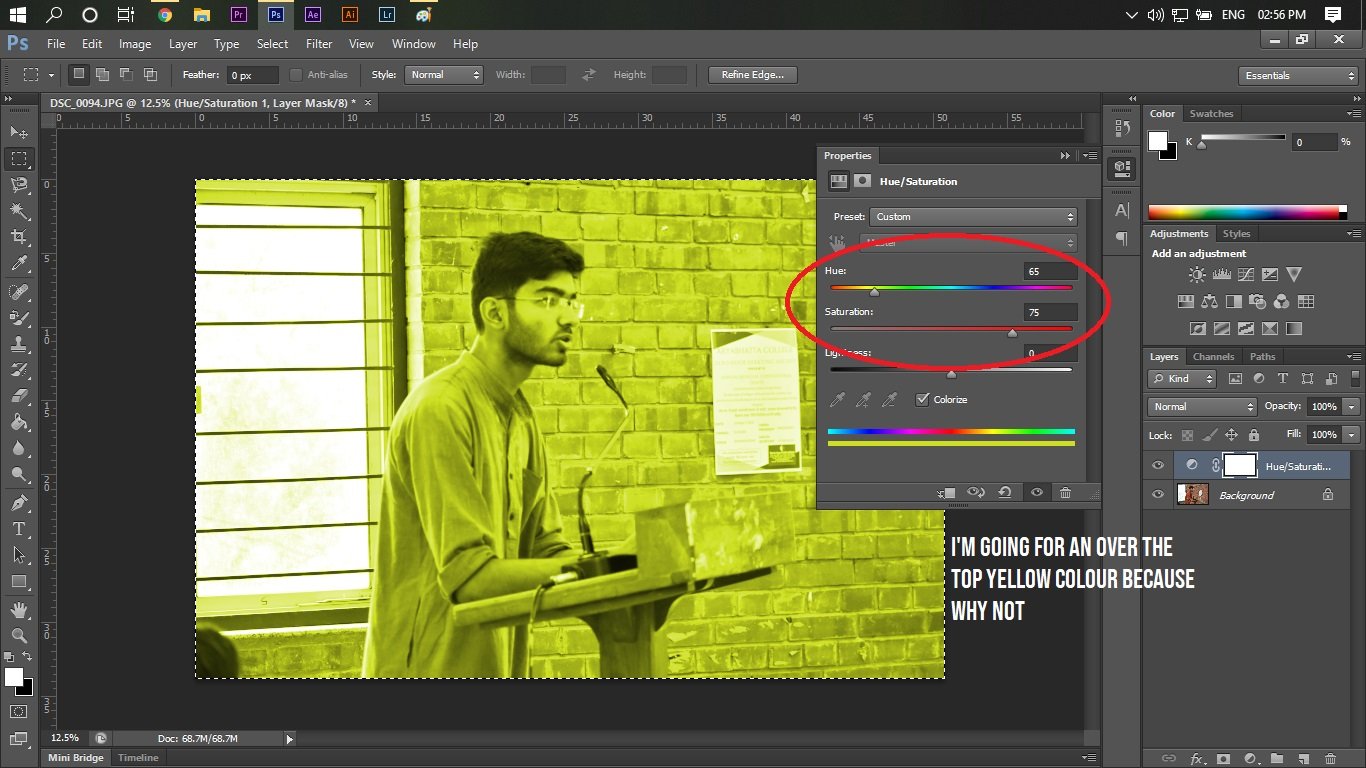
Go to the Add Fill/Adjustment Layer Button and add a Hue/Saturation layer to the image. When the Hue/Saturation properties dialogue box opens up, check the Colorize option.

Step 2: Selecting the hair colour
Here’s the fun part. Next, adjust the Hue slider to select a colour for the person’s hair. This can be anything you want. Play around with the Hue/Saturation sliders to get the desired colour.

You’ll notice that the entire image is being colourised at the moment. Don’t worry. We’ll fix that in the next couple of steps.
Step 3: Creating a layer mask
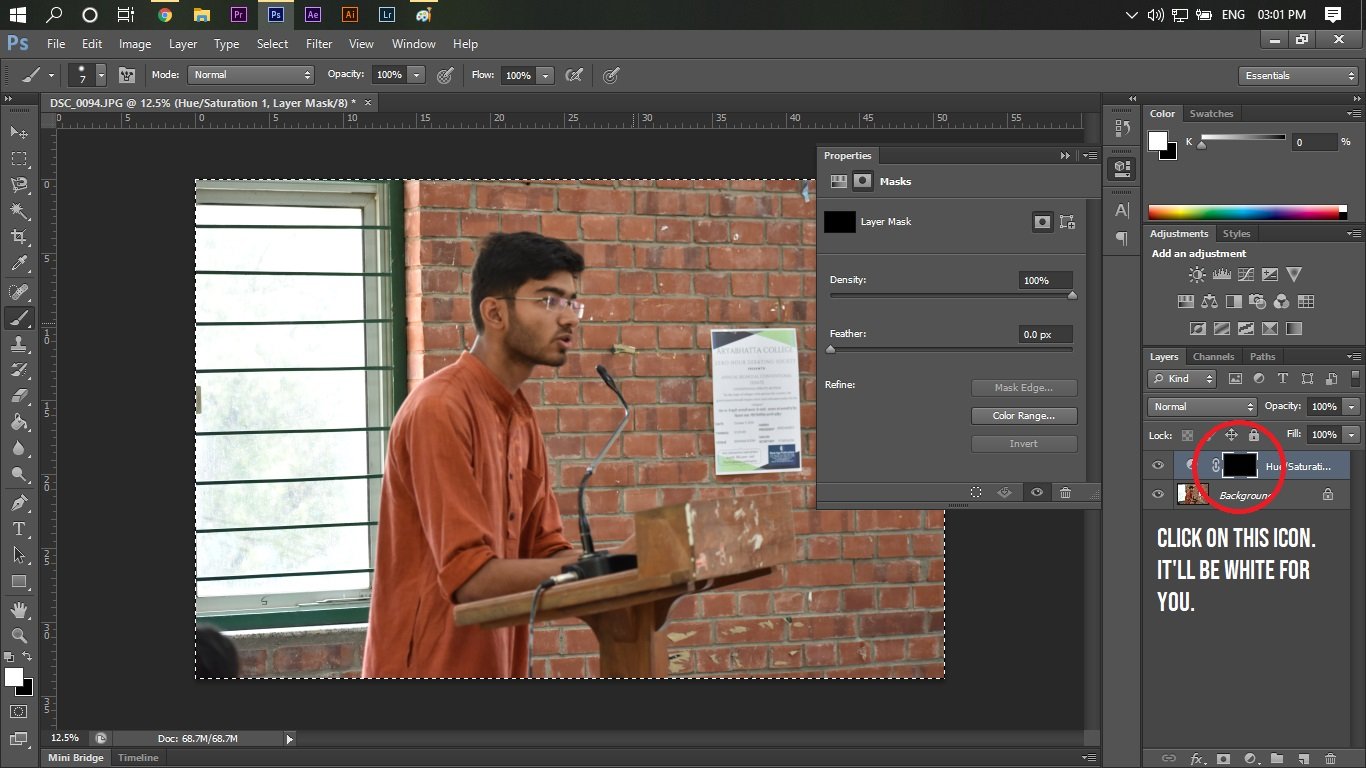
This step is filling the Hue/Saturation layer we just added with black. What this means is essential, we’re hiding the whole layer. Then we’ll paint over a mask so that the layer only affects the parts we want it to, instead of the entire image.
Go ahead and click on the small white rectangle in your layer. Then use CTRL+Backspace to invert the swatches so that black becomes the foreground colour, and your image will revert to its original colours.

Step 4: Painting the mask on
Now go ahead and select the Brush tool. After this, you can start painting the mask on the hair, and as you go along, you’ll notice that the colourise effect will start showing up.

Adjust your brush size and softness accordingly to get the best results. For dealing with areas like hair strands or so, try lowering the opacity of the brush.
Step 5: Finishing touches
Now that you’ve painted the mask, you can move on to play with finer properties, such as changing the layer’s blend mode. By default, the blend mode is set to colour, but you can change it to Soft Light for a more punchy effect.

You can lower the opacity of the Hue/Saturation layer for a more subtle effect, or you can also change the Hue/Saturation sliders if you want to experiment with other colours.
Also read: Photoshop 101: Changing colours in an image


