Chromebooks have become essential for various activities like work, learning, and entertainment. Nonetheless, like any device, they can sometimes run into issues. One of the common problems is the camera not functioning properly. Whether you’re a student attending online classes or a professional relying on video meetings, a malfunctioning camera can be inconvenient.
This article discusses various causes of the Chromebook camera not working and a few ways to fix the issue.
Why Chromebook camera is not working?
There can be various reasons that might be causing issues with your Chromebook’s camera.
- Temporary system glitch.
- The app or site does not have camera permission.
- The Webcam privacy switch is enabled.
Also read: Are Chromebooks good for college?
How to fix the issue?
Here are a few ways that might help you fix the issues with your Chromebook’s camera:
Restart the device
A simple restart can resolve lots of technical problems. If your camera isn’t working, try restarting your Chromebook. This can help refresh the system and clear any minor glitches causing the issue.
Use camera on other apps
Use the apps on which you require a camera, like Google Meet. If the camera is running properly in the app, it means the problem is not with your camera; it is either with the app or Chromebook.
Enable camera permission for the app
It is possible that the camera might not be working properly on the app because it does not have the proper permissions to access the camera. To enable permission for that app, follow the steps below:
Step 1: Click on the clock in the bottom right corner. Click on the Settings (gear) icon to open the settings menu.

Step 2: Click on the Apps in the sidebar, and then on the right side, under the Apps section, click on Manage your Apps.
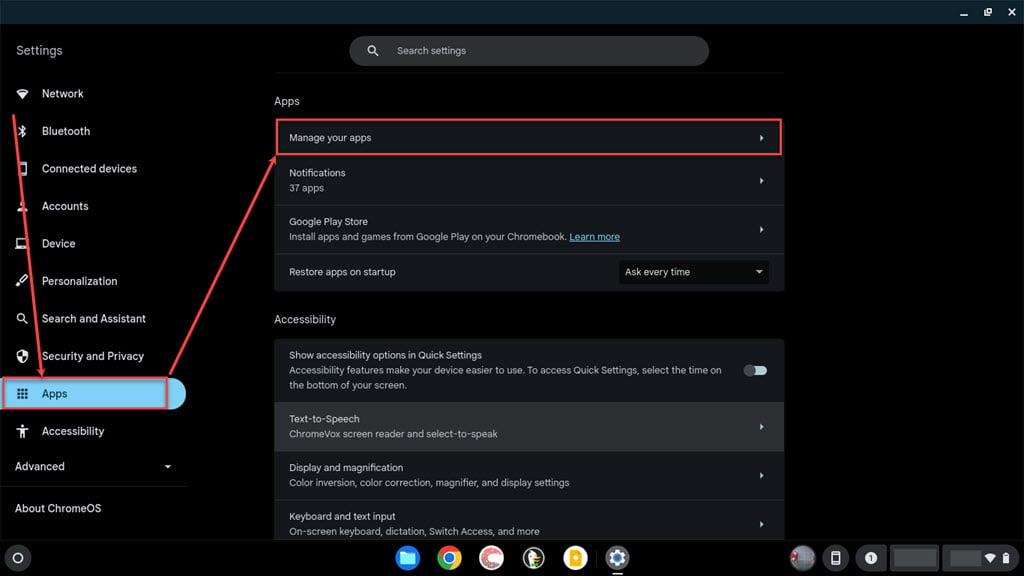
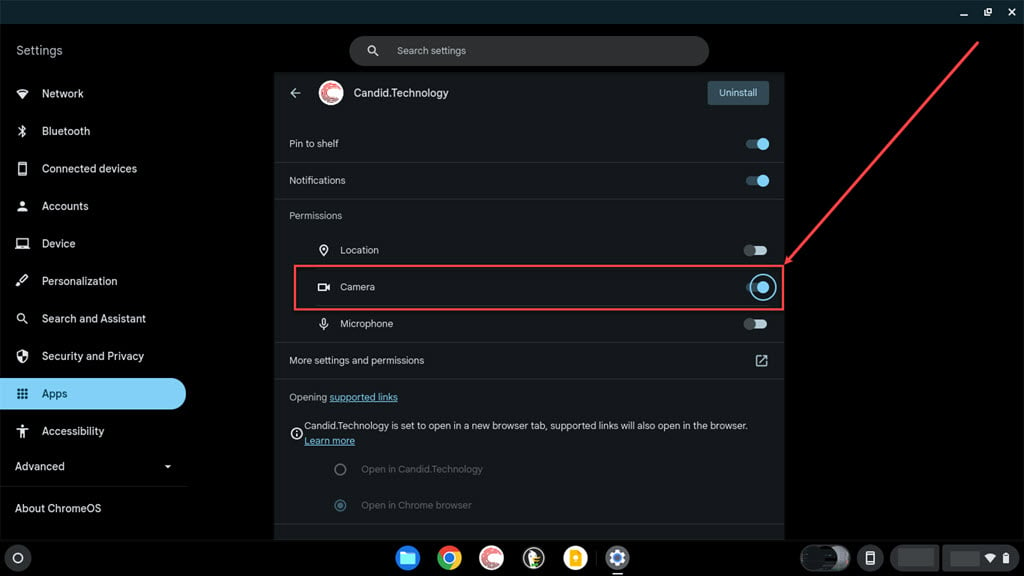
Step 3: Click on the app for which you want to enable the camera permission.

Step 4: Under the Permissions section, turn the toggle beside the Camera.
Also read: YouTube symbols and icons explained
Enable camera permission for the sites
If your Chromebook camera cannot work on your browser on a site, then the camera permission might be off on your browser. To enable the camera permissions on the browser, follow the steps below:
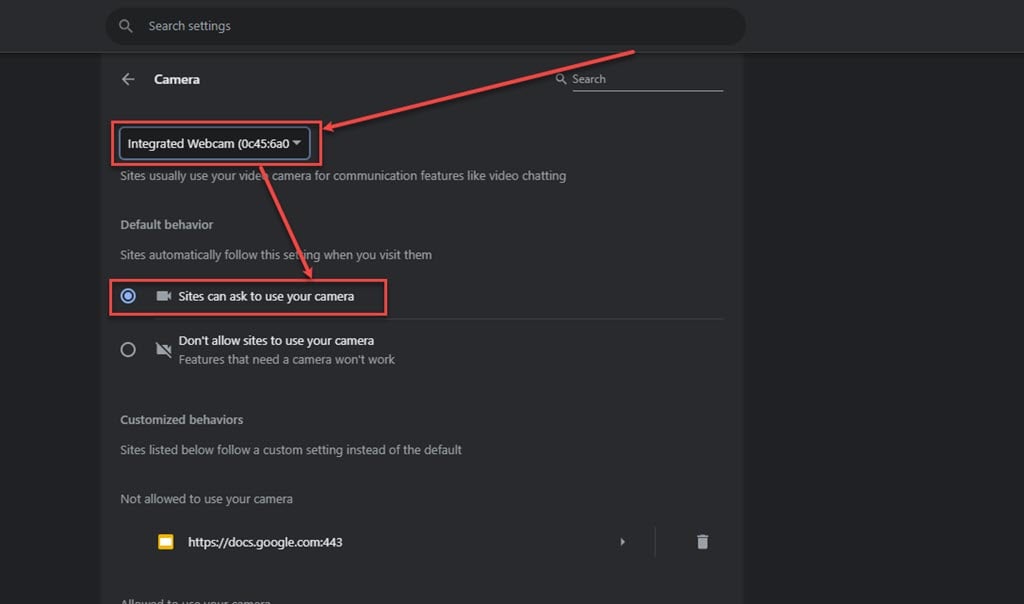
Step 1: Open the browser, type chrome://settings/content/camera in the address bar and hit Enter.
Step 2: If you have multiple cameras connected to your Chromebook, then select the one you want to use and then click on the Sites can ask to use your camera option.
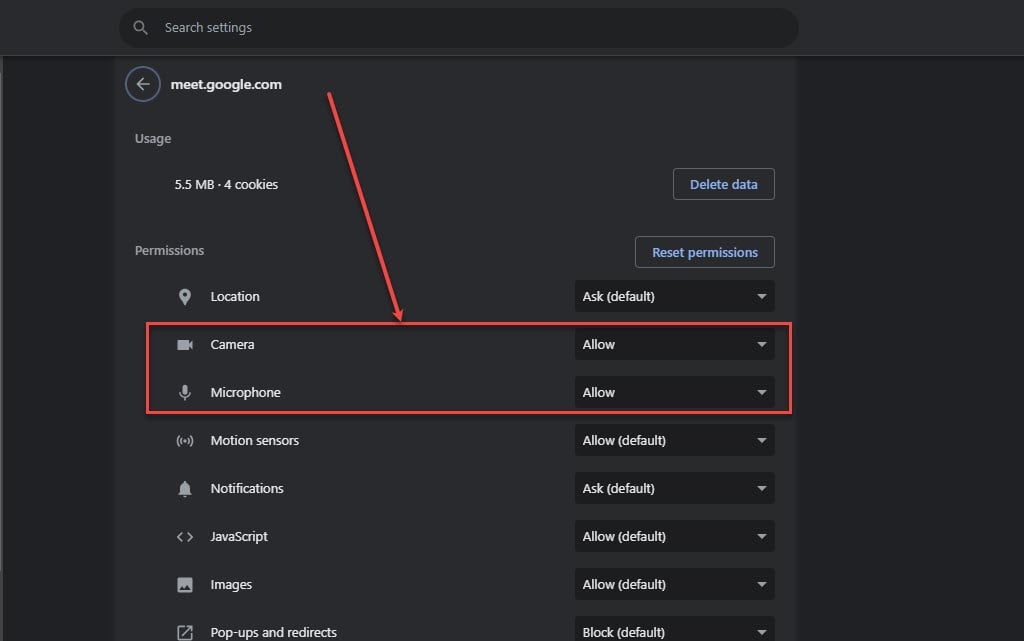
Step 3: Now, open the site on which the camera was not working and click on the View Site Information (Toggle) button. Then, in the menu, click on the Site Settings option.

Step 4: Under the permissions section, change the permissions for Camera and Microphone to Allow.
Ensure the Webcam Privacy Switch is disabled
HP Chromebook models, such as the 14b and 14c, have a handy feature to protect your privacy. On the left side of the Chromebook, there’s a switch that controls the webcam. When this switch is disabled, a red light will appear next to the camera. To use your HP Chromebook’s camera, switch it off.
Also read: Fix: iPhone 12 power button not working and the screen not working
Reset Chrome
If the problem with your camera only occurs when using the Chrome browser, you can try resetting Chrome to its original settings. Doing this is likely to resolve the camera issue on your Chromebook. To reset it follow the steps below:
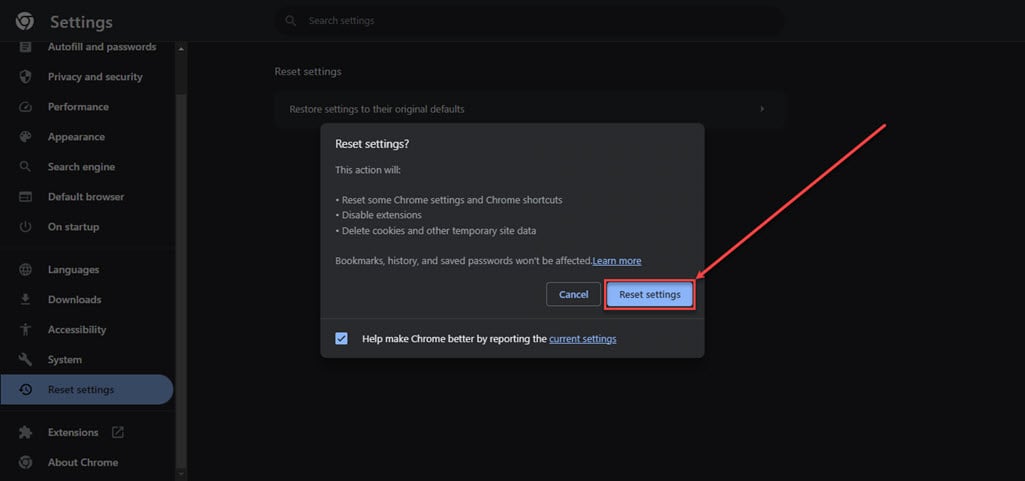
Step 1: Open the Chrome browser and type chrome://settings/reset in the address bar and then hit Enter.
Step 2: Click on the Restore settings to their original defaults.

Step 3: Now, click on the Reset settings button.
Powerwash Chromebook
If none of the above fixes resolved the issues with your Chromebook’s camera, then the last resort is to perform a powerwash. To do that, follow the steps below:
Step 1: Click on the Clock on the Chromebook shelf, and then in the notification menu, click on the Settings icon.

Step 2: Click on Advanced in the sidebar to expand it.

Step 3: In Advanced options, click on the Accessibility option and then click on the Reset button on the right side of the screen.

Your Chromebook will restart; follow the on-screen instructions and sign in with your Google account.
Alternate way to powerwash
- Sign out of your Chromebook.
- Press and hold the Ctrl + Alt + Shift + R keys on the login screen.
- On the pop-up window, click on Restart.
- In the box that appears, select Powerwash > Continue.
- Follow the on-screen instructions.
- Sign in with your Google account and then set up your Chromebook.
Also read: How to change the Chromebook owner?


