In today’s world, digital media is key to the success of many. A website is one such tool that can help businesses or individuals increase their worth by advertising their skills and expertise online.
They help provide information and can serve as a place for teams to share info and collaborate. Its reach can catch the attention of interested parties and bring forth opportunities. Through the steps listed below, one can learn how to create a website with the help of Google’s free website creator tool.
This guide has been made by referring to the new Google Sites Creator tool.
To create a website head over to Google Sites and follow the steps listed below.
Step 1: Under the Start a new Site section, select a blank template or a custom one from the Template Gallery.

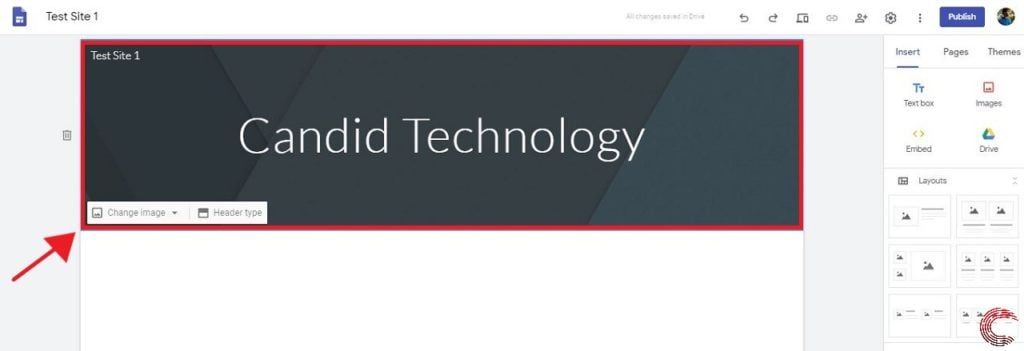
Step 2: Edit the site name, title, header type and header background by hovering over the section highlighted in the image.

Step 3: Use Insert to add content to the site or edit its layout.
The following modification options are available:
- Text box: Add text to site.
- Images: Add images to the site either via uploads, Google Images Search or URLs.
- Embed: Add content like videos and posts from other websites (Twitter, YouTube, etc.) via URLs
- Drive: Add files from the cloud storage service.
- Layouts: Add pre-designed modules to organise content.
- Collapsible Text: Add a text box with a section that can be hidden behind a click interaction.
- Image Carousel: Add multiple images in one location on the site — these can be scrolled through.
- Button: An interactive element which can be linked to other sites.
- Divider: Used to indicate the end of a section.
- Placeholder: An element which blocks space for files that need to be added at a later time.
- Youtube: Add a YouTube video to your site.
- Calendar: Add a calendar linked with a Google Account
- Map: Add an element which can pinpoint a location for visitors.
- Docs: Add a document to your site.
- Slides: Add a presentation to your site.
- Sheets: Add a worksheet to your site.
- Forms: Add a form to your site.
- Charts: Add a chart to your site.

Step 4: Click on Publish in the top right corner.

Note: The humanoid figure in the top-right allows the site to be shared with others for collaborative work.

Also read: How to create a playlist on Spotify?
More options to improve your Google website
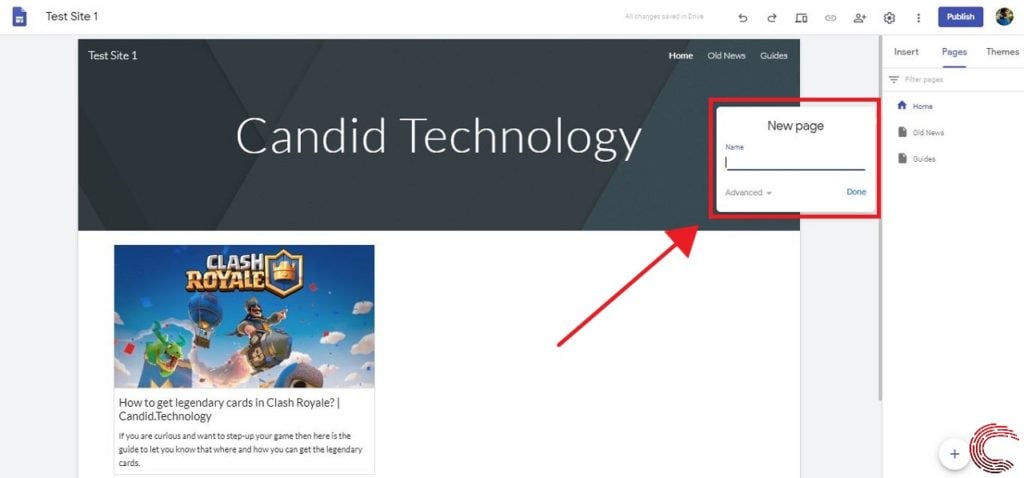
Adding Pages to your site
Step 1: Choose Pages from the top of the right sidebar.

Step 2: Click on the plus (+) at the bottom.
Hovering over this option will also allow you to add external links in place of generating new pages. For example, this can be used to add social media sites or different websites.

Step 3: Now insert the title of the new page.

Also read: How to stretch a wallpaper across two monitors in Windows?
Customising website navigation
Step 1: Click on the gear-shaped (settings) icon in the top-right.

Step 2: Click on the Navigation subsection.

Step 3: Choose between Top or Side styles.

Step 3: Choose the desired colour scheme for the navigation bar.

Also read: How to make a time-lapse in Canon cameras?
Changing theme and font
Step 1: Choose Themes.

Step 2: Select a theme alongwith a custom accent colour.

Step 3: Click on Font style to choose between the options available for the chosen theme.

Also read: How to disable the firewall on Windows 10?
Adding Logo and Favicon
Step 1: Click on the gear-shaped (settings) icon in the top-right.

Step 2: Within the Brand images subsection, choose a desired logo and favicon either via uploads, Google Image Search or URLs.

Also read: How to make your LinkedIn profile private?


