Steam is a large gamer community with tens of millions of active users and as is true for every public community, friends, family and colleagues sort to public or private groups to discuss things.
Steam also allows users to create groups — both public and private — which can be used to talk to the group members, play together, organise tournaments and get-togethers or even have some casual chat online.
In this article, we’ve compiled a step-by-step guide to help you create a group on Steam with ease.
Also read: How to change your Steam region and country?
Creating a Steam group
Launch the Steam app for PC and follow the steps mentioned below to create a group on Steam.
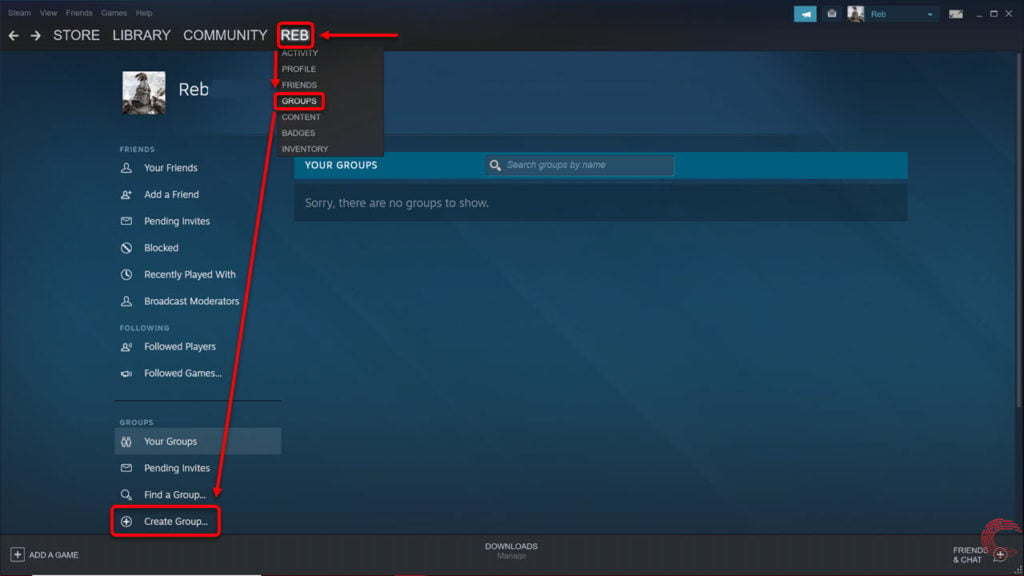
Step 1: Click on your current username from the toolbar options at the top and then select Groups from the dropdown menu list. Now on the Groups page, click on Create Group… from the left sidepanel.

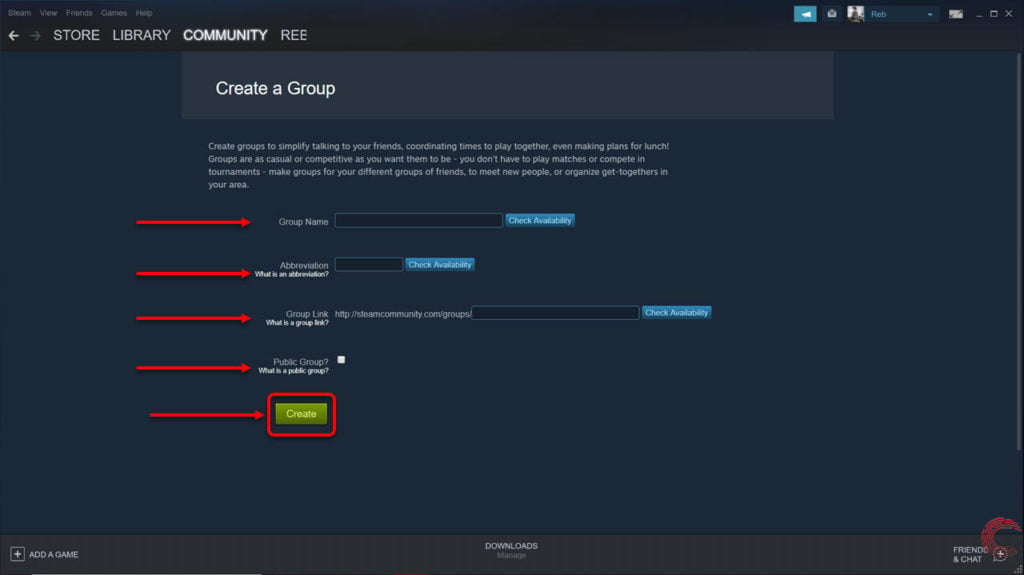
Step 2: On the next Create a Group page, enter your preferred group name, followed by an abbreviation, group link and click on the button beside Public Group if you want it to be available to everyone else on Steam. Anyone on Steam can join public groups and contribute to them. If you want to keep your group private, leave the box unchecked.
Once all the entries have been made and you’ve checked their availability via the Check Availability button for the first three entries, click on the Create button.

Step 3: Check all the information on the next page and if all seems alright, click on the Create button.

If you want to edit some information, click on the back button on the top-left of the screen or the Cancel button and you’ll be redirected the previous page where you can edit the information.
Also read: Where are Steam screenshots saved?


