Windows 11 is the latest instalment in a long-running line of operating systems from Microsoft that have been the most popular ones for decades. However, as seamless as Windows 11 is, it can still run into issues occasionally.
In this article, we’re talking about how the “Critical process died” error, its causes and what you can do to fix the problem.
What causes the “Critical process died” error in Windows 11?
The error can be triggered by several different problems, including:
- Missing or corrupt system files
- Outdated Windows version
- Hardware or driver issues
Also read: Windows error 0x80248007: 4 Fixes
How to fix the “Critical process died” error in Windows 11?
Here are seven fixes you can try out.
Update your PC
The first thing you should do is to update your PC. Updating your PC will, in most cases, update your drivers and fix any issues.
Check out this detailed guide to know how to update your PC here
Run an SFC scan
Corrupt files are the number one reason your PC might behave weirdly. Here’s how you can get rid of them and potentially resolve your issue.
Step 1: Press Windows Key + S to bring up the Cortana/Search box and search for Powershell. Open Windows Powershell from the search results.
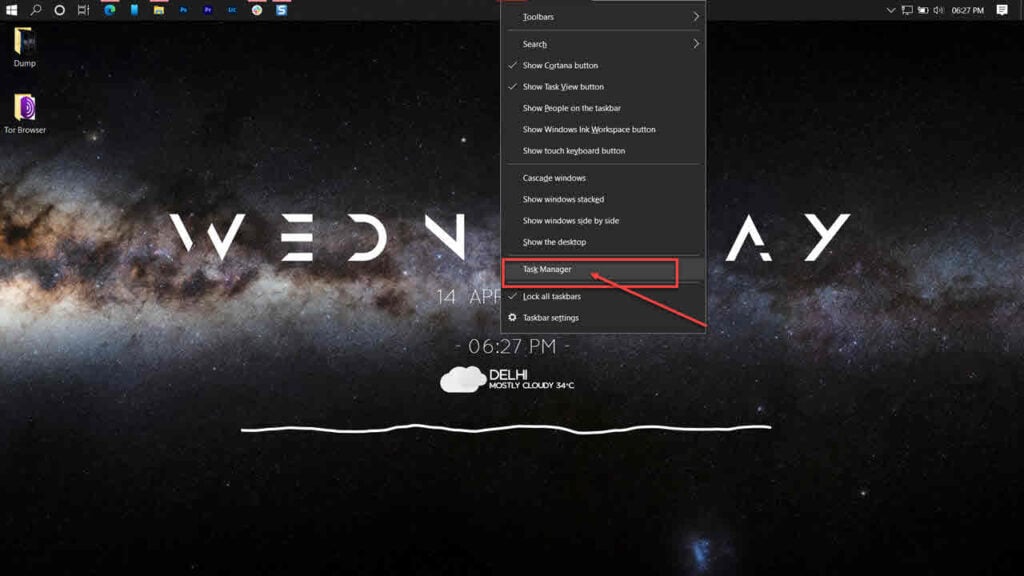
Step 2: Type sfc /scannow to scan your system for issues.
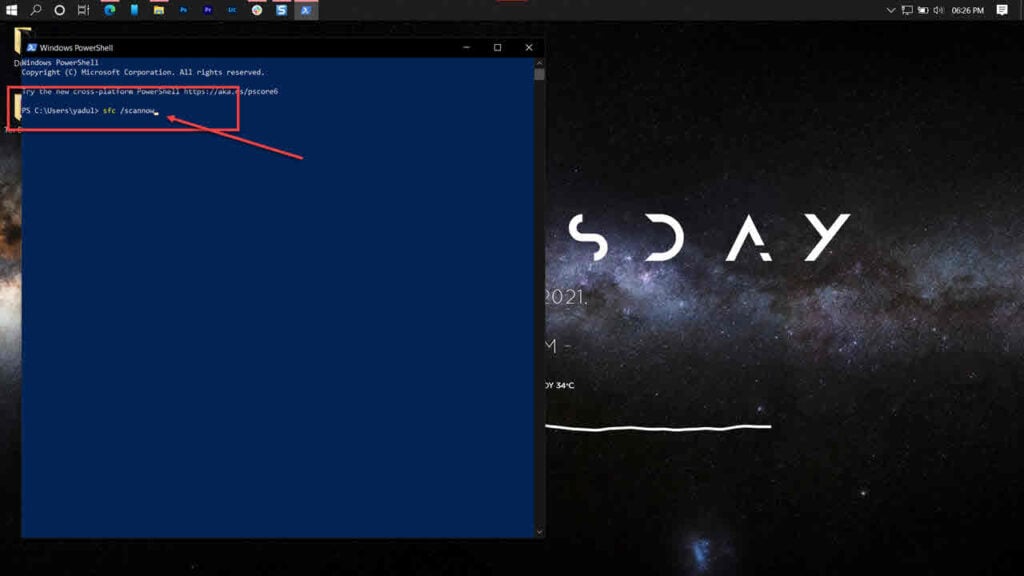
Step 3: If the SFC scan finds any problems, use the following command to resolve them.
DISM /Online /Cleanup-Image /RestoreHealth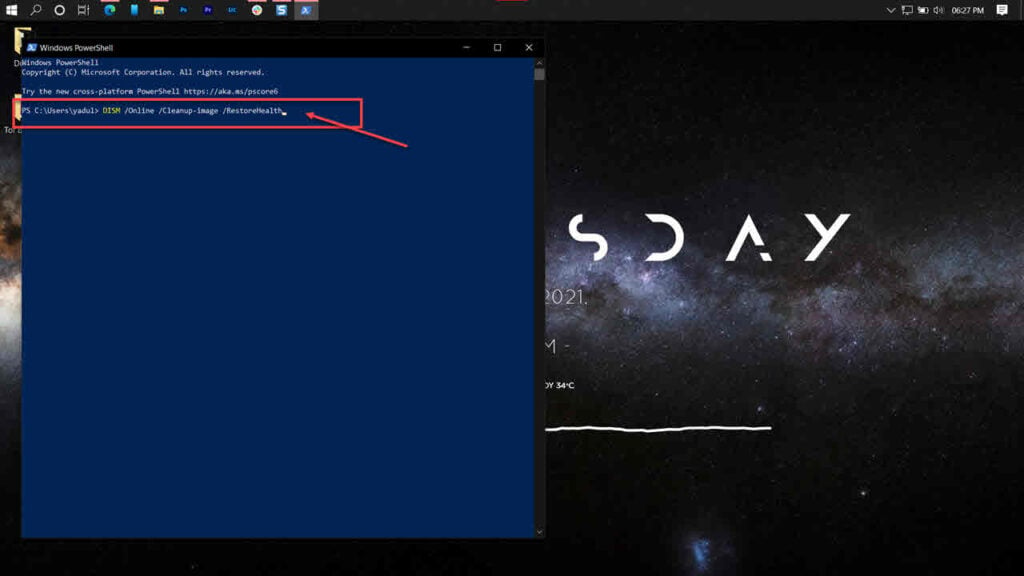
Restart your PC and the error should be gone.
Run the Check Disk utility
A BSOD can very well be a sign of your boot drive failing to perform as it should. Try running the check disk utility to check whether or not your storage drives are, in fact, functional.
You can refer to our detailed guide here on how to run the check disk utility
Update your drivers
Updating (or uninstalling) the problematic driver can also fix the problem.
Step 1: Right-click Start and select Device Manager from the menu.
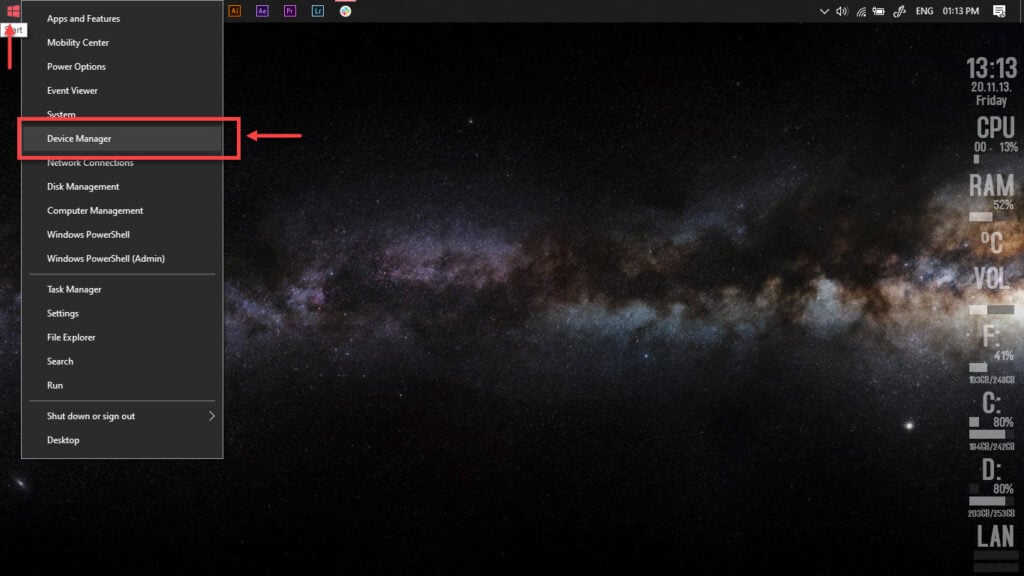
Step 2: Expand the problematic driver, right-click on it and click Update driver.

Step 3: Click on Search automatically for drivers. Windows will then automatically look for and download the latest drivers.
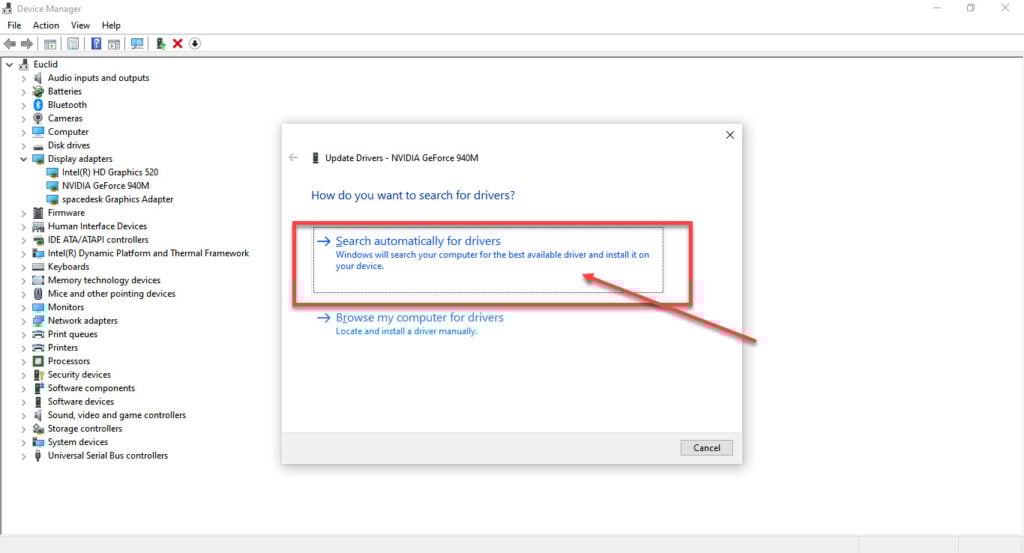
While this should help resolve the error, if it doesn’t, click Uninstall device and restart your PC to force Windows to install the required drivers. You can then update them later.
Perform a clean boot
To isolate the problem, perform a clean boot and then start the missing processes one at a time to find your culprit.
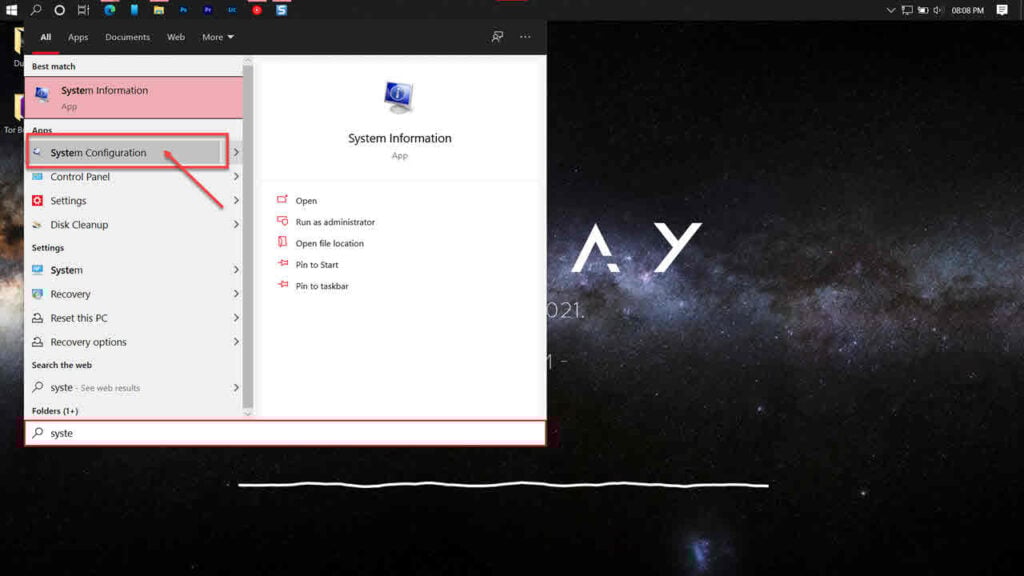
Step 1: Press the Windows key and search for System Configuration.
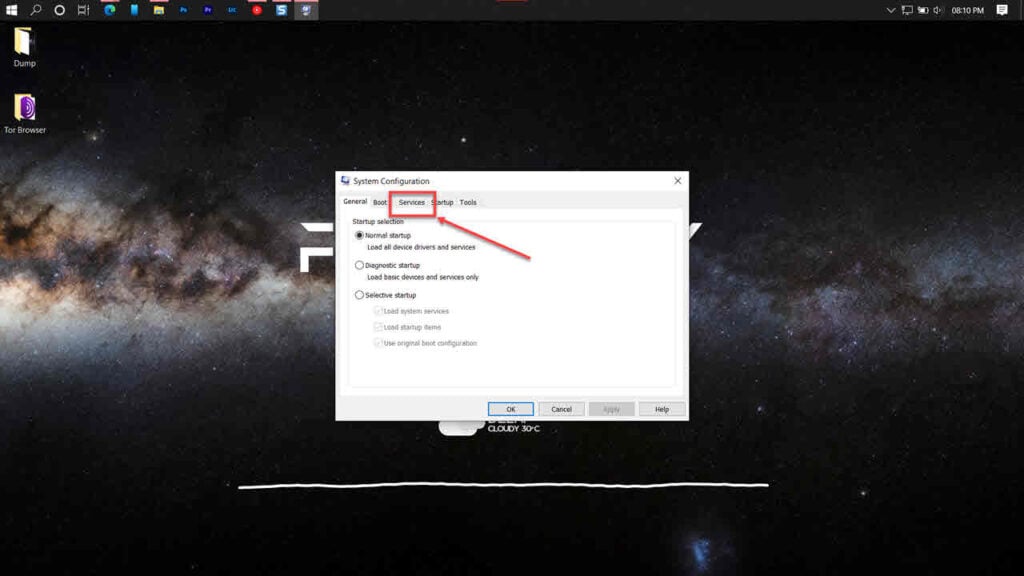
Step 2: Head over to the Services tab.
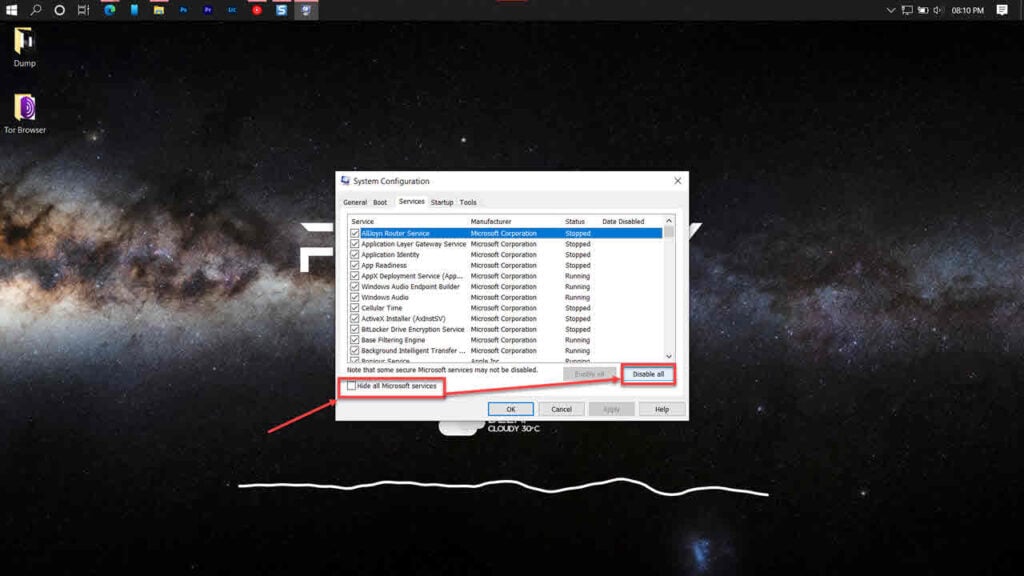
Step 3: Uncheck the Hide all Microsoft Services checkbox. Now click the Disable All button.
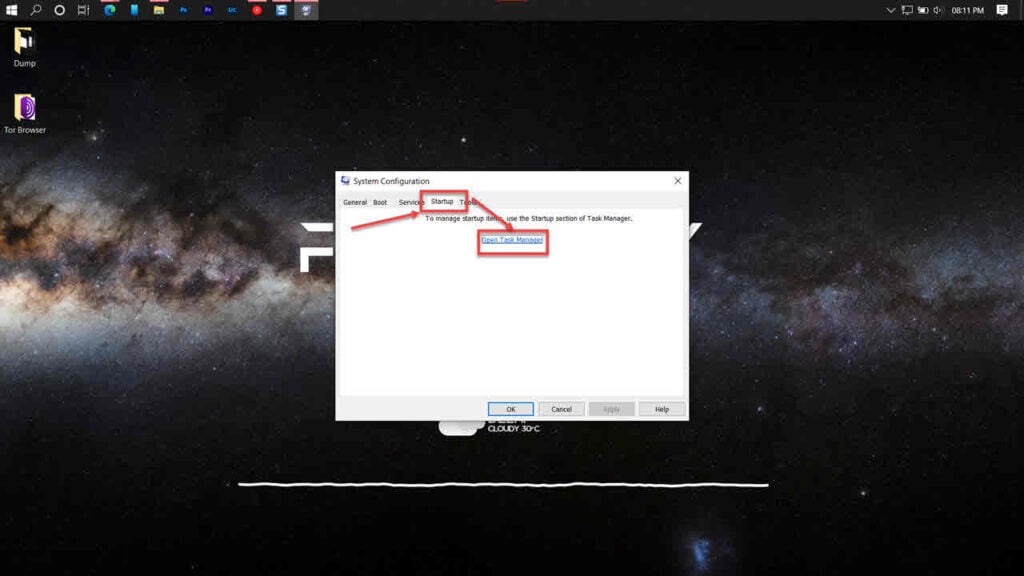
Step 4: Now head to the Startup tab and click Open Task Manager.
Step 5: Click the Startup tab again, select all the services and click the Disable button.
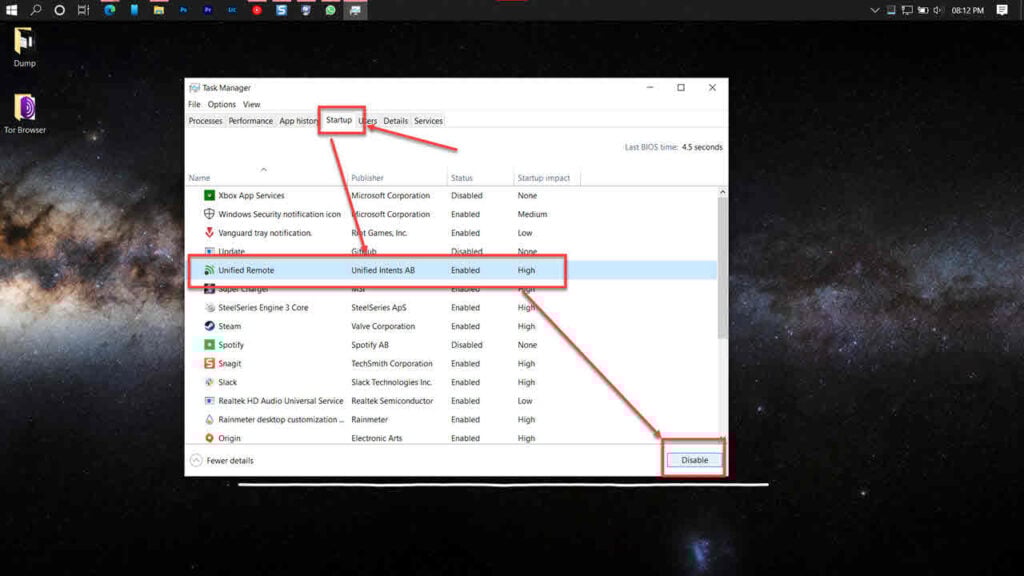
Check if the error persists.
Restore to a previous backup
Restoring your system to a previous state when everything was working fine can often help solve BSOD problems on Windows.
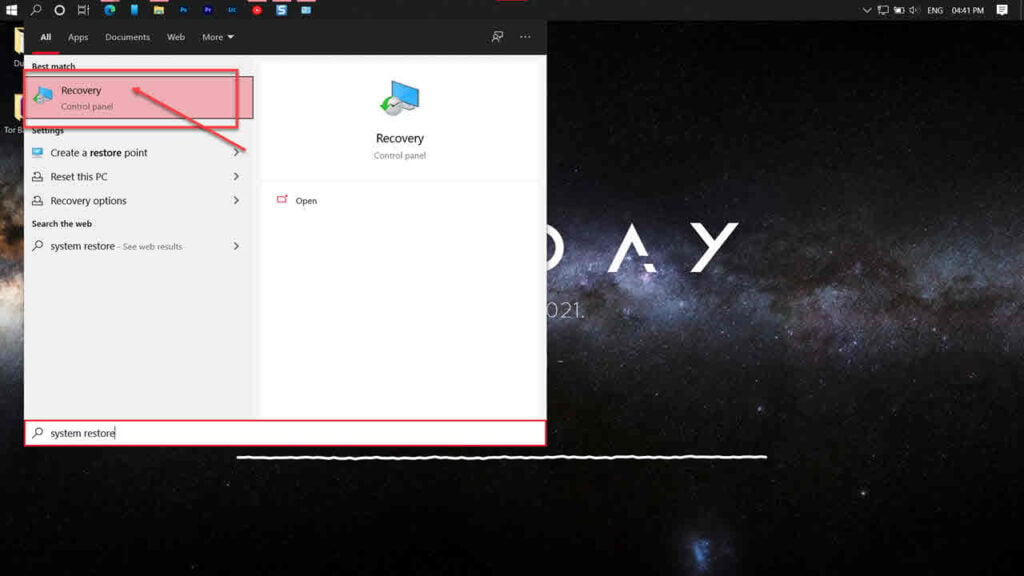
Step 1: Press the Windows key and search for Reset this PC. Then, launch the Recovery setting from the search results.
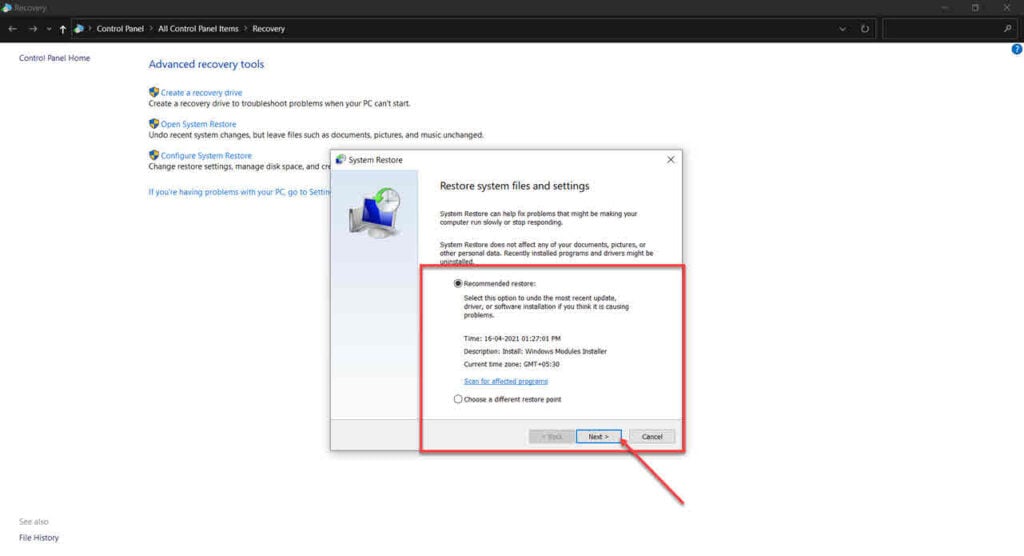
Step 2: Click on Open System Restore.

Step 3: Select the recommended restore point and click the Next button to proceed.
Repair your system
If nothing else works, the best way to eliminate the error is by reinstalling or repairing your OS.
The Windows Media Creation tool is a great way to install Windows and repair the OS. Using this, you can perform a clean installation or repair your OS without affecting your data.
You can download the Media Creation Tool here
Also read: Windows error 0xc1900106: 7 Fixes


