Microsoft Excel is a widely used tool that helps users to organise, analyse, and present data. An important skill for anyone using Excel is knowing how to format data effectively. One such formatting aspect is changing the column width, which can significantly impact the readability and looks of your spreadsheet.
In this article, we discussed how to change the column width and row height in Excel in simple and easy steps.
Also read: How to hide and unhide rows in Excel?
Change the column width in Excel
To change the column width in Excel, follow the steps below.
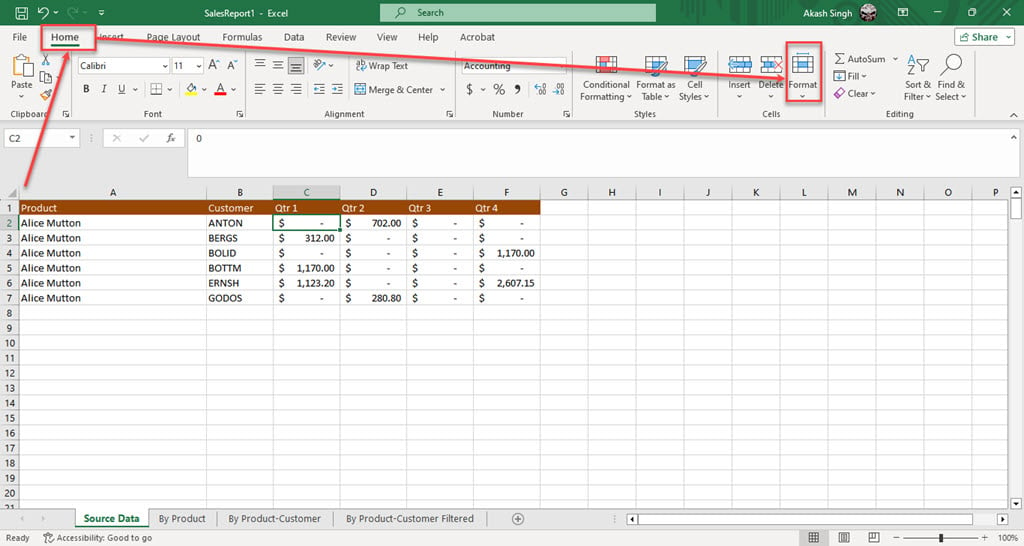
Step 1: Open the Excel document and click on the Home tab in the toolbar ribbon and then click on the Format in the Cells section.

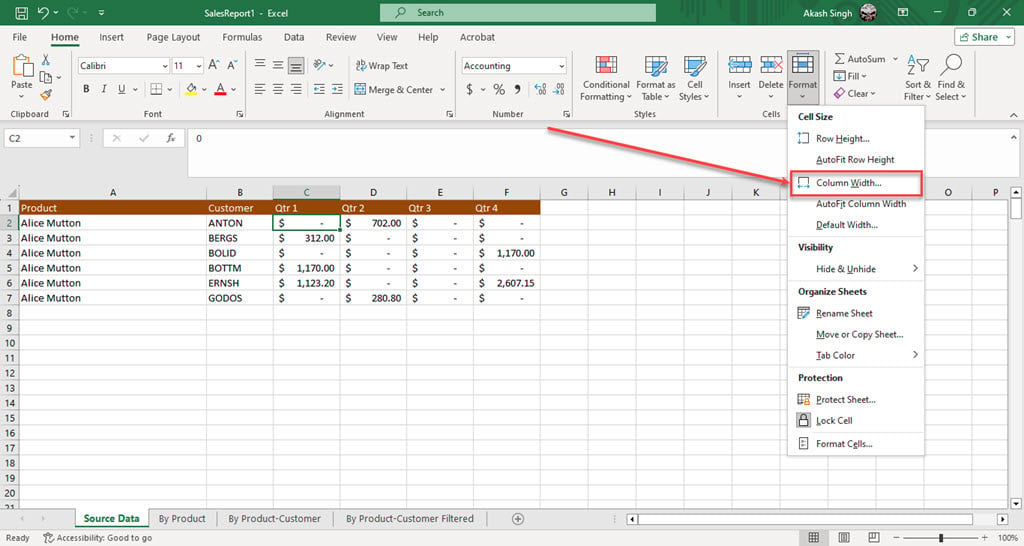
Step 2: Click on the Column Width option in the dropdown menu.

Step 3: Put the desired width in the Column width box and click the OK button.

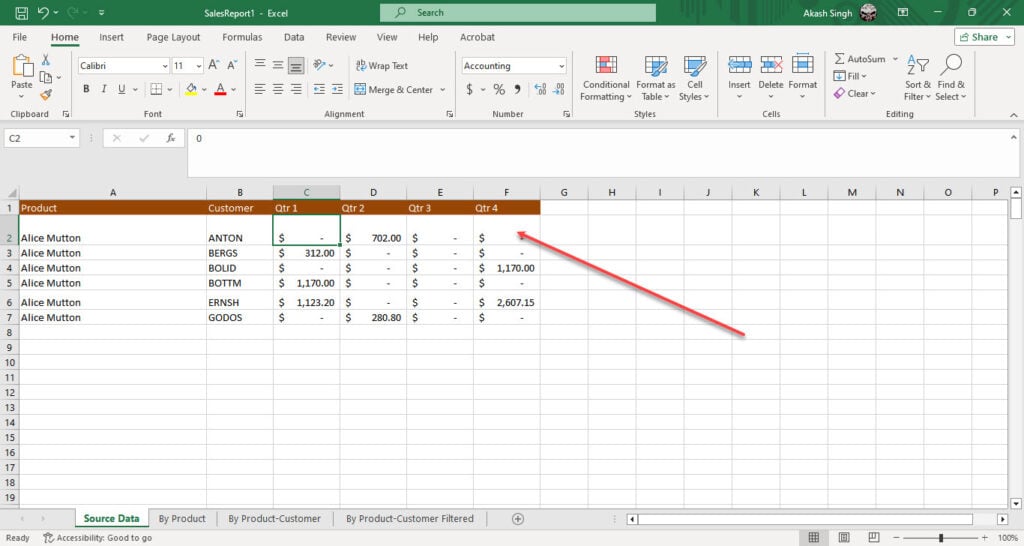
Step 4: The width of the column you selected will be changed.

If you want to change the width of multiple columns at once, then select those columns and follow the above-mentioned steps.
Also read: How to change the orientation of one page in Word?
Change the row height in Excel
The steps to change the row height are similar to changing the column width. To change the row height, follow the steps below.
Step 1: Open the Excel document, click on the Home tab in the toolbar ribbon, and then click on the Format in the Cells section.

Step 2: Click on the Row Height option in the dropdown menu.

Step 3: Put the desired height in the Row height box and click the OK button.

Step 4: The height of the row you selected will be changed.

If you want to change the height of multiple rows at once, select those rows and follow the steps mentioned above.
Also read: How to add a total row in Excel?


