A Graphics Processing Unit, otherwise called a GPU or simply a graphics card, is a rather important part of your PC. If you’ve got a pre-built PC or a laptop, figuring out what GPU you’re rocking can go a long way in helping you decide the appropriate upgrades and your PC’s overall capabilities.
In this article, we’re going over how to check your graphics card on a Windows 11 PC. There are several ways you can check your GPU apart from just ripping apart your computer to inspect the card physically. Here are the most common ones.
- Using the task manager
- Using DirectX diagnostics tool
- Using device manager
- Using display settings
- Using system information tool
Also read: How to access BIOS in Windows 11?
How to check GPU in Windows 11 using the Task Manager?
One of the simplest ways to check your GPU is using the Task Manager. Here’s how.
Step 1: Press Windows key + X to open the Quick Access menu. Click Task Manager.

Step 2: Head over to the Performance tab and click GPU. You’ll see your GPU’s name and all related information here.

How to check GPU in Windows 11 using DirectX diagnostics tool?
Another quick way of checking your GPU is the DirectX diagnostics tool.
Step 1: Press Windows Key + R to open the Run prompt. Type dxdiag and hit enter.

Step 2: The Display tab will show the integrated GPU in your computer, and the Render tab will show your dedicated GPU (if you have one).

Also read: Windows theme tool resetting after restart: 8 Fixes
How to check GPU in Windows 11 using Device Manager?
The Device Manager lists all the working peripherals on your computer, including your GPU.
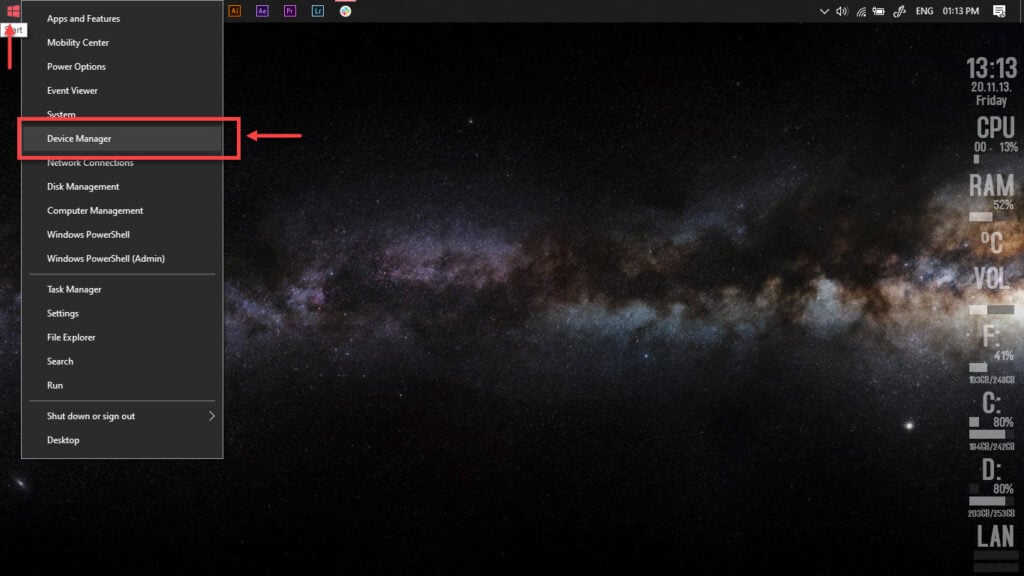
Step 1: Right-click Start and select Device Manager from the menu.

Step 2: Under Display Adaptors, you’ll find all attached GPUs.

How to check GPU in Windows 11 using Display Settings?
Display Settings on your Windows 11 device also show the attached GPU.
Step 1: Right-click your desktop and click Display Settings.

Step 2: Under Related Settings, click Advanced display.

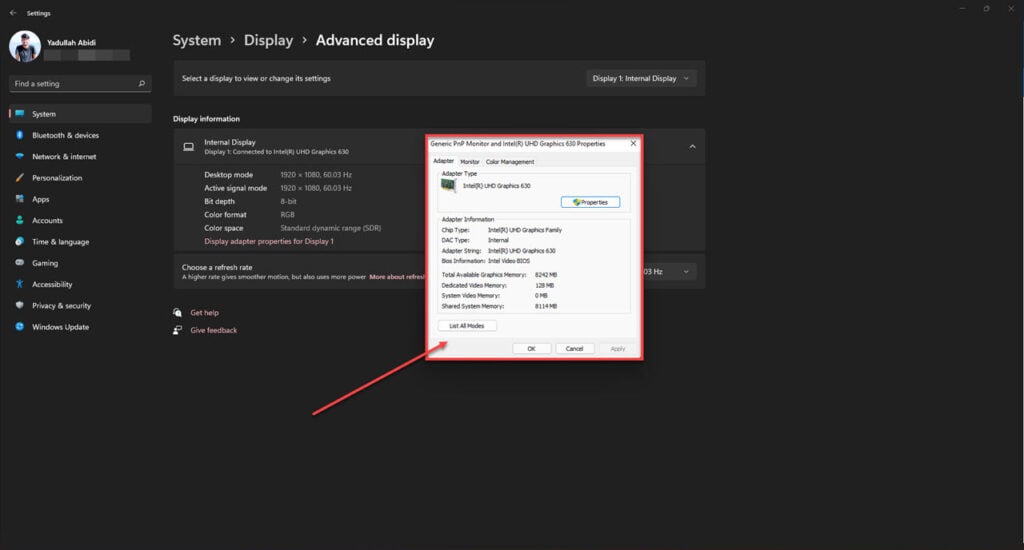
Step 3: Under Display information, click Display adapter properties for Display.

You’ll see a pop up containing all the information on the device running your displays. Do keep in mind that if you’re on a dual GPU system like on laptops with dedicated GPUs, you’ll only see the internal GPU here.

Also read: How to set different wallpapers on dual monitors on Windows 11?
How to check GPU in Windows 11 using the System Information tool?
Last but not least, you can also check your GPU from the System Information tool.
Step 1: Press the Windows key + R to open the Run prompt. Type msinfo32 and hit enter.

Step 2: Click System Summary, followed by Components and finally Display. You’ll be able to see all GPU information here.

Also read: Bluetooth headphones delay in Windows 11: 5 Fixes


