Bookmarks in Word are just like placing bookmarks in a book, bookmarks in Word are a great way to mark a place in your Word documents. You can create as many bookmarks as you see fit according to your needs and also give them separate names so that you can identify them easily.
In this guide, we have discussed how to create a bookmark and how to make it visible in Word in a few simple and easy steps.
Also read: How to duplicate a page in Word?
Creating a bookmark in Word
If you want to know how to create a bookmark in Word then follow the steps below.
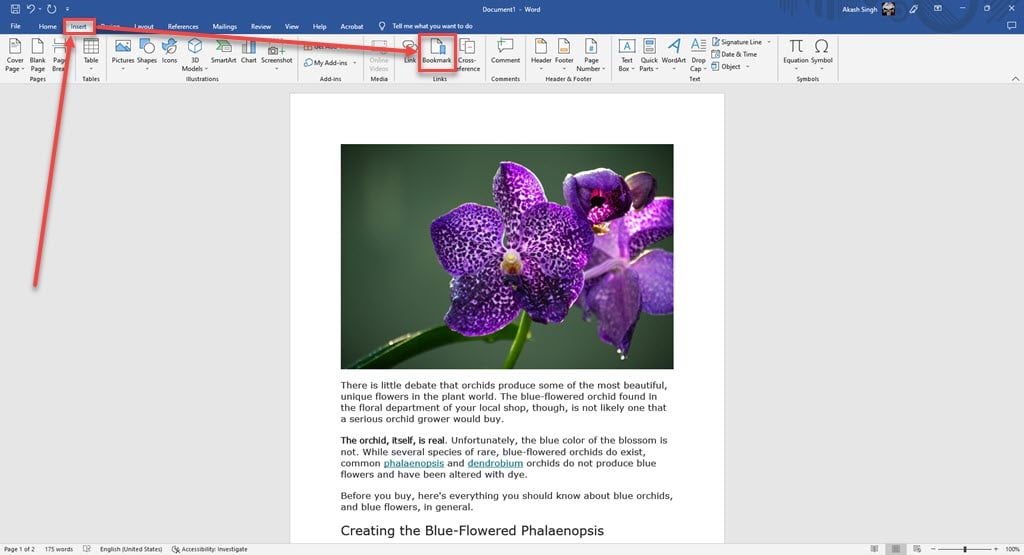
Step 1: Open your Word file and select the word or place the cursor where you want to create a bookmark.
Step 2: Click on the Insert tab and then click on the Bookmark option in the Links menu.

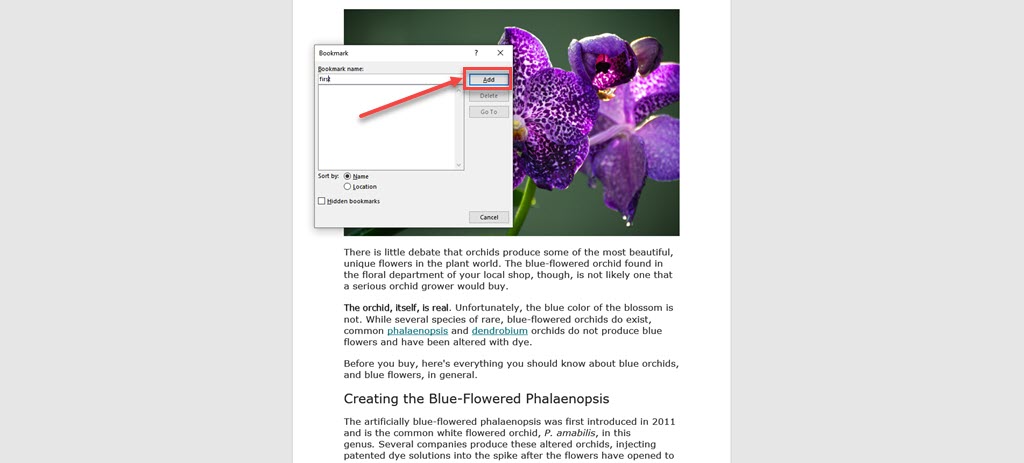
Step 3: A box will appear, firstly type in the name of the bookmark you want to set under the Bookmark name, it will not allow you to use space between words however, you can use an underscore to separate the words and then click on the Add button to create the bookmark.

How to make your bookmarks visible on the document?
If you have created bookmarks in your document and are unable to see them then most probably they are hidden. To know how to make them visible on your document follow the steps below.
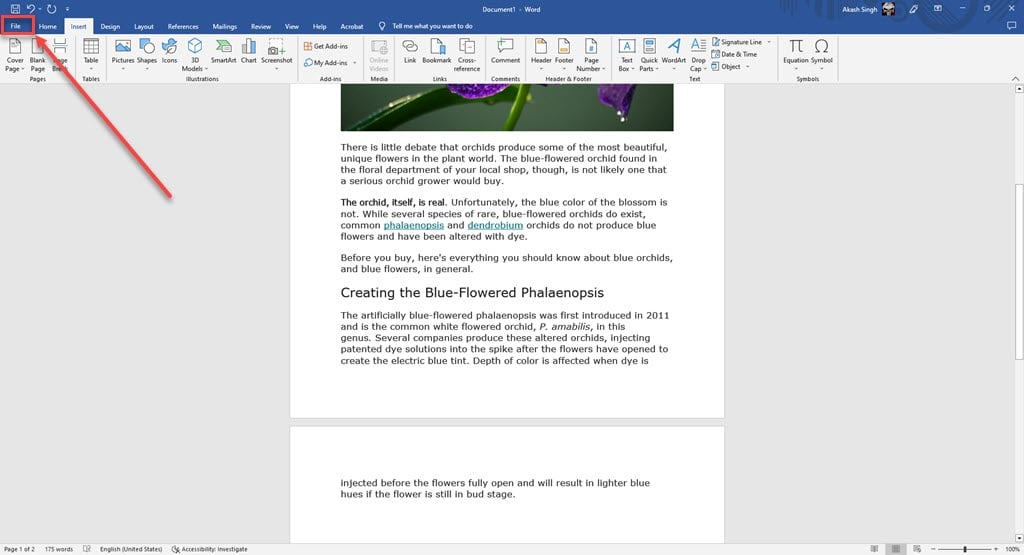
Step 1: Open Word and click on the File tab.

Step 2: Click on the Options tab at the bottom of the menu on the left side of the screen.

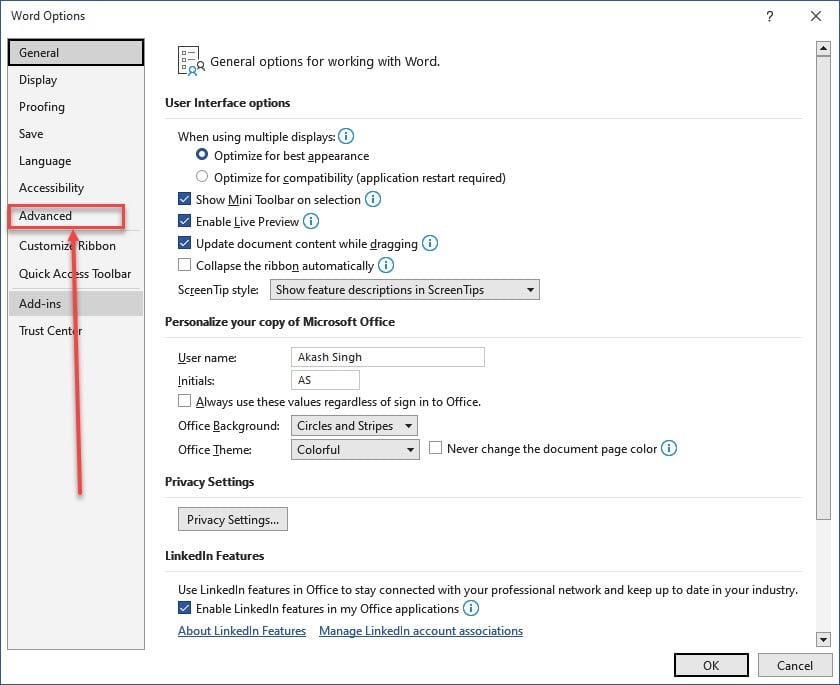
Step 3: The Word Options window will appear, click on the Advanced option from the menu on the left side of the screen.

Step 4: Then scroll down and find the Show document content heading under which you will find the Show bookmarks option make sure to checkmark the option and after that click on the OK button.

Now you will be able to see all the bookmarks you have set in all the documents.
Also read: How to fix ‘error: failed building wheel for Wordcloud’?


