Microsoft Excel serves as the ultimate instrument for managing, analysing, and presenting data. While working with this spreadsheet tool, you might encounter situations where you must add multiple rows. Learning how to add multiple rows in Excel can significantly boost your productivity.
In this article, we have discussed various ways to add multiple rows in Excel in a few simple and easy steps.
Also read: How to create a collapsible row in Excel?
Insert multiple rows in Excel
If you wish to add multiple rows in an Excel spreadsheet, then follow the steps below.
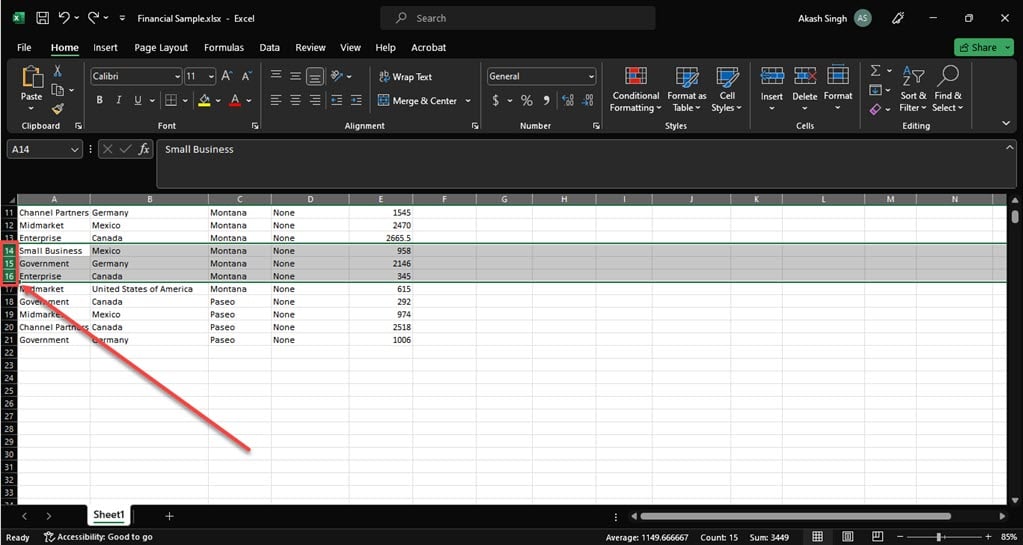
Step 1: Select the row heading where you want to add the multiple blank rows and right-click on them.
Choose the exact number of rows you intend to add. If you wish to insert three empty rows, make sure to select three rows. Even if those rows already have data, the new rows will be inserted above them without any problem.

Step 2: In the dropdown menu, click on the Insert option.

Step 3: We chose three rows and got three blank rows above the selected rows. If you want more blank rows, select more rows.

Also read: How to enable macros in Excel?
Use the keyboard shortcut to add multiple rows
If you don’t like using the mouse much and rely on a keyboard shortcut, as it seems much more convenient for many people, then follow the steps below to add multiple rows using the keyboard shortcut.
Step 1: Select the row heading where you want to add the multiple blank rows.
Step 2: Press Alt + I keys and then press Alt + R keys. Another simpler keyboard shortcut to add multiple rows is Ctrl + +(plus) keys
Step 3: Excel will add the multiple blank rows above the selected rows.
Also read: How to hide and unhide rows in Excel?


