Wireless adaptors are an absolute necessity these days, especially with most systems, including the internet going wireless just about everywhere. However, regardless of the hardware, these adaptors still require software to work and the combination of the two can at times not work as you’d expect.
In this article, we’re talking about Intel Wireless AC 9560 not working as it should, the reasons behind it and what you can do to fix the problem.
Why isn’t Intel Wireless AC 9560 working?
There are several reasons why your wireless adaptor might not work as expected. Common factors include:
- Faulty or outdated drivers
- Network connection issues
- Outdated Windows version
- Corrupt temporary files
- WLAN AutoConfig service isn’t running
Also read: Why is Wistron NeWeb Corporation on my WiFi network?
How to fix issues with Intel Wireless AC 9560?
Here are eight fixes you can try out.
Force restart your PC
Since regular restarting will just repeat the boot loop you’re already experiencing, the best way to get out of this rut is to press and hold down the power button for around 15-20 seconds until your computer shuts down. Then wait a couple of minutes before restarting your computer and the error should be resolved.
Reset BIOS defaults
Corrupt BIOS settings can also cause wireless adaptors to not work as they directly control the ports on your motherboard. Try resetting your BIOS to the default settings to see if that gets the PC going. You can either reset the settings from inside the BIOS or you can just take out the CMOS battery from your motherboard and leave it like that for a couple of minutes while holding down the power button to drain the board of all residual charges and then put the battery back in before restarting the PC.
Disable adaptor power management settings
The Device Manager lets you control individual settings for all the different components on your PC, including any wireless adaptors. Check to make sure that Windows isn’t interfering with the device’s power settings. Incorrect or inconsistent power to your network adaptor can also cause this error.
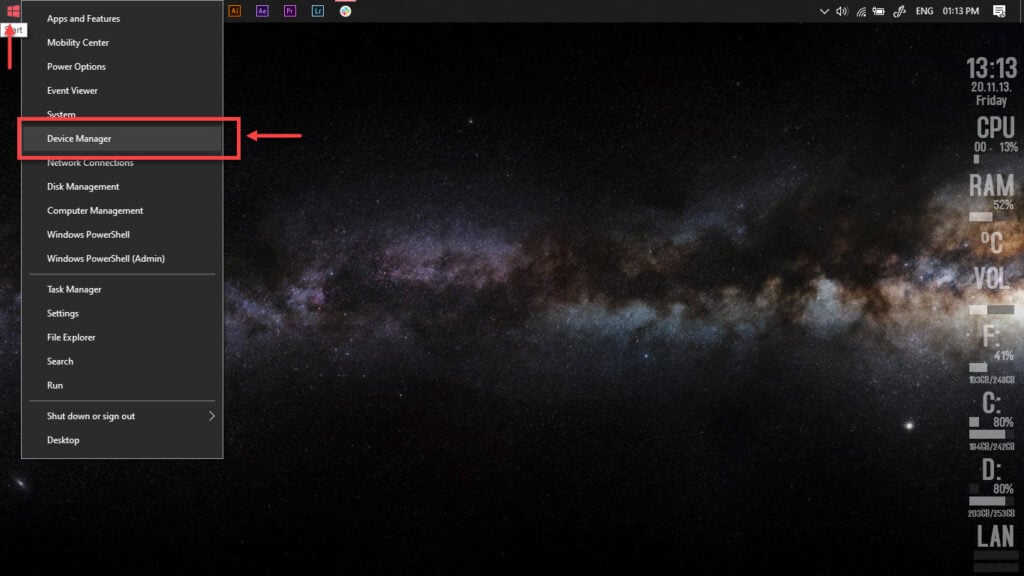
Step 1: Right-click Start and select Device Manager from the menu.
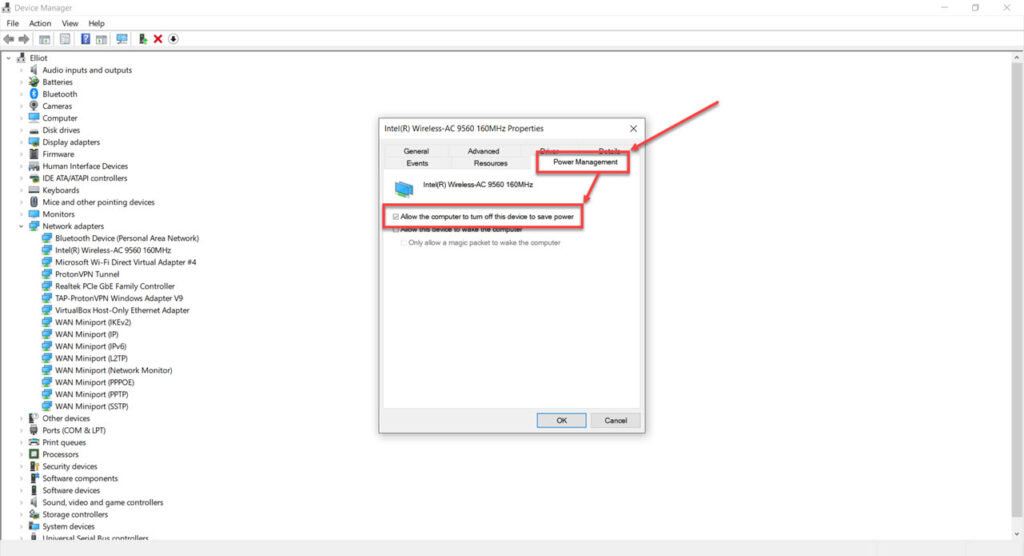
Step 2: Find your network adaptor and double-click it to open its properties.

Step 3: Head over to the Power Management tab and uncheck the Allow the computer to turn off this device to save power option.
Check your drivers
Your network adaptor’s (WiFi or ethernet) drivers could also be causing connectivity issues. Try connecting to the internet using either an ethernet connection or any other alternative and follow these steps to get your drivers in place.
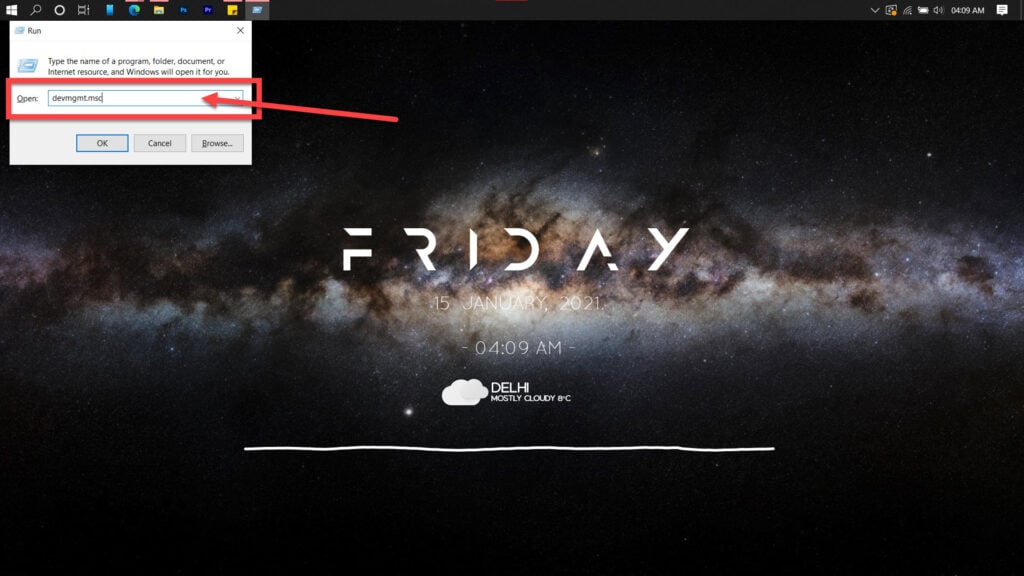
Step 1: Press Windows key + R, type in devmgmt.msc and hit enter.
Step 2: Double-click Network adaptors to expand it and right-click your WiFi card or ethernet adaptor, depending upon what you need to fix. Click on Update driver.
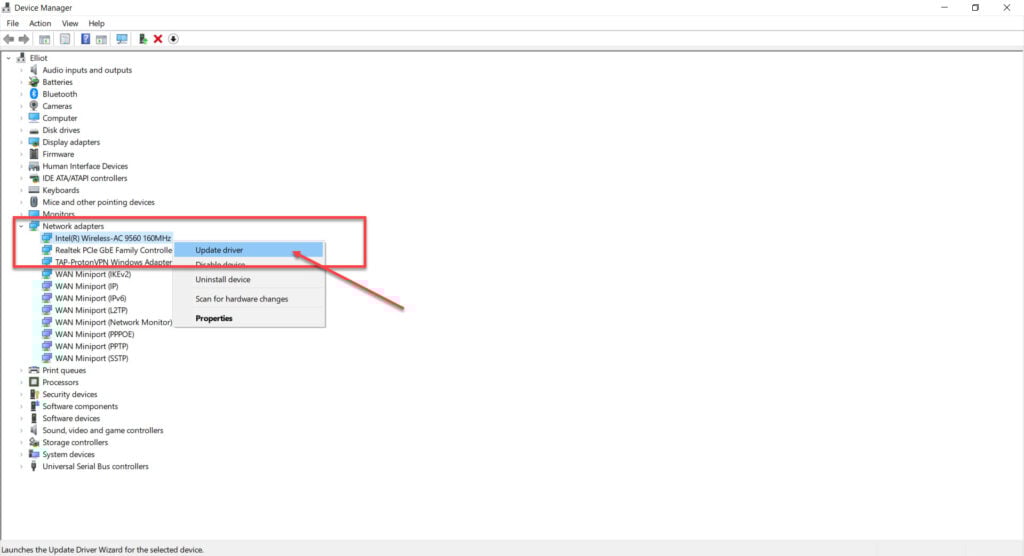
Step 3: Select Search automatically for drivers, and Windows will find and install any available updates.
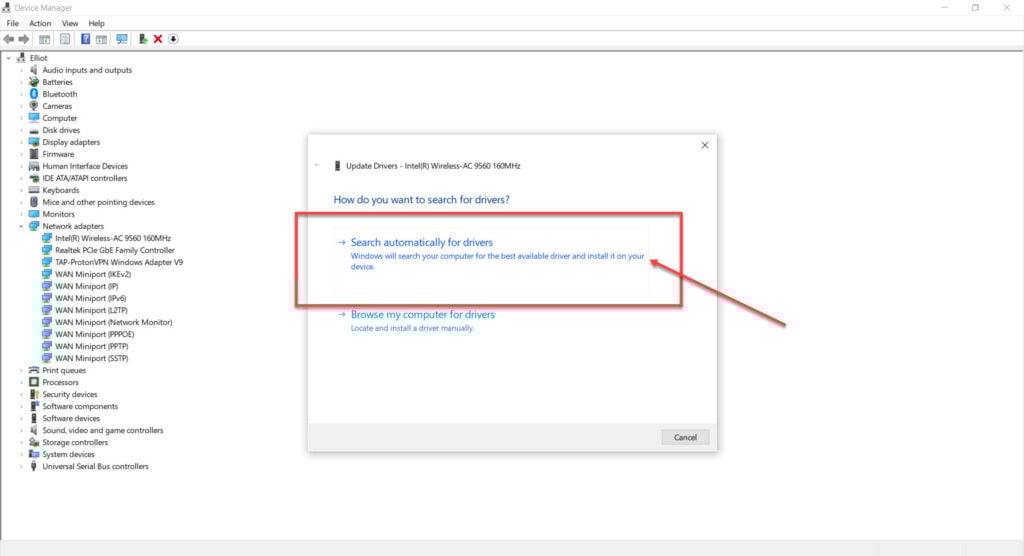
Now restart your PC and try again.
Also read: 9 tips and tricks for Moto users to make life easier
Enable the WLAN AutoConfig service
The WLAN AutoConfig service is responsible for setting and getting the wireless adaptor running. Check to make sure that the service is running as expected.
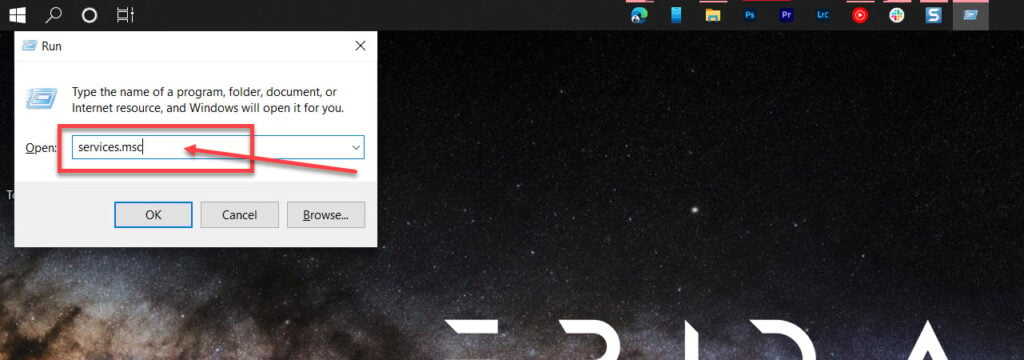
Step 1: Press Windows Key + R to open the Run prompt. Type services.msc and hit enter.
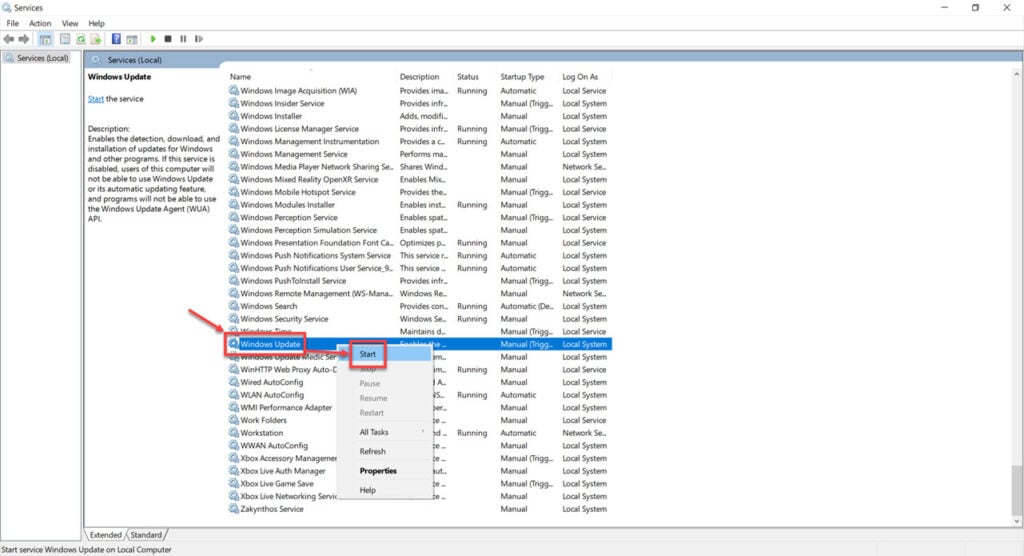
Step 2: Find the WLAN AutoConfig service. Right-click it and select Start.
Check your DNS settings
If you’re running custom DNS settings on purpose or by mistake, having them set incorrectly can cause internet connectivity issues.
Flushing your DNS settings can set them back to the default values and resolve such issues. Here’s how.
Step 1: Press Windows key + R, type cmd and hit the Enter key.
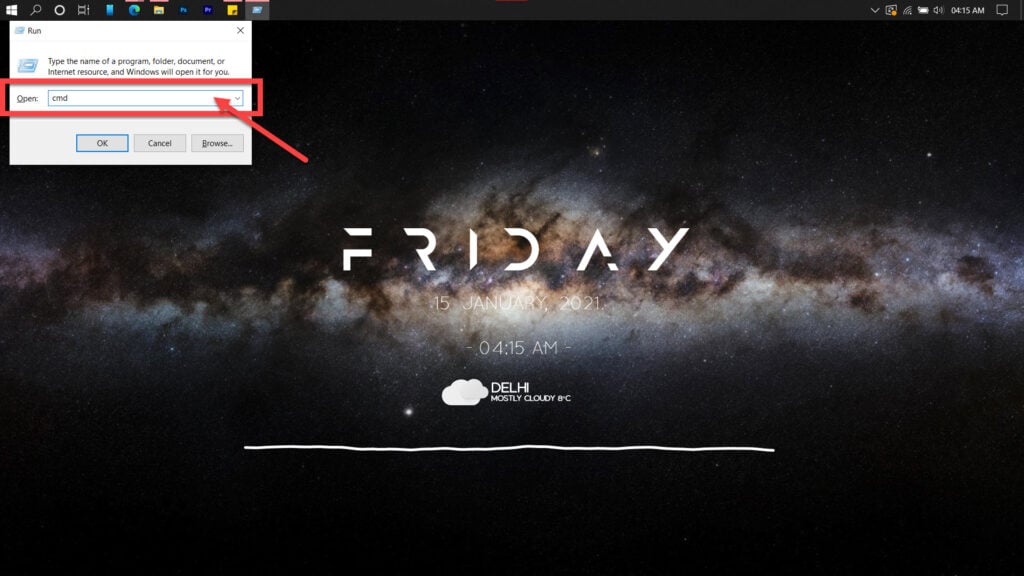
Step 2: Type in ipconfig /flushdns and hit enter. This will reset your DNS settings to their defaults.
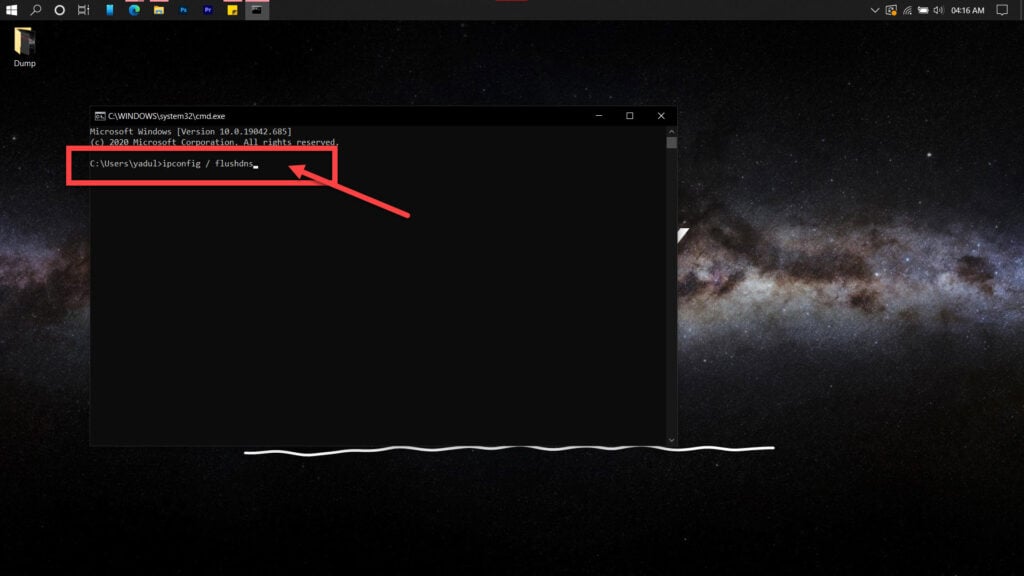
You can take this a step further and reset Windows files to access the internet by using these commands back to back.
netsh winsock reset
netsh int ip reset
If you suspect an issue with your router’s DHCP assignment, use these commands to release your old IP and request a new one.
ipconfig /release
ipconfig /renew
If that doesn’t work either, you can use the following commands in the order that they’re listed to reset your network stack.
ipconfig/flushdns
nbtstat -R
nbtstat -RR
netsh int ip reset C:\resetlog.txt
netsh winsock reset
Also read: Netflix not working on Samsung TV: Quick Fix
Reset your network settings
You can also try resetting the network settings on your PC, This should reset your entire network stack and help the data go through.
Step 1: Press Windows Key + I to open Windows Settings. Click on Update and Security.
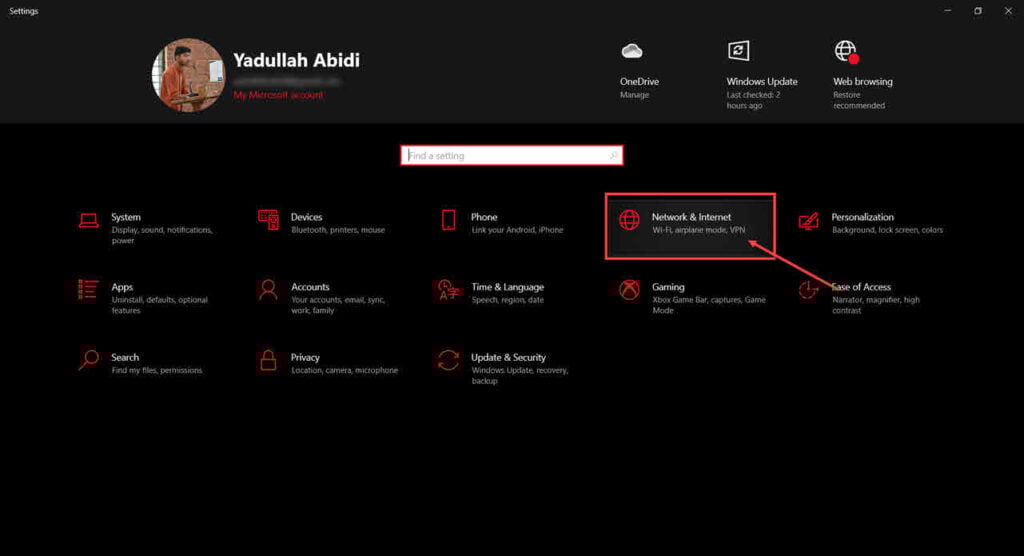
Step 2: Scroll down to find the Network reset option. Click on it to reset your PC’s network stack.
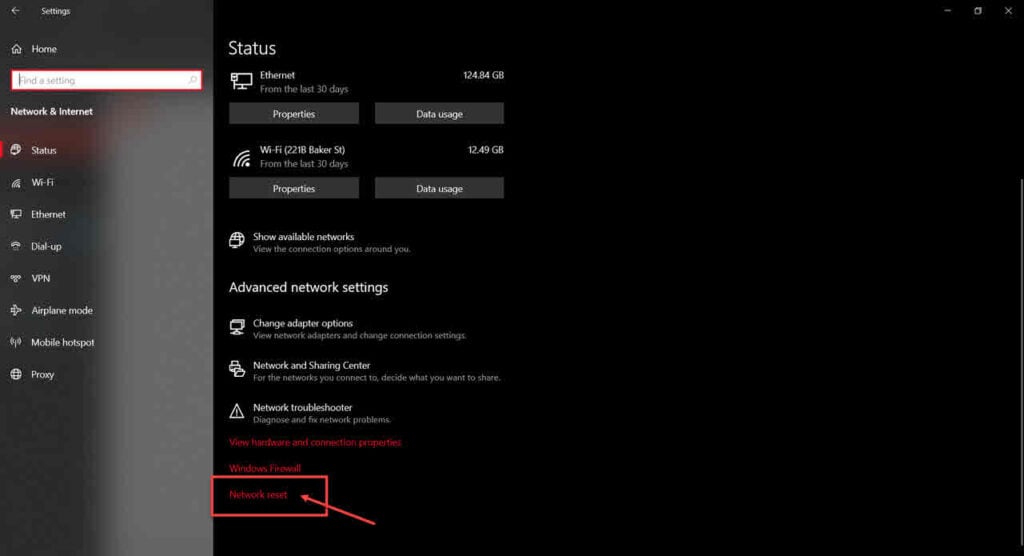
Once the reset is complete, restart your PC and try again.
Repair your system
If nothing else works, the best way to get rid of the problem is simply reinstalling or repairing your OS.
The Windows Media Creation tool is a great way to install and repair the OS. Using this, you can perform a clean installation or repair your OS without affecting your data.
You can download the Media Creation Tool here
Also read: Why is Samsung wireless charger blinking yellow? Quick Fixes


