Often, when your computer shows an error message, it gives you a clue about what’s going wrong. The issue can be because of things you added to your computer, like new parts or software updates. It doesn’t usually happen randomly. It might happen after you add a new RAM, change your graphics card, update Windows or apps, or install something new.
If you also encountered this error, worry not; this guide discusses the Page_Fault_In_Nonpaged_Area error, its causes and a few quick fixes.
What is Page_Fault_In_Nonpaged_Area error?
The Page Fault In Nonpaged Area error is usually associated with a problem in your computer’s RAM (Random Access Memory) or issues with the data that Windows is trying to access. This can be due to faulty hardware, corrupt system files, or incompatible drivers.
What causes this error?
There can be various reasons that might cause the Page_Fault_In_Nonpaged_Area error and they are mentioned below:
- Issues with the hardware.
- Issues with the RAM.
- Outdated drivers
- Faulty drivers.
Also read: Fix: This PC can’t run Windows 11
How to fix the issue?
Here are a few fixes that might help you fix the Page_Fault_In_Nonpaged_Area error.
Run hardware troubleshooter
Hardware issues can also trigger this error. It’s important to know if your hardware is functioning correctly. To run the hardware troubleshooter, follow the steps below:
Step 1: Type Cmd in the Windows search and click on the first result.
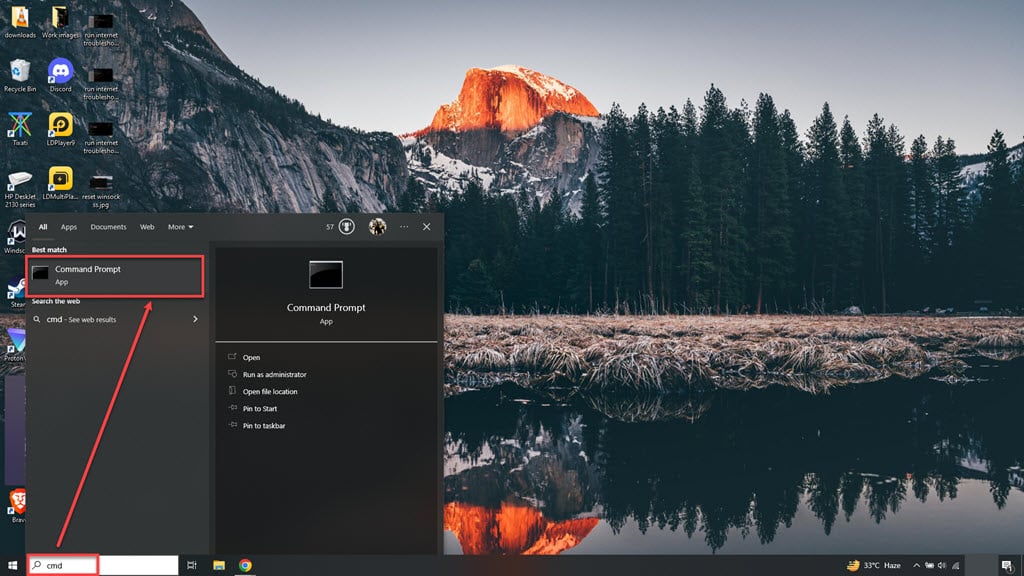
Step 2: Type msdt.exe -id DeviceDiagnostic and hit enter.

It will run the Windows hardware troubleshooter and follow the instructions by the troubleshooter.
Check the RAM
If you’ve recently made any hardware changes to your computer, verifying the proper installation of these components is advisable. Occasionally, newly installed RAM modules can be defective, or even older ones may experience issues. Here are some steps you can take to inspect your RAM:
Step 1: Remember to power off your computer and disconnect all cables from wall sockets before proceeding.
Step 2: If you are using two RAM sticks, consider swapping their slots. You can also experiment using just one RAM slot to troubleshoot the issue. For those using a single RAM module, take a moment to clean away any accumulated dust.
Step 3: If you have spare RAM modules on hand, you can attempt replacing the RAM and reboot your PC.
Step 4: If the error no longer occurs, it indicates a problem with the RAM.
Update the drivers
Outdated or incompatible drivers can lead to this error. Ensure your graphics, network, and chipset drivers are current. Follow the steps below to update the drivers:
Step 1: Press the Windows+X and tap on the Device Manager option in the dropdown menu.
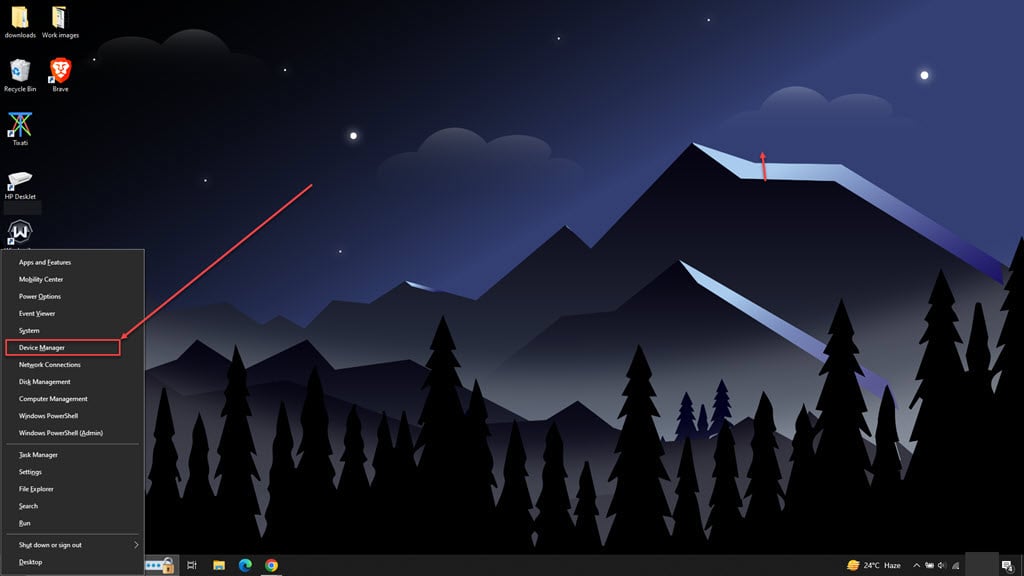
Step 2: Find and then expand the device category in which you want to update the drivers, and right-click on the driver.
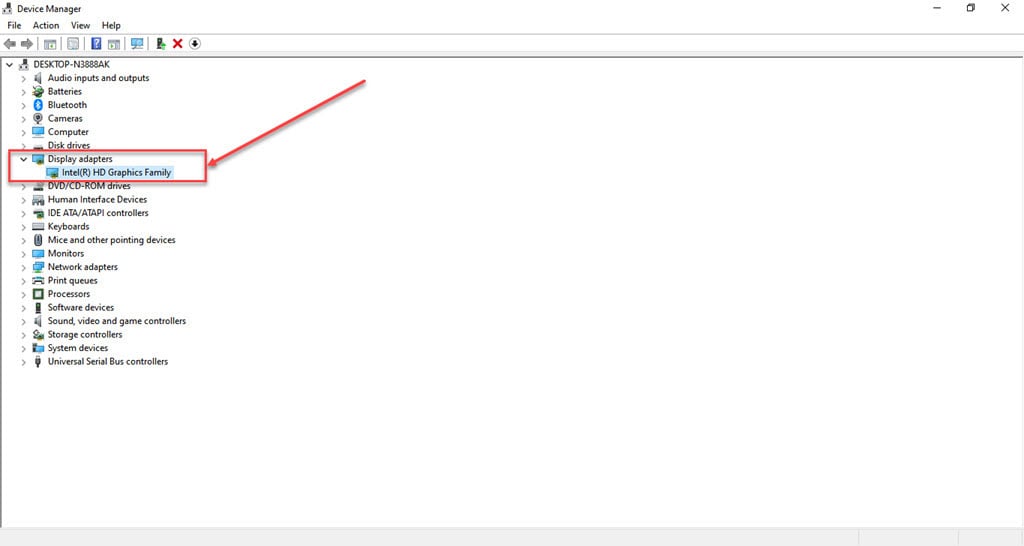
Step 3: Click on the Update driver option in the pop-up menu.

Step 4: In the new window, click on the Search automatically for drivers option.
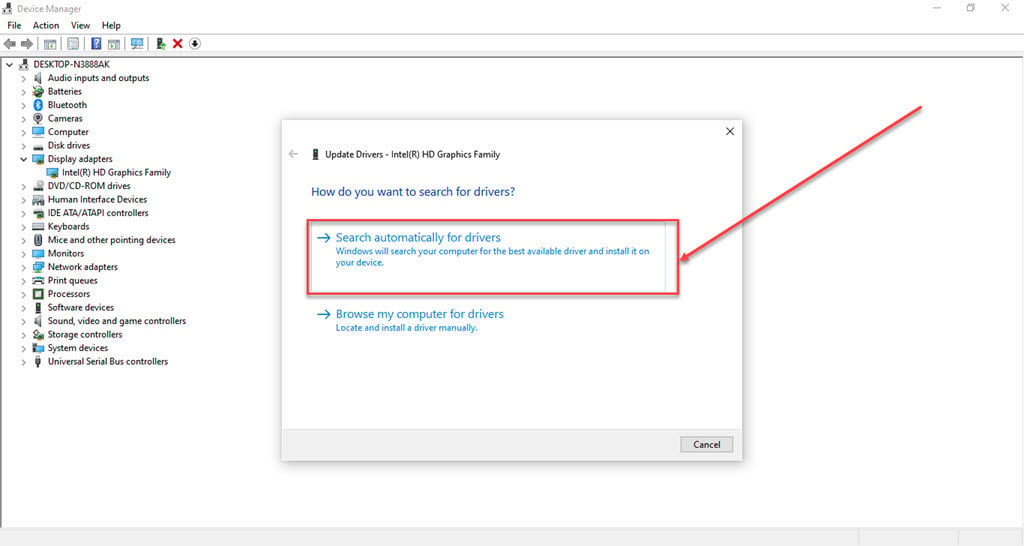
Roll back drivers
In some cases, updating to the latest drivers may cause compatibility issues that result in the Page_Fault_In_Nonpaged_Area error. If you recently updated a driver and started experiencing this problem, consider returning to the previous driver version. Here’s how you can do it:
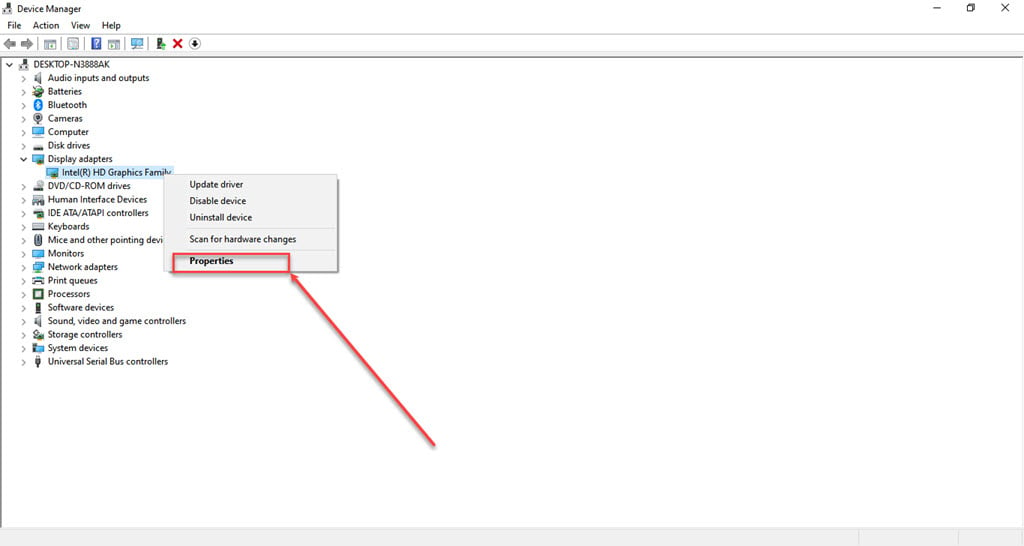
Step 1: Press the Windows+X and tap on the Device Manager option in the dropdown menu.

Step 2: Find and then expand the device category in which you want to update the drivers, and right-click on the drive.

Step 3: In the pop-up menu, click on the Properties option.
Step 4: Click on the Driver tab and then the Roll Back Driver button.
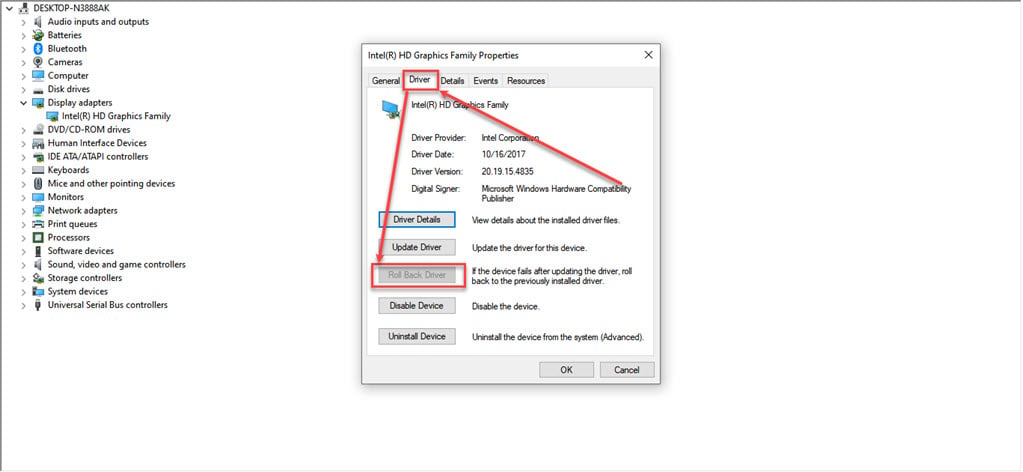
After this, restart your PC and check whether the issue is resolved.
Run Windows Memory Diagnostic
The built-in Windows Memory Diagnostic tool detects and resolves issues within your computer’s RAM. To use it, follow the steps below:
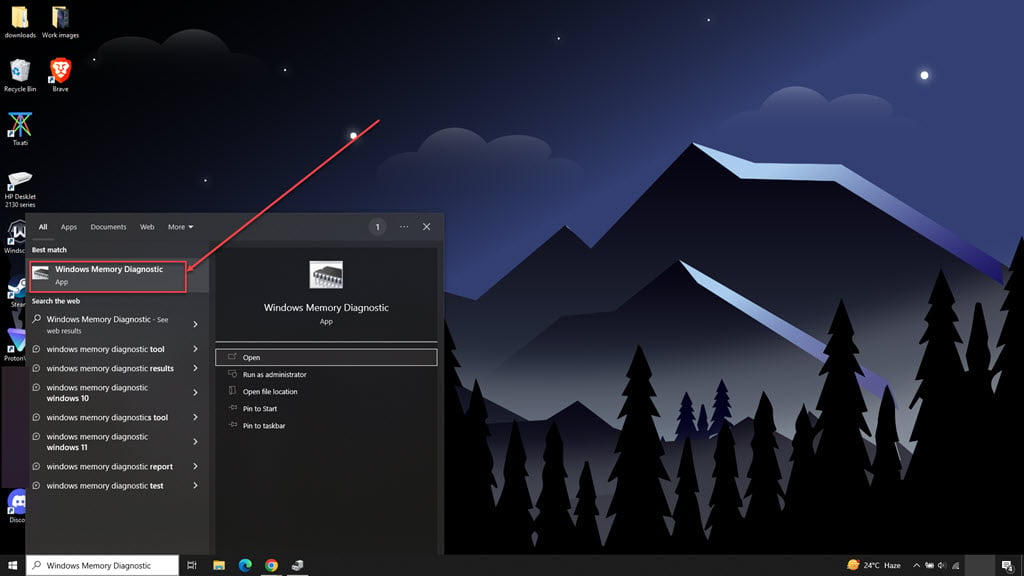
Step 1: In the Windows search, type Windows Memory Diagnostic and then click on the first option.
Step 2: In the pop-up window, click on Restart now and check for problems option.
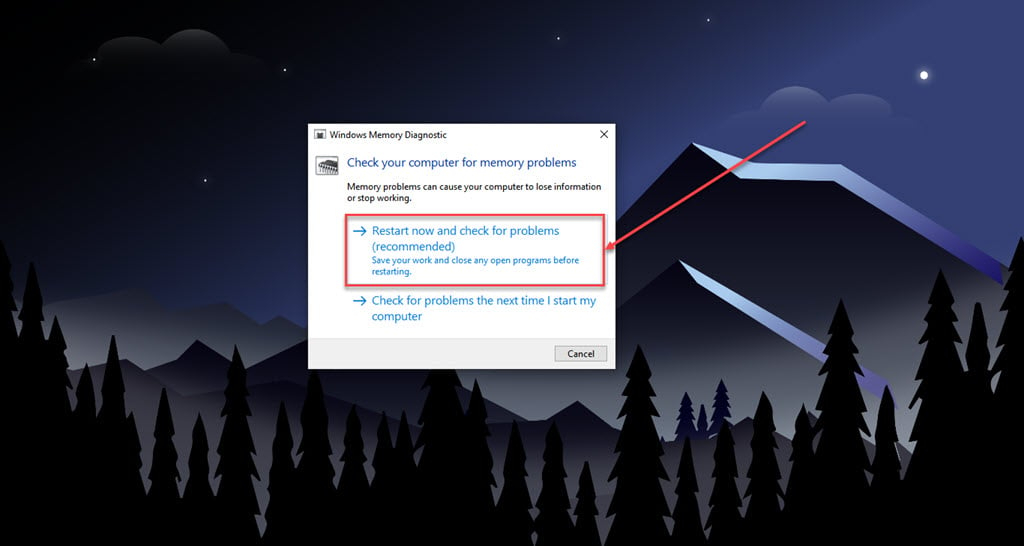
The PC will reboot and start the test process; after the test is complete, the PC will restart again and show the results on the screen.
Also read: How to change the Chromebook owner?
Run DISM and SFC to repair corrupted system files
DISM and SFC are two very useful tools for fixing system files. Since there are many reasons why the error can happen, it’s a good idea to use both of these tools.
Run DISM
Check out our detailed guide on using the DISM tool here.
Run SFC
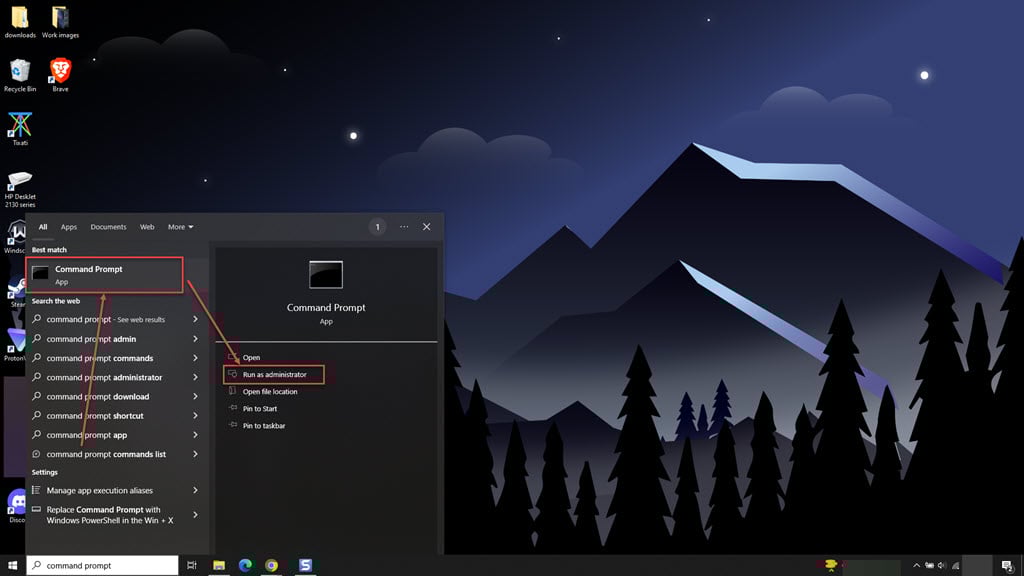
Step 1: Type Cmd in the Windows search and click on the Run as administrator option available on the right side.
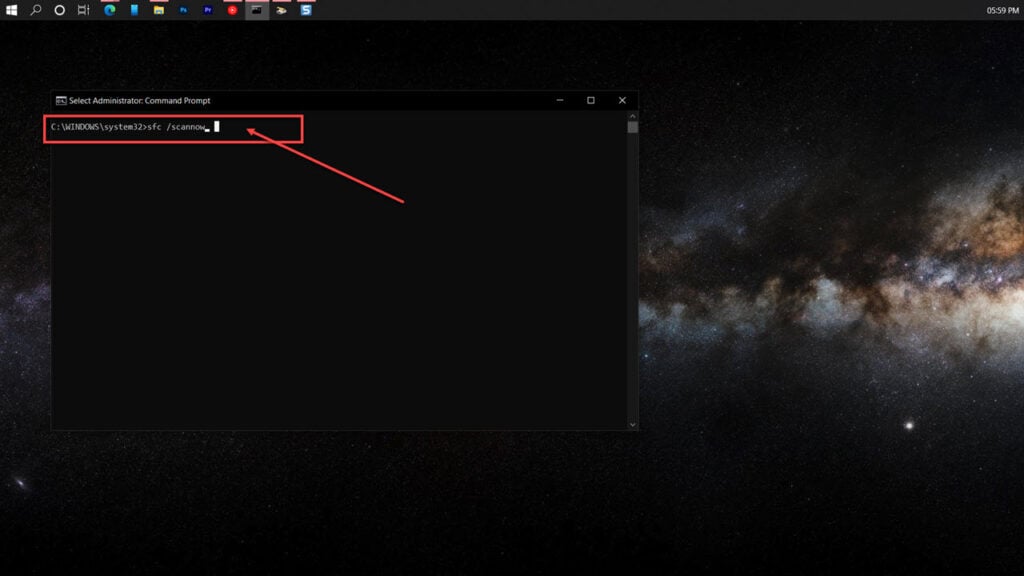
Step 2: In the command prompt, type sfc /scannow to run a system scan.
Perform a System Restore
If none of the above methods work for you, you can try restoring a system. This process will restore your system to its default settings by undoing any changes made in the device manager and all other system programs.
Make sure to take a data backup before performing a system restore. To restore your PC, follow the steps below.
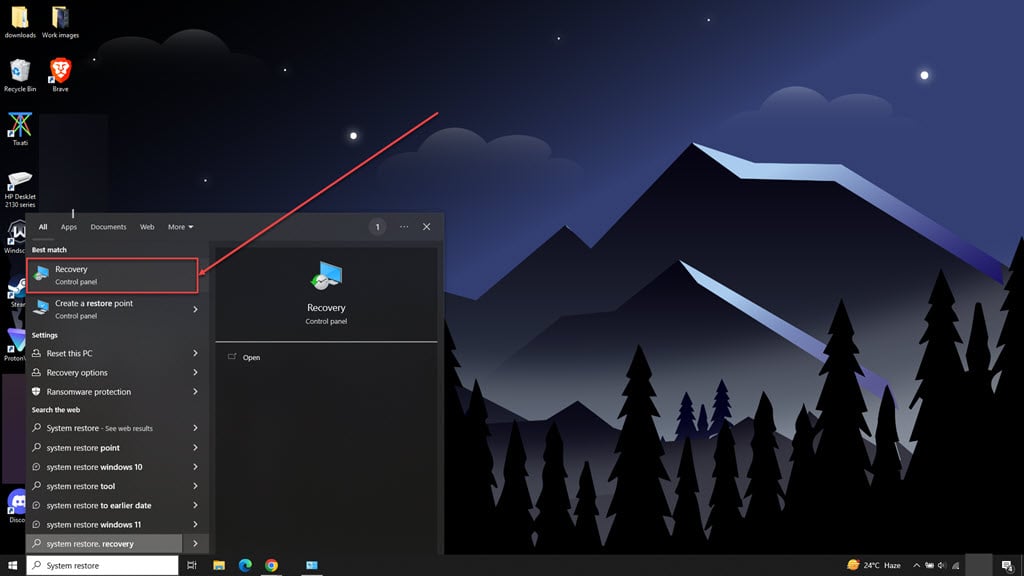
Step 1: Type System Restore in the Windows search and click on the Recovery option.
Step 2: In the new window, click on Open System Restore.

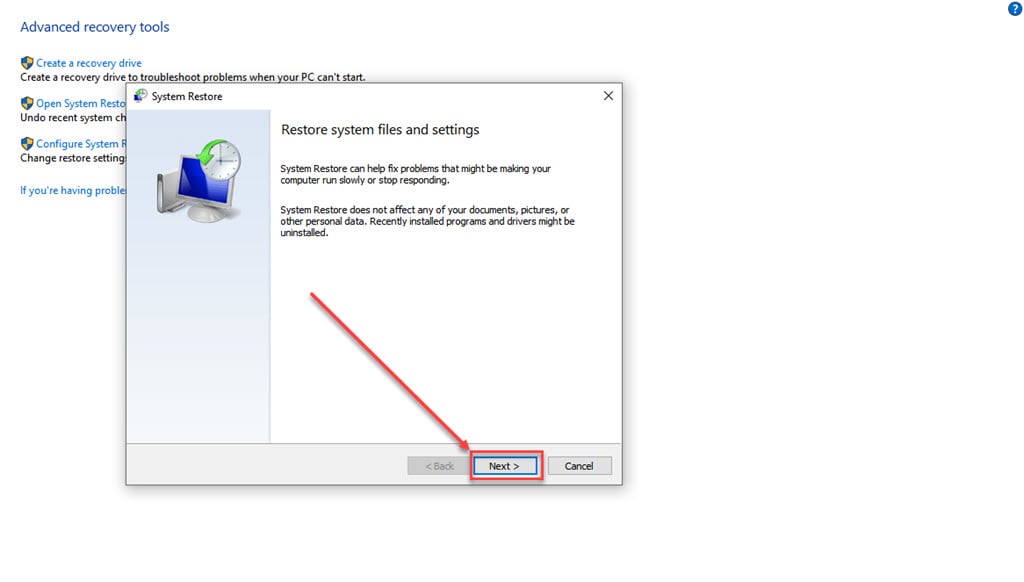
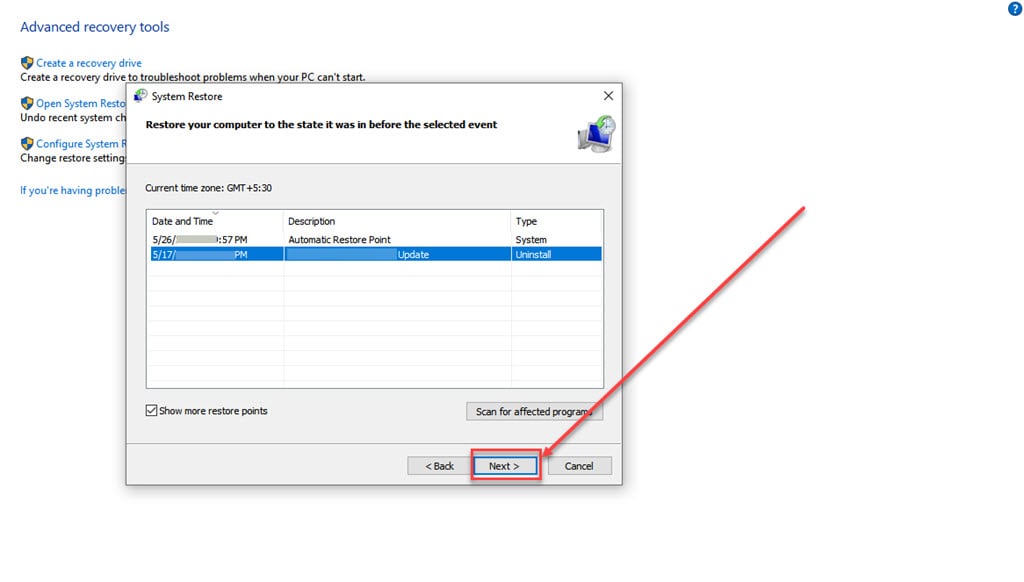
Step 3: In the System Restore window, click on the Next button.
Step 4: Select the store point from the options and click on the Next button.
Step 5: Click on the Finish button.
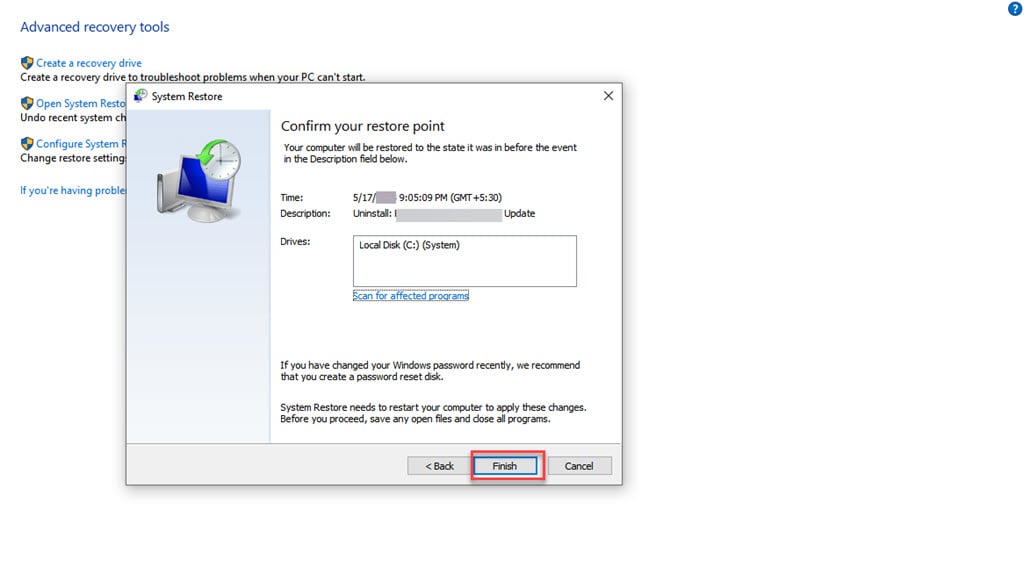
Let the system restore process complete.
Also read: Why does my Apple Watch not vibrate?


