In the modern world, where technology has become an integral part of our daily lives, encountering occasional glitches or errors on our computers is common. One such occurrence is when your computer suddenly reboots with a message stating The Computer has rebooted from a bugcheck.
In this article, we have discussed the causes of the computer has rebooted from a bugcheck issue and a few ways to help you fix the issue.
What are the causes of the computer has rebooted from a bugcheck?
Below we have discussed a few possible causes that might be causing the computer has rebooted from a bugcheck issue.
- Using an outdated version of the device driver.
- Memory issues.
Also read: Windows cannot connect to the printer: 8 Fixes
How to fix the issue?
If your PC is rebooting and showing the computer has rebooted from a bugcheck then we have explained a few ways that might help you fix the issue.
Update the Device driver
Outdated drivers are one of the main causes of the computer has rebooted from a bugcheck, so updating the faulty device driver might fix the issue. To update the faulty device driver follow the steps below.
Step 1: Press the Windows+X and tap on the Device Manager option in the dropdown menu.
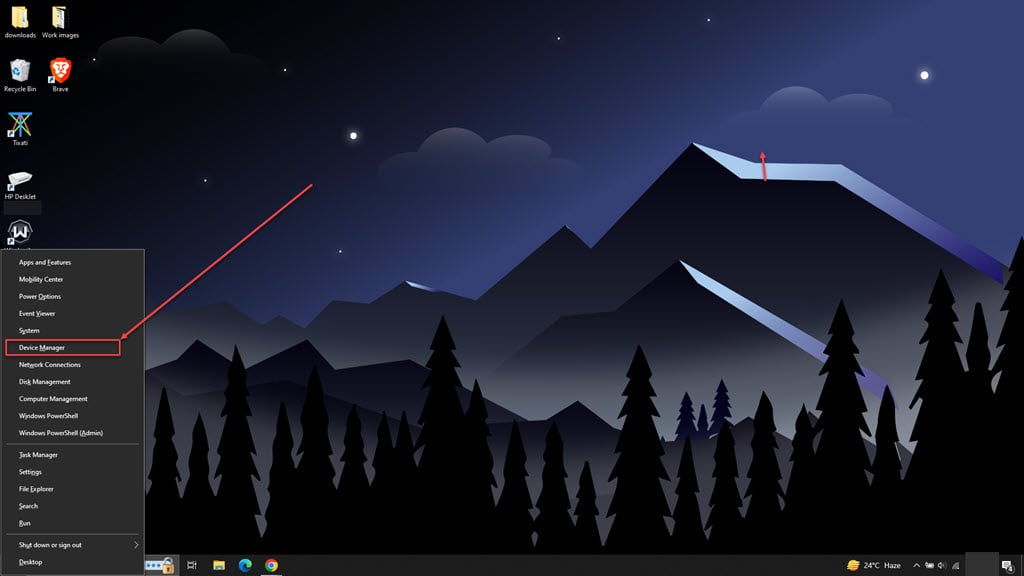
Step 2: Find and then expand the faulty device category, and right-click on the driver that you think is faulty.

Step 3: In the pop-up menu, click on the Update driver option.

Step 4: In the new window, click on the Search automatically for drivers option.
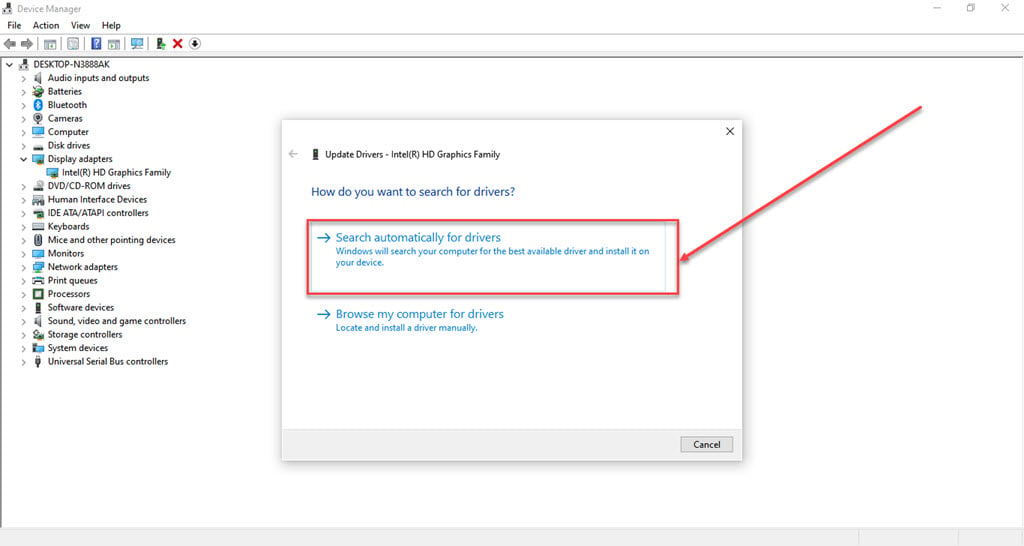
Windows will search for the update of the driver and update it.
Uninstall the Device driver
A corrupted device driver might also cause this error. To uninstall the faulty device driver follow the steps below.
Step 1: Press the Windows+X and tap on the Device Manager option in the dropdown menu.

Step 2: Find and then expand the faulty device category, and right-click on the driver that you think is faulty.

Step 3: In the pop-up menu, click on the Uninstall driver option.
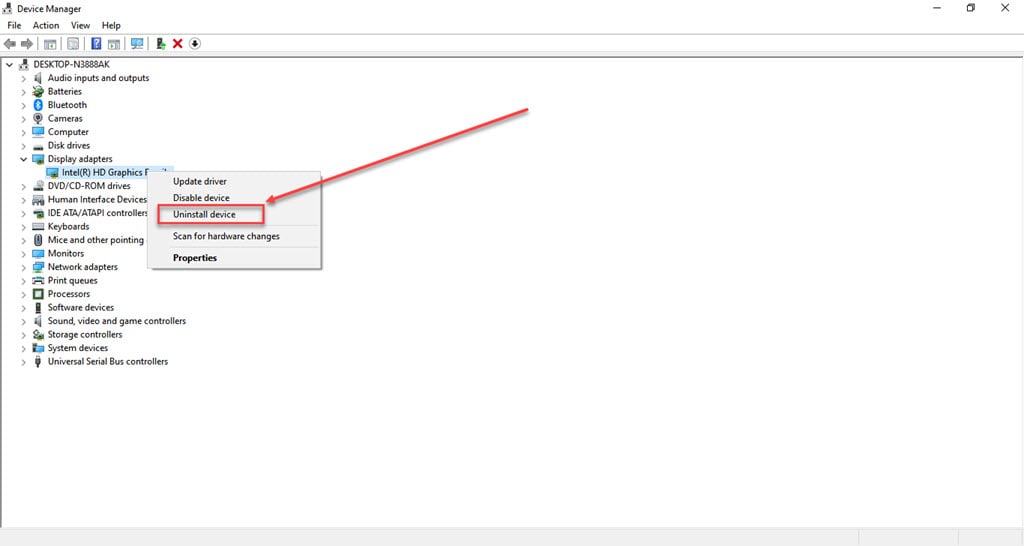
Step 4: Check mark the box and then click on the Uninstall button.
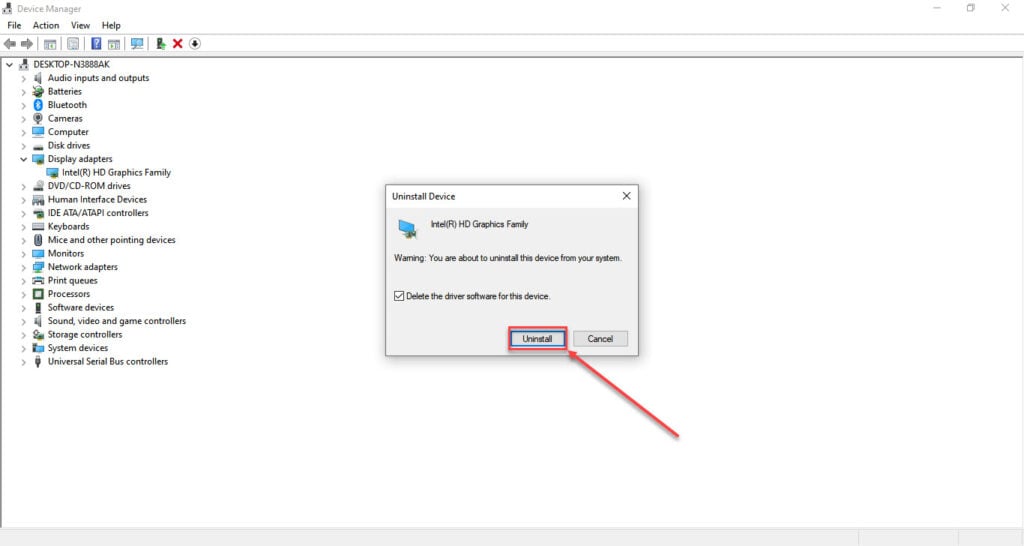
Windows will uninstall the driver and after the uninstalling process, restart your PC.
Run Windows Memory Diagnostic
It is possible that your PC doesn’t have sufficient memory space or has faulty RAM which is causing the issue. Running a Windows Memory Diagnostic might solve the issue for you. To run the Windows Memory Diagnostic follow the steps below.
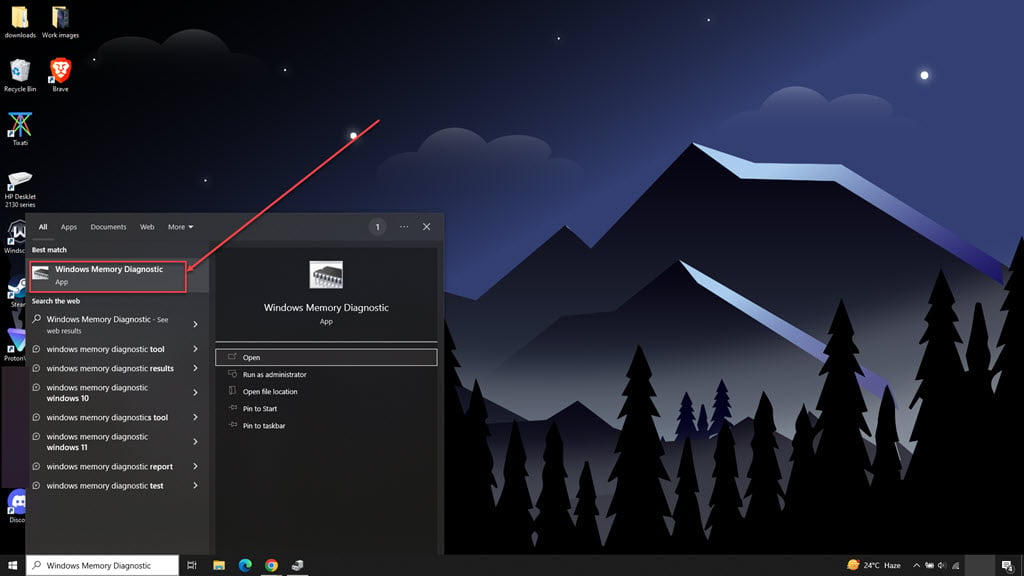
Step 1: In the Windows search, type Windows Memory Diagnostic and then click on the first option.
Step 2: In the pop-up window, click on Restart now and check for problems option.
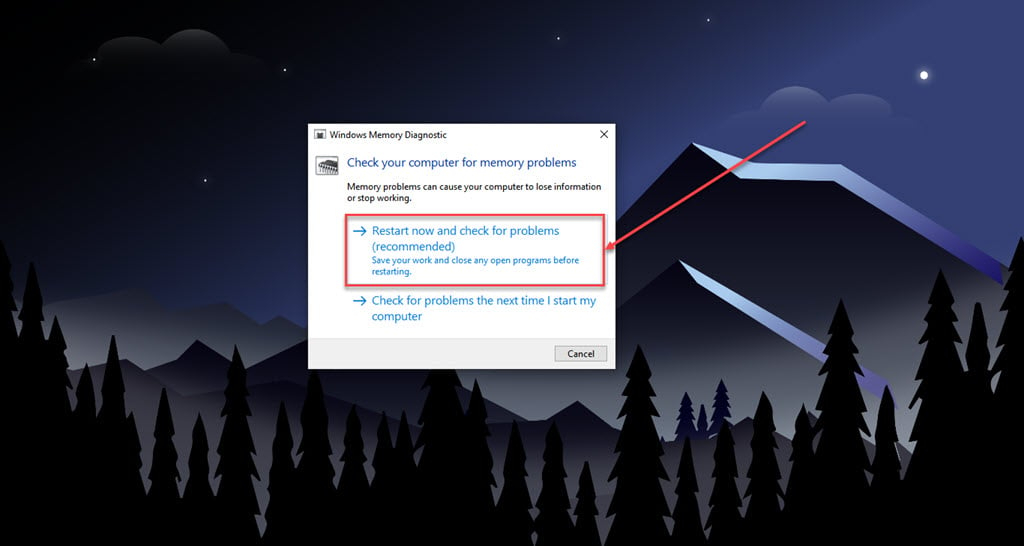
The PC will reboot and start the test process; after the test is complete the PC will restart again and show the results on the screen.
Use the System restore point
If none of the above methods work for you then you can try doing a system restore. This process will restore your system to its default settings by undoing any changes made in the device manager and all other system programs. Make sure to take a data backup before performing a system restore. To restore your PC follow the steps below.
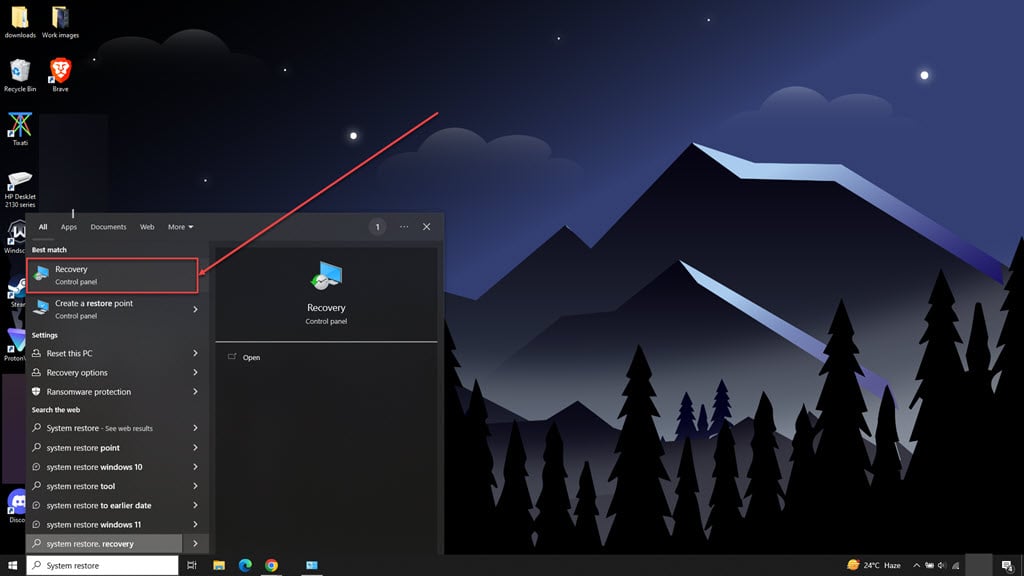
Step 1: Type System Restore in the Windows search and click on the Recovery option.
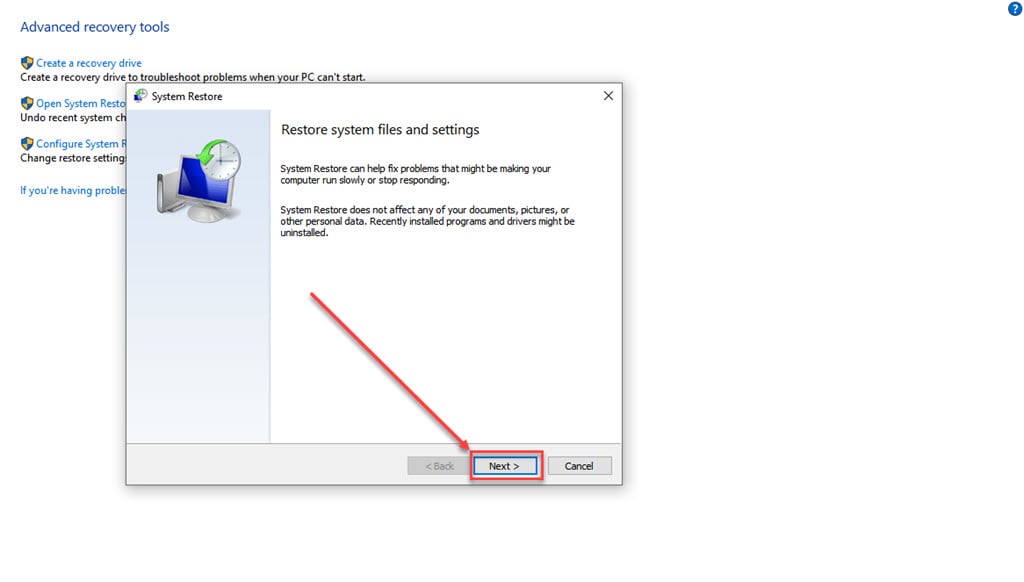
Step 2: In the new window, click on Open System Restore.

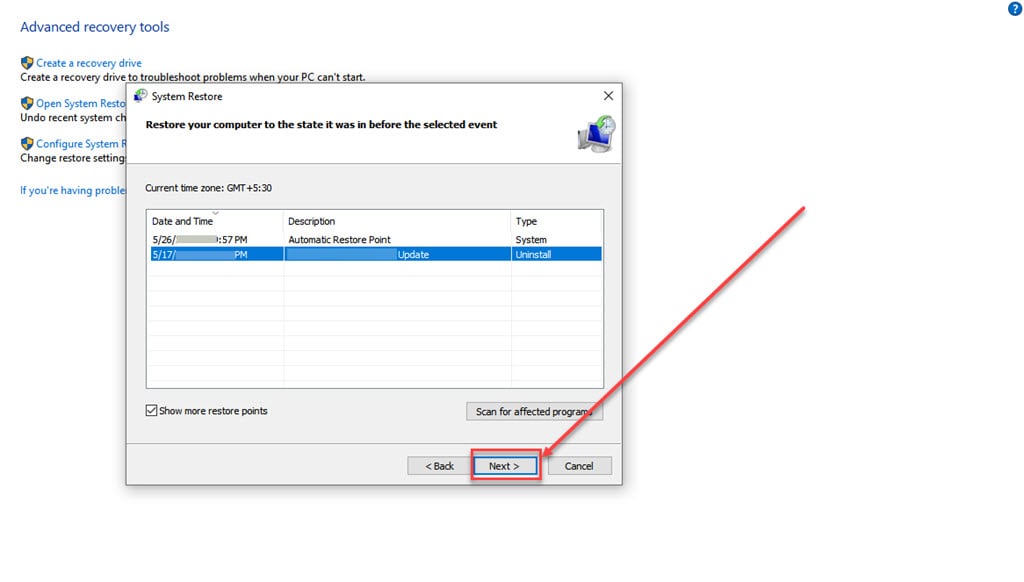
Step 3: In the System Restore window, click on the Next button.
Step 4: Select the store point from the options and click on the Next button.
Step 5: Click on the Finish button.
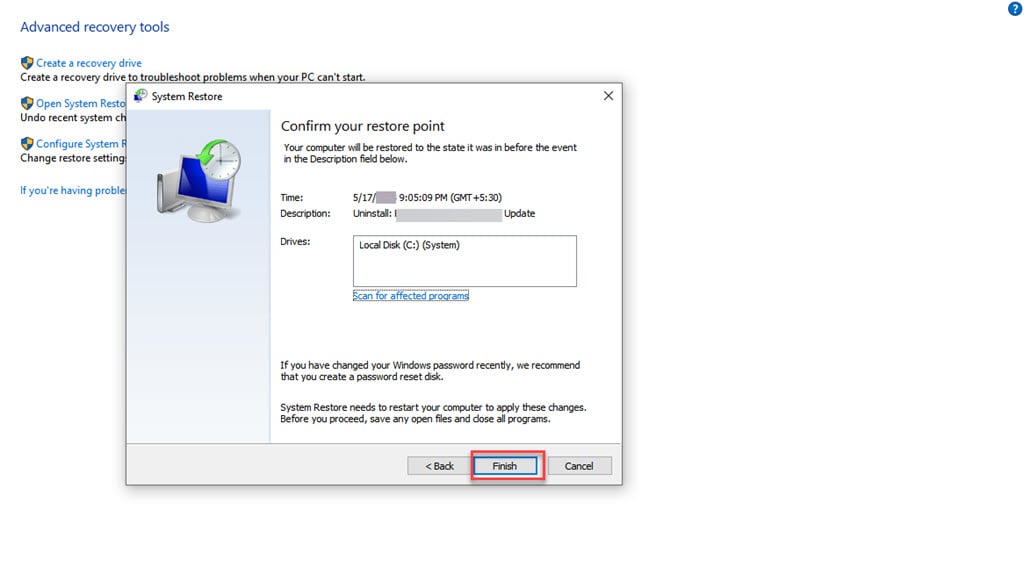
Let the system restore process complete.


